

Posted by The Fabric Fox on 2nd Nov 2016
Christmas Modern Hexie Hoop Tutorial
With Christmas just around the corner I thought it’s the perfect time to start making some decorations for the house. If you have read my previous blog you will know I have recently discovered modern hexies. I have now made a huge pile of hexies and thought it was time I came up with something to make with them.
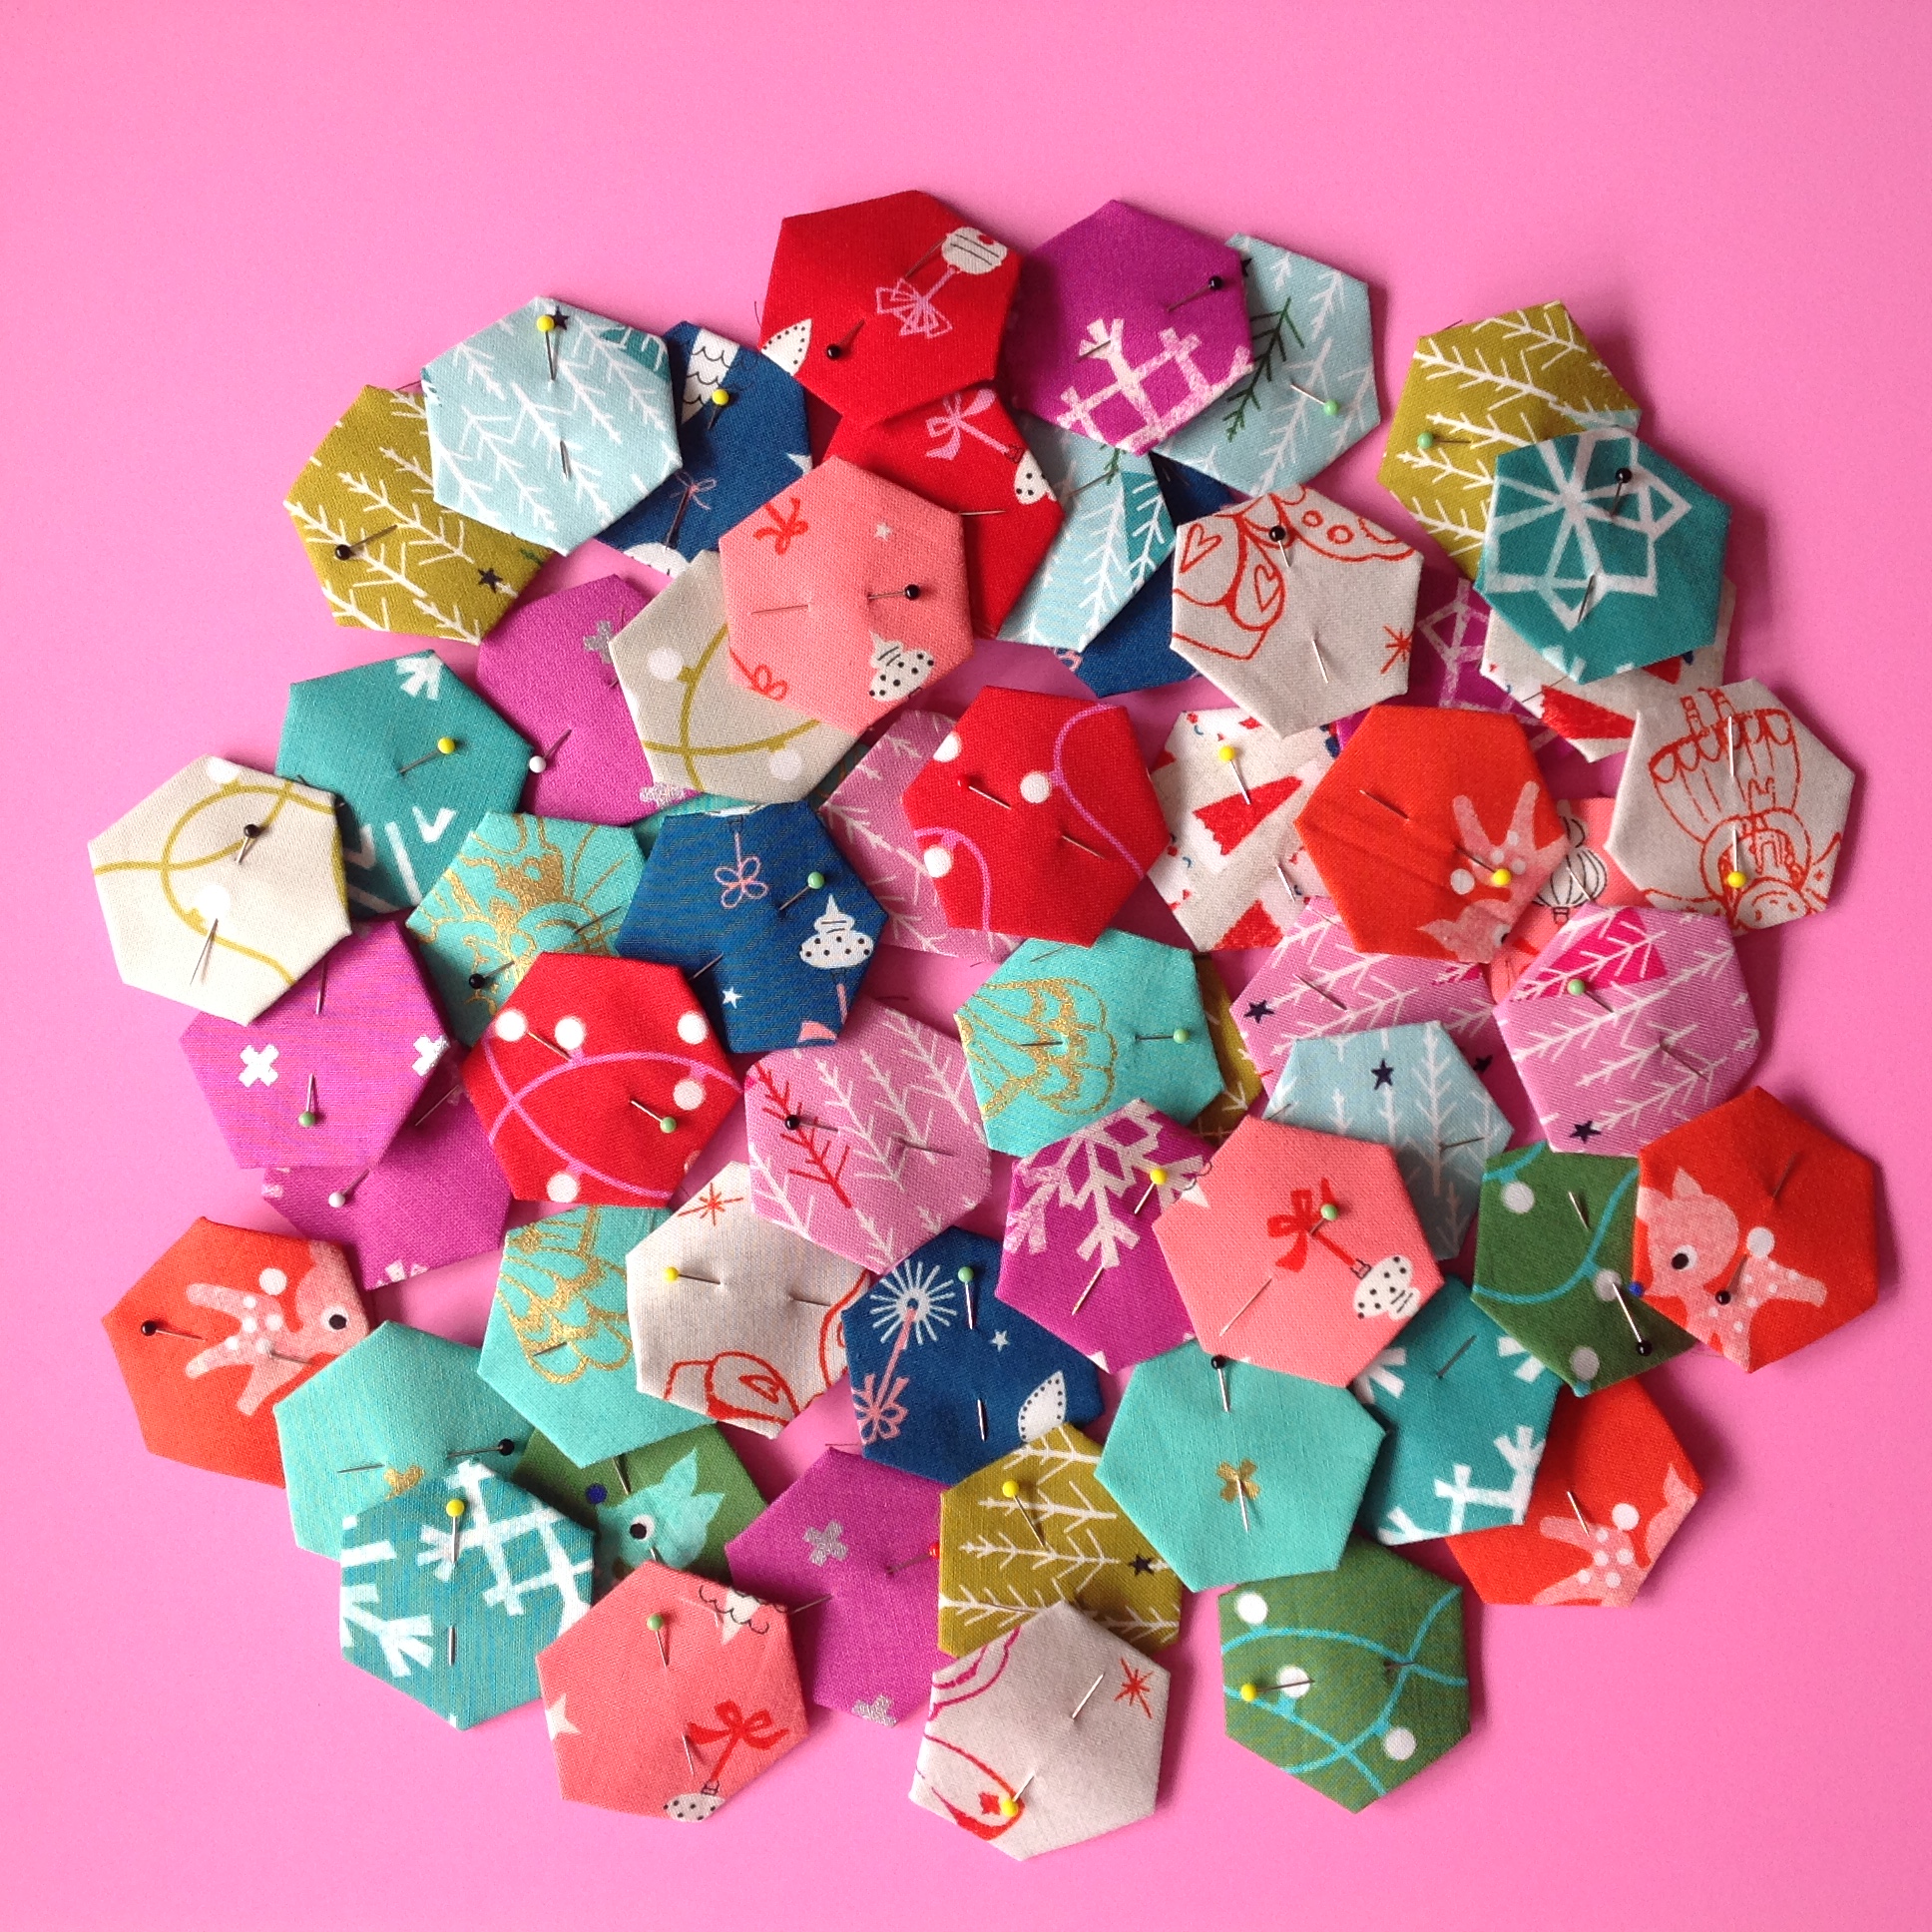
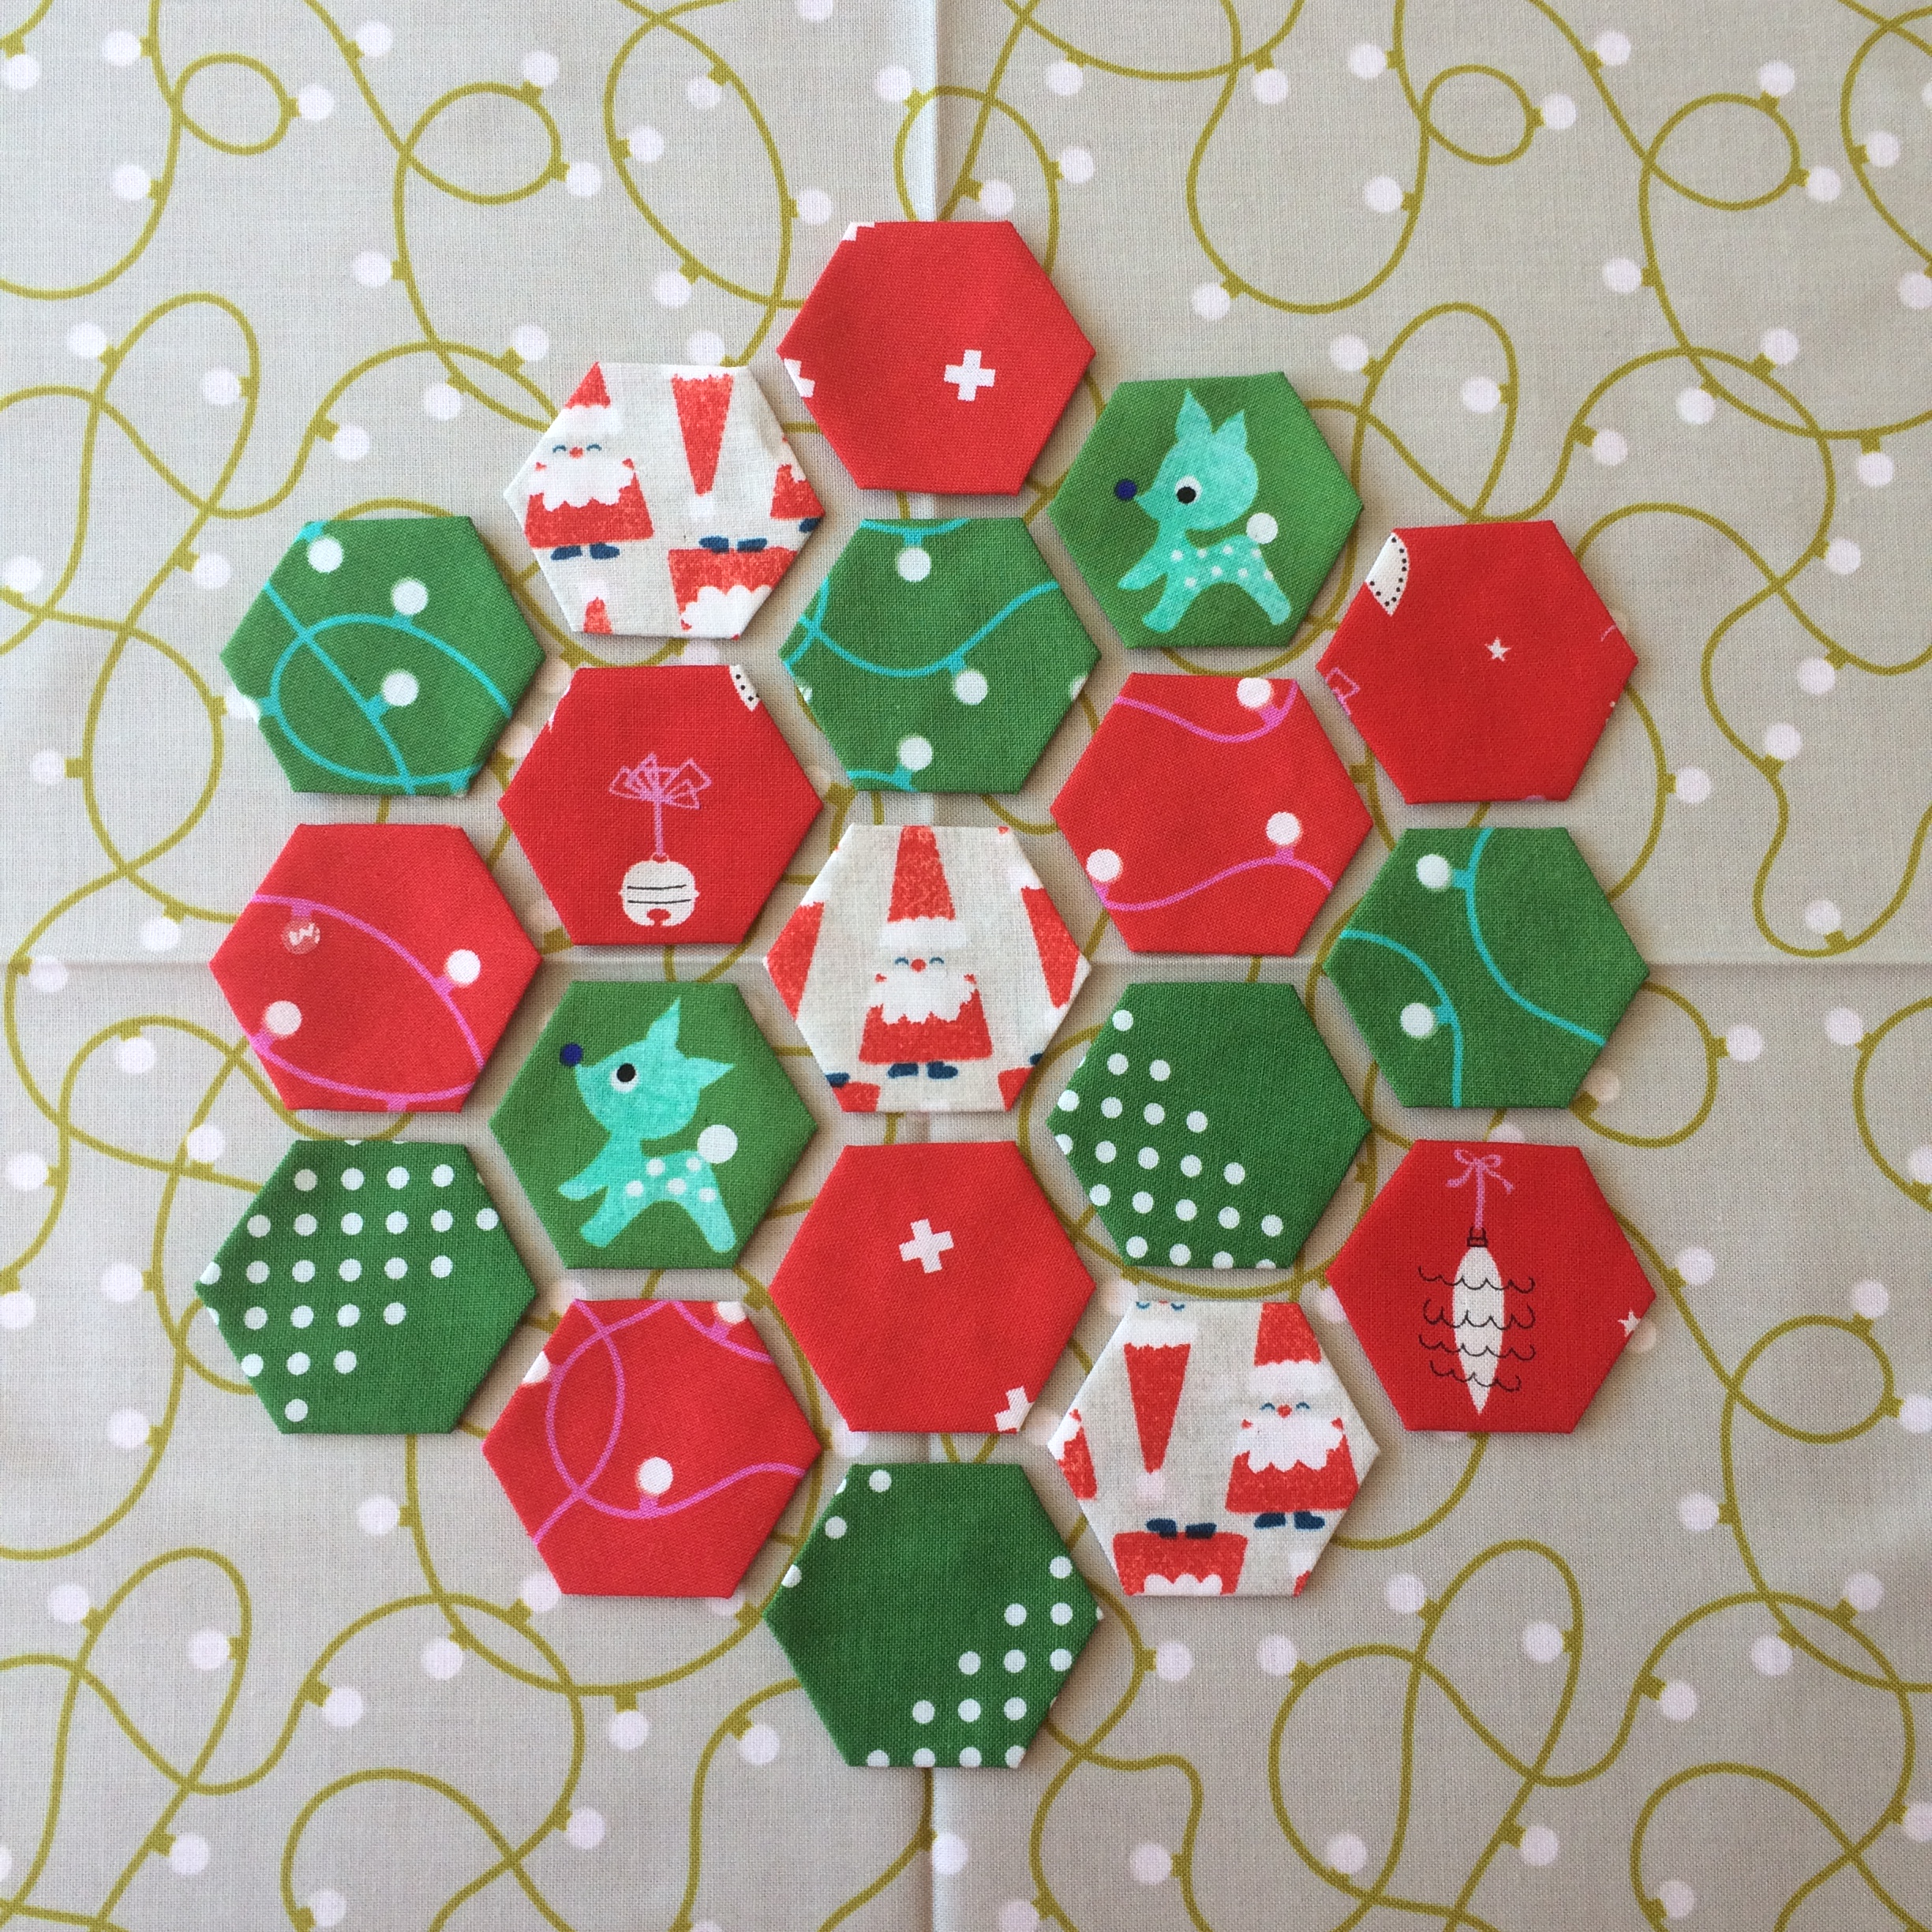
I used a selection of fabrics from Cotton + Steel’s Christmas collection Garland as well as some co-ordinating Cotton + Steel basics. They have a really fun retro feel to them, with cute motifs and bright colours.
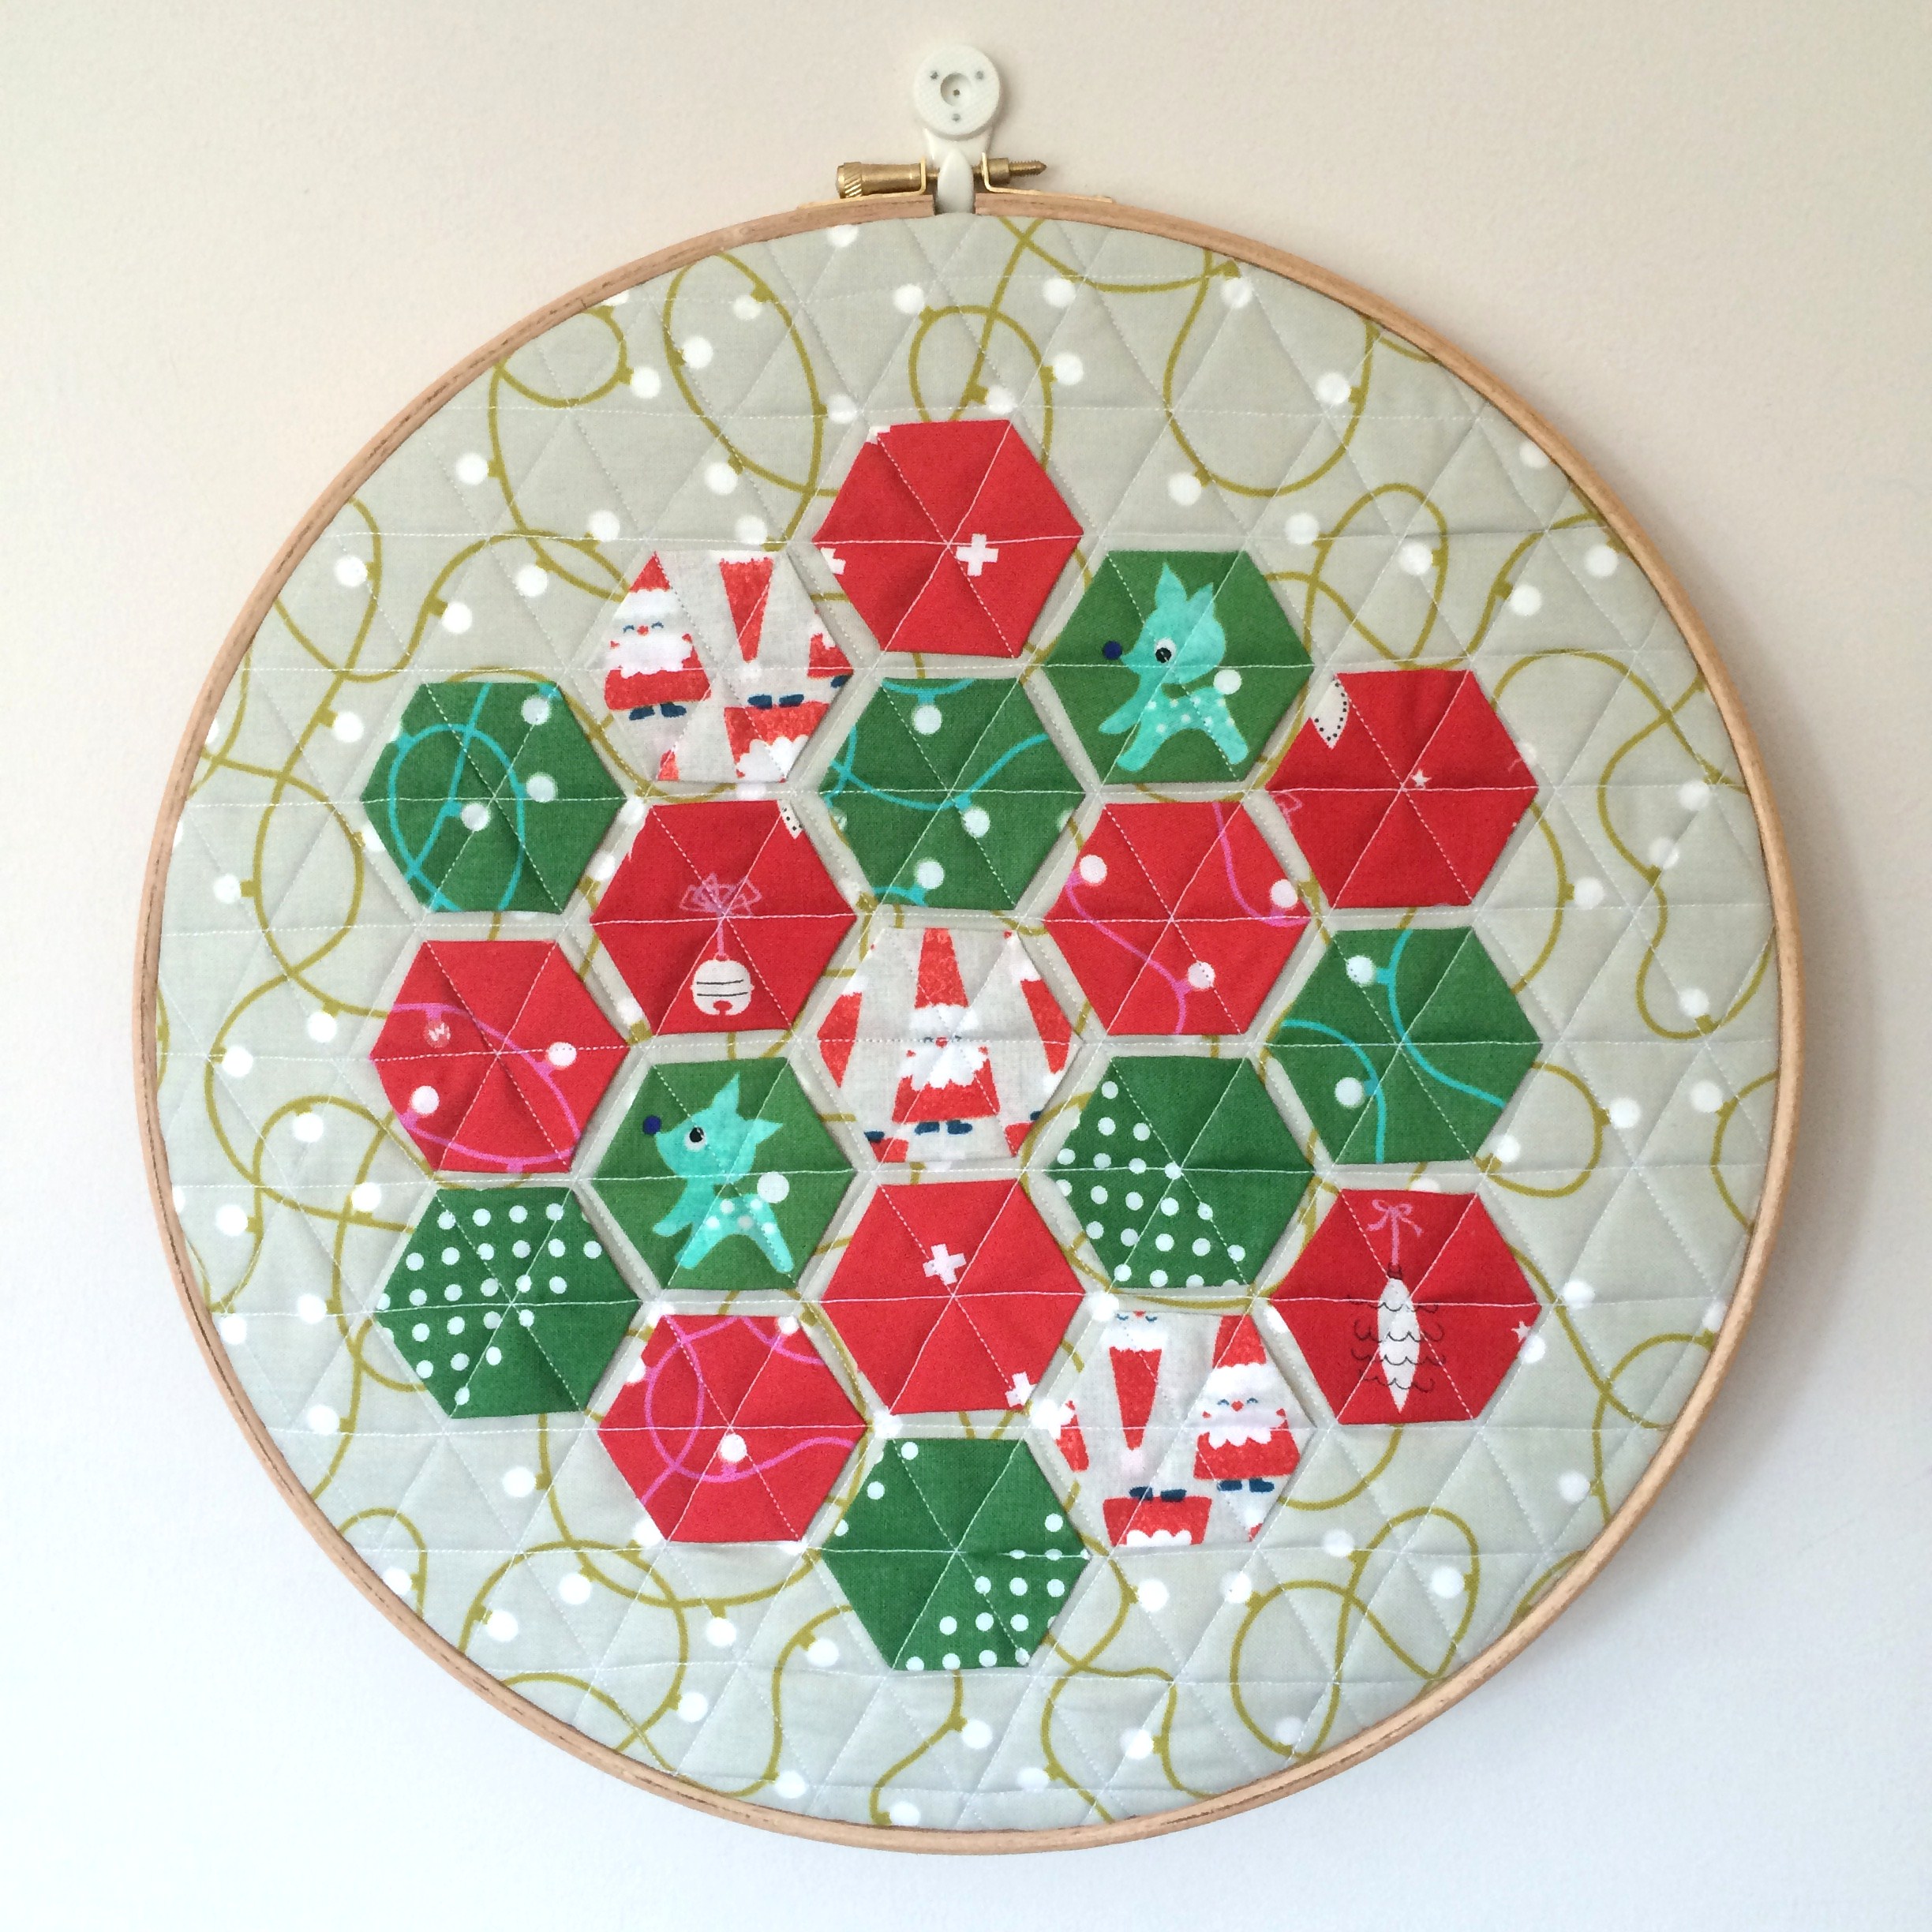
I wanted my first hexie project to be quite simple so I chose to arrange my hexies in a circle and frame them in a hoop.
If you would like to make your own Christmas hexie hoop you can follow my instructions below.
You will need:
19 hexies
40cm x 40cm background fabric
40cm x 40cm wadding
40cm x 40cm backing fabric/calico
Fabric glue
Ruler
Crease maker
12”/ 30cm hoop
Scissors
Sewing machine
Instructions:
1.First of all you will need to make 19 hexies. If you don’t know how to make modern hexies take a look at my previous blog post to find out how to make them. I chose to use traditional Christmas colours - reds and greens – but feel free to use whichever colours remind you of Christmas the most.
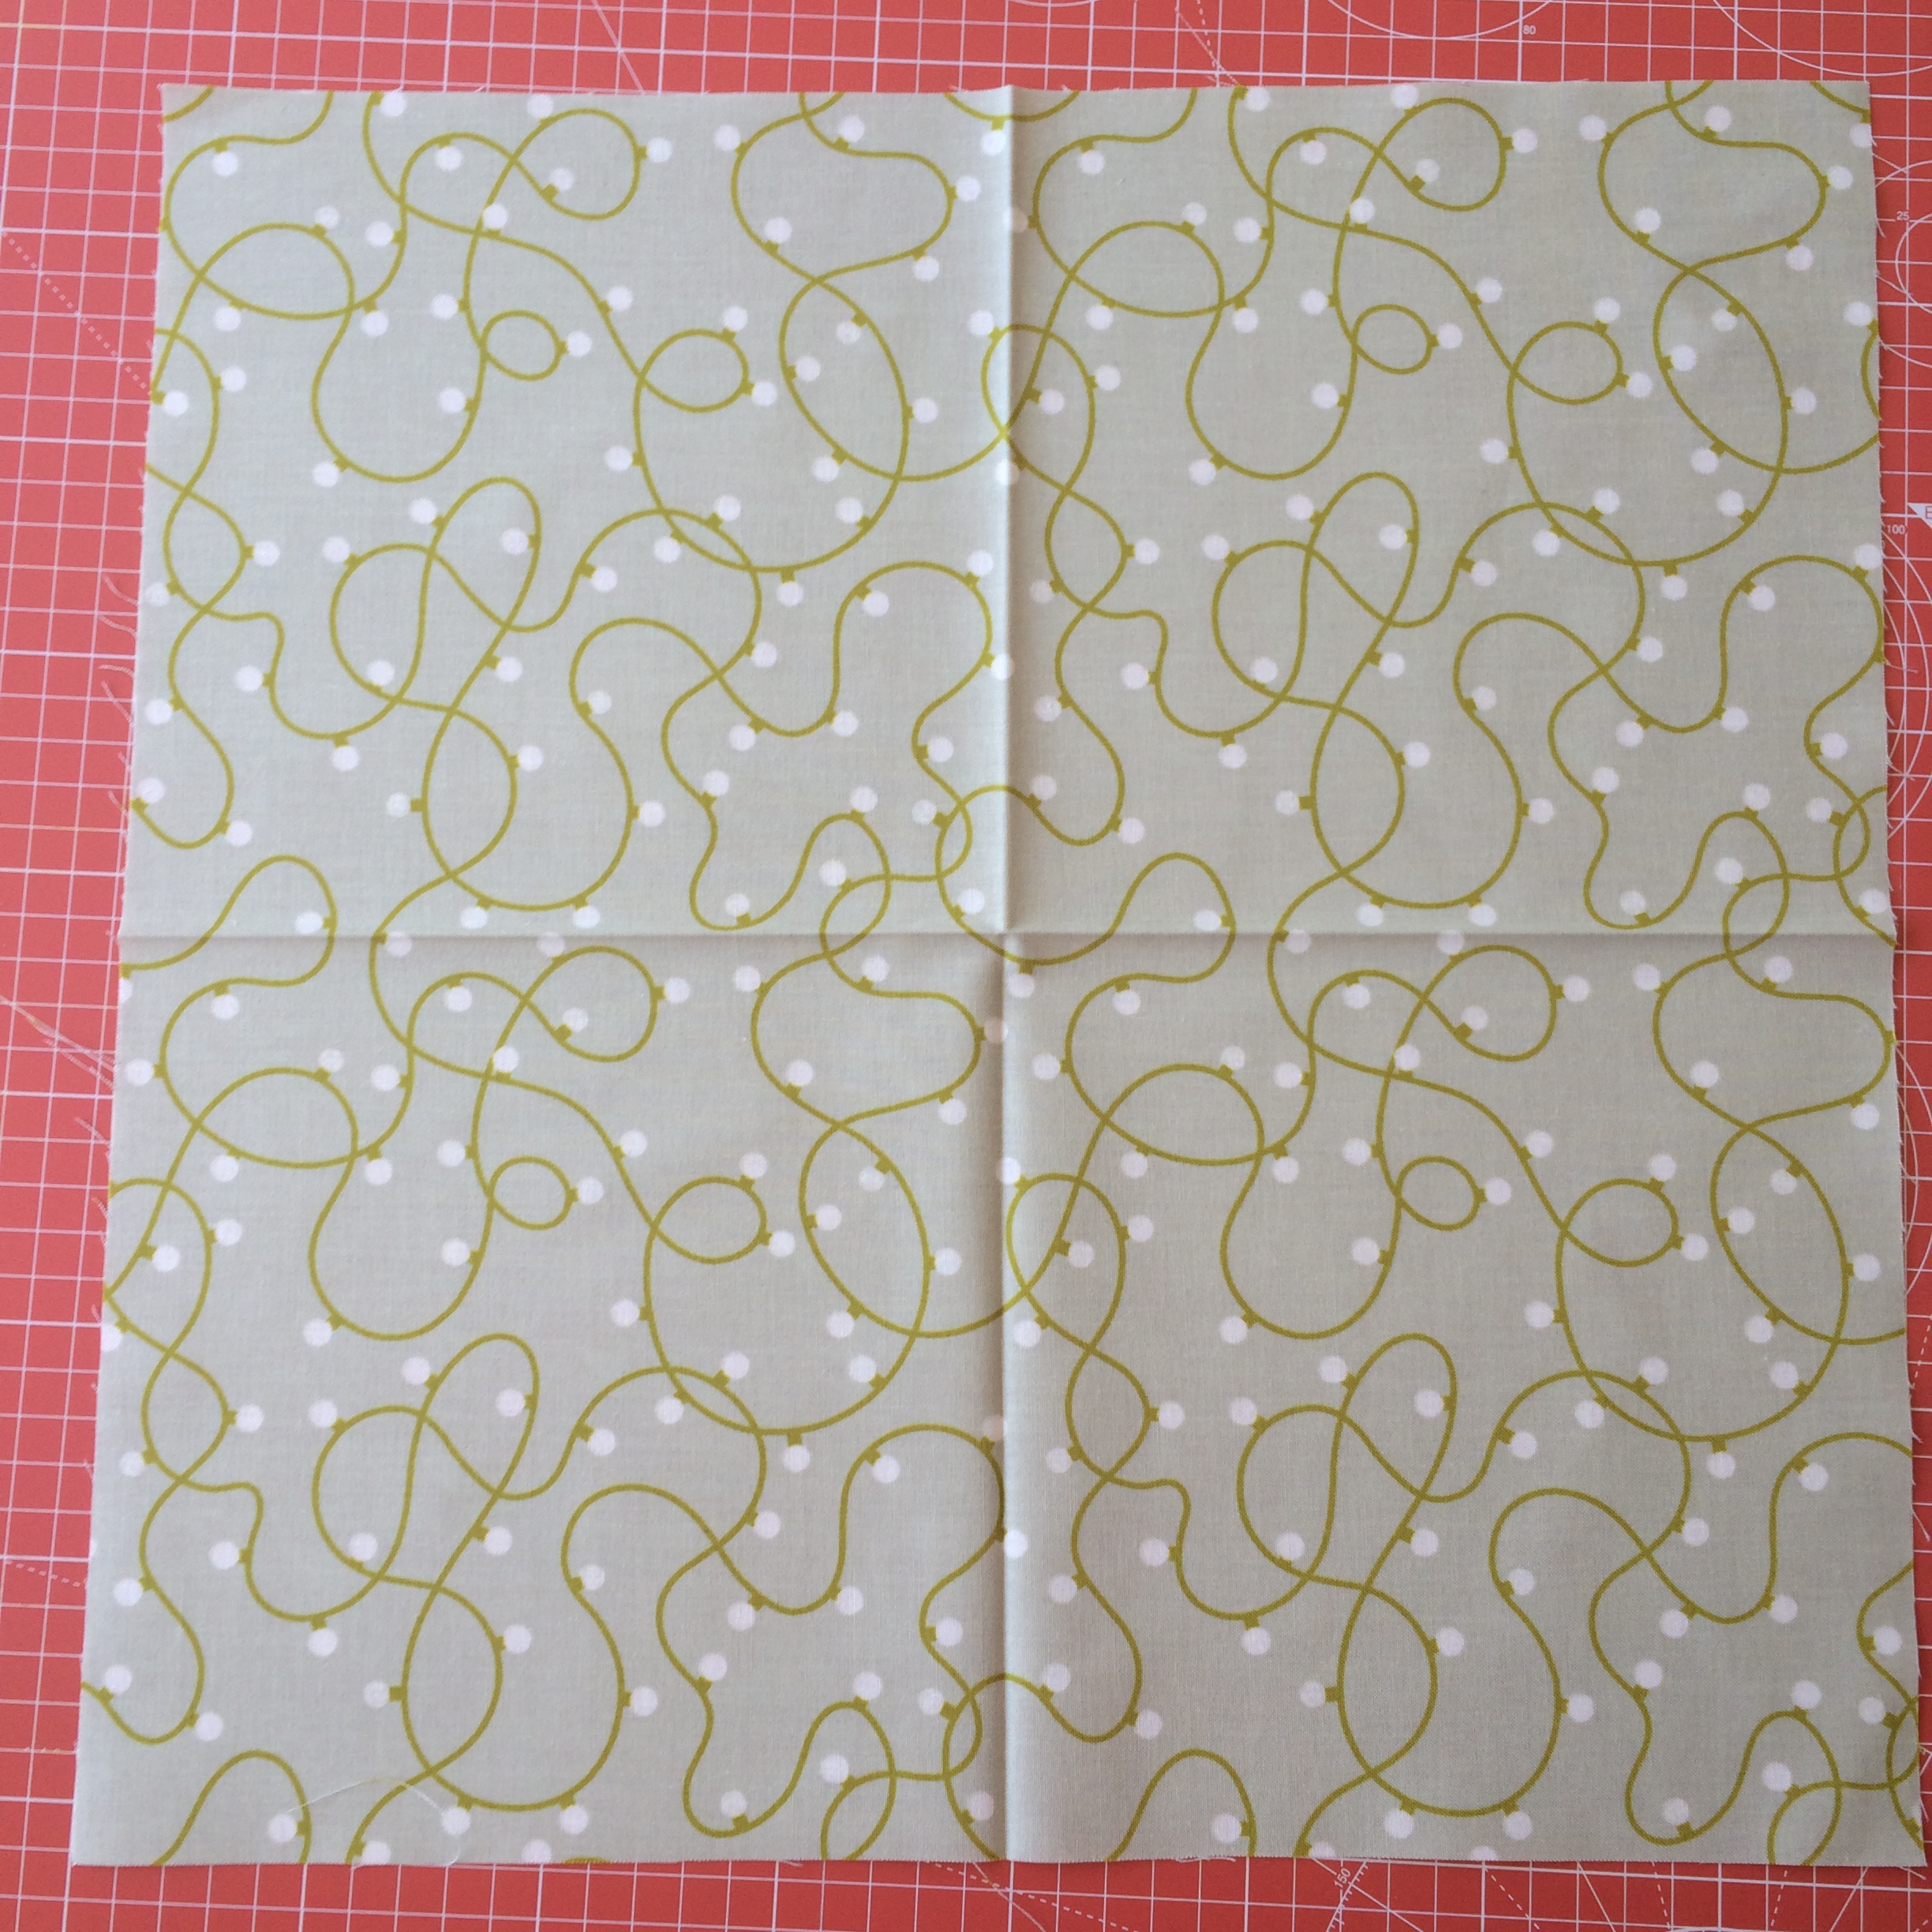
2.Choose your background fabric. This will need to be 40cm x 40cm. I used Illuminate Ivory because its neutral colour and simple print helps the reds and greens stand out. Pick a background fabric that won’t distract the eye from your hexies.
3.Next you need to find the centre of your background fabric. Fold the fabric in four. Now unfold your fabric and lay it out flat.
4.To arrange your hexies start by placing your first hexie in the centre. Then arrange six more hexies around the first one, leaving space between them so that they don’t touch and are evenly spaced. Use the creases in the background fabric to keep them straight. Repeat the process until all hexies are arranged as desired. Tip: Take a photo of your arrangement and take a look. Double check you are 100% happy with it before moving onto step 5.
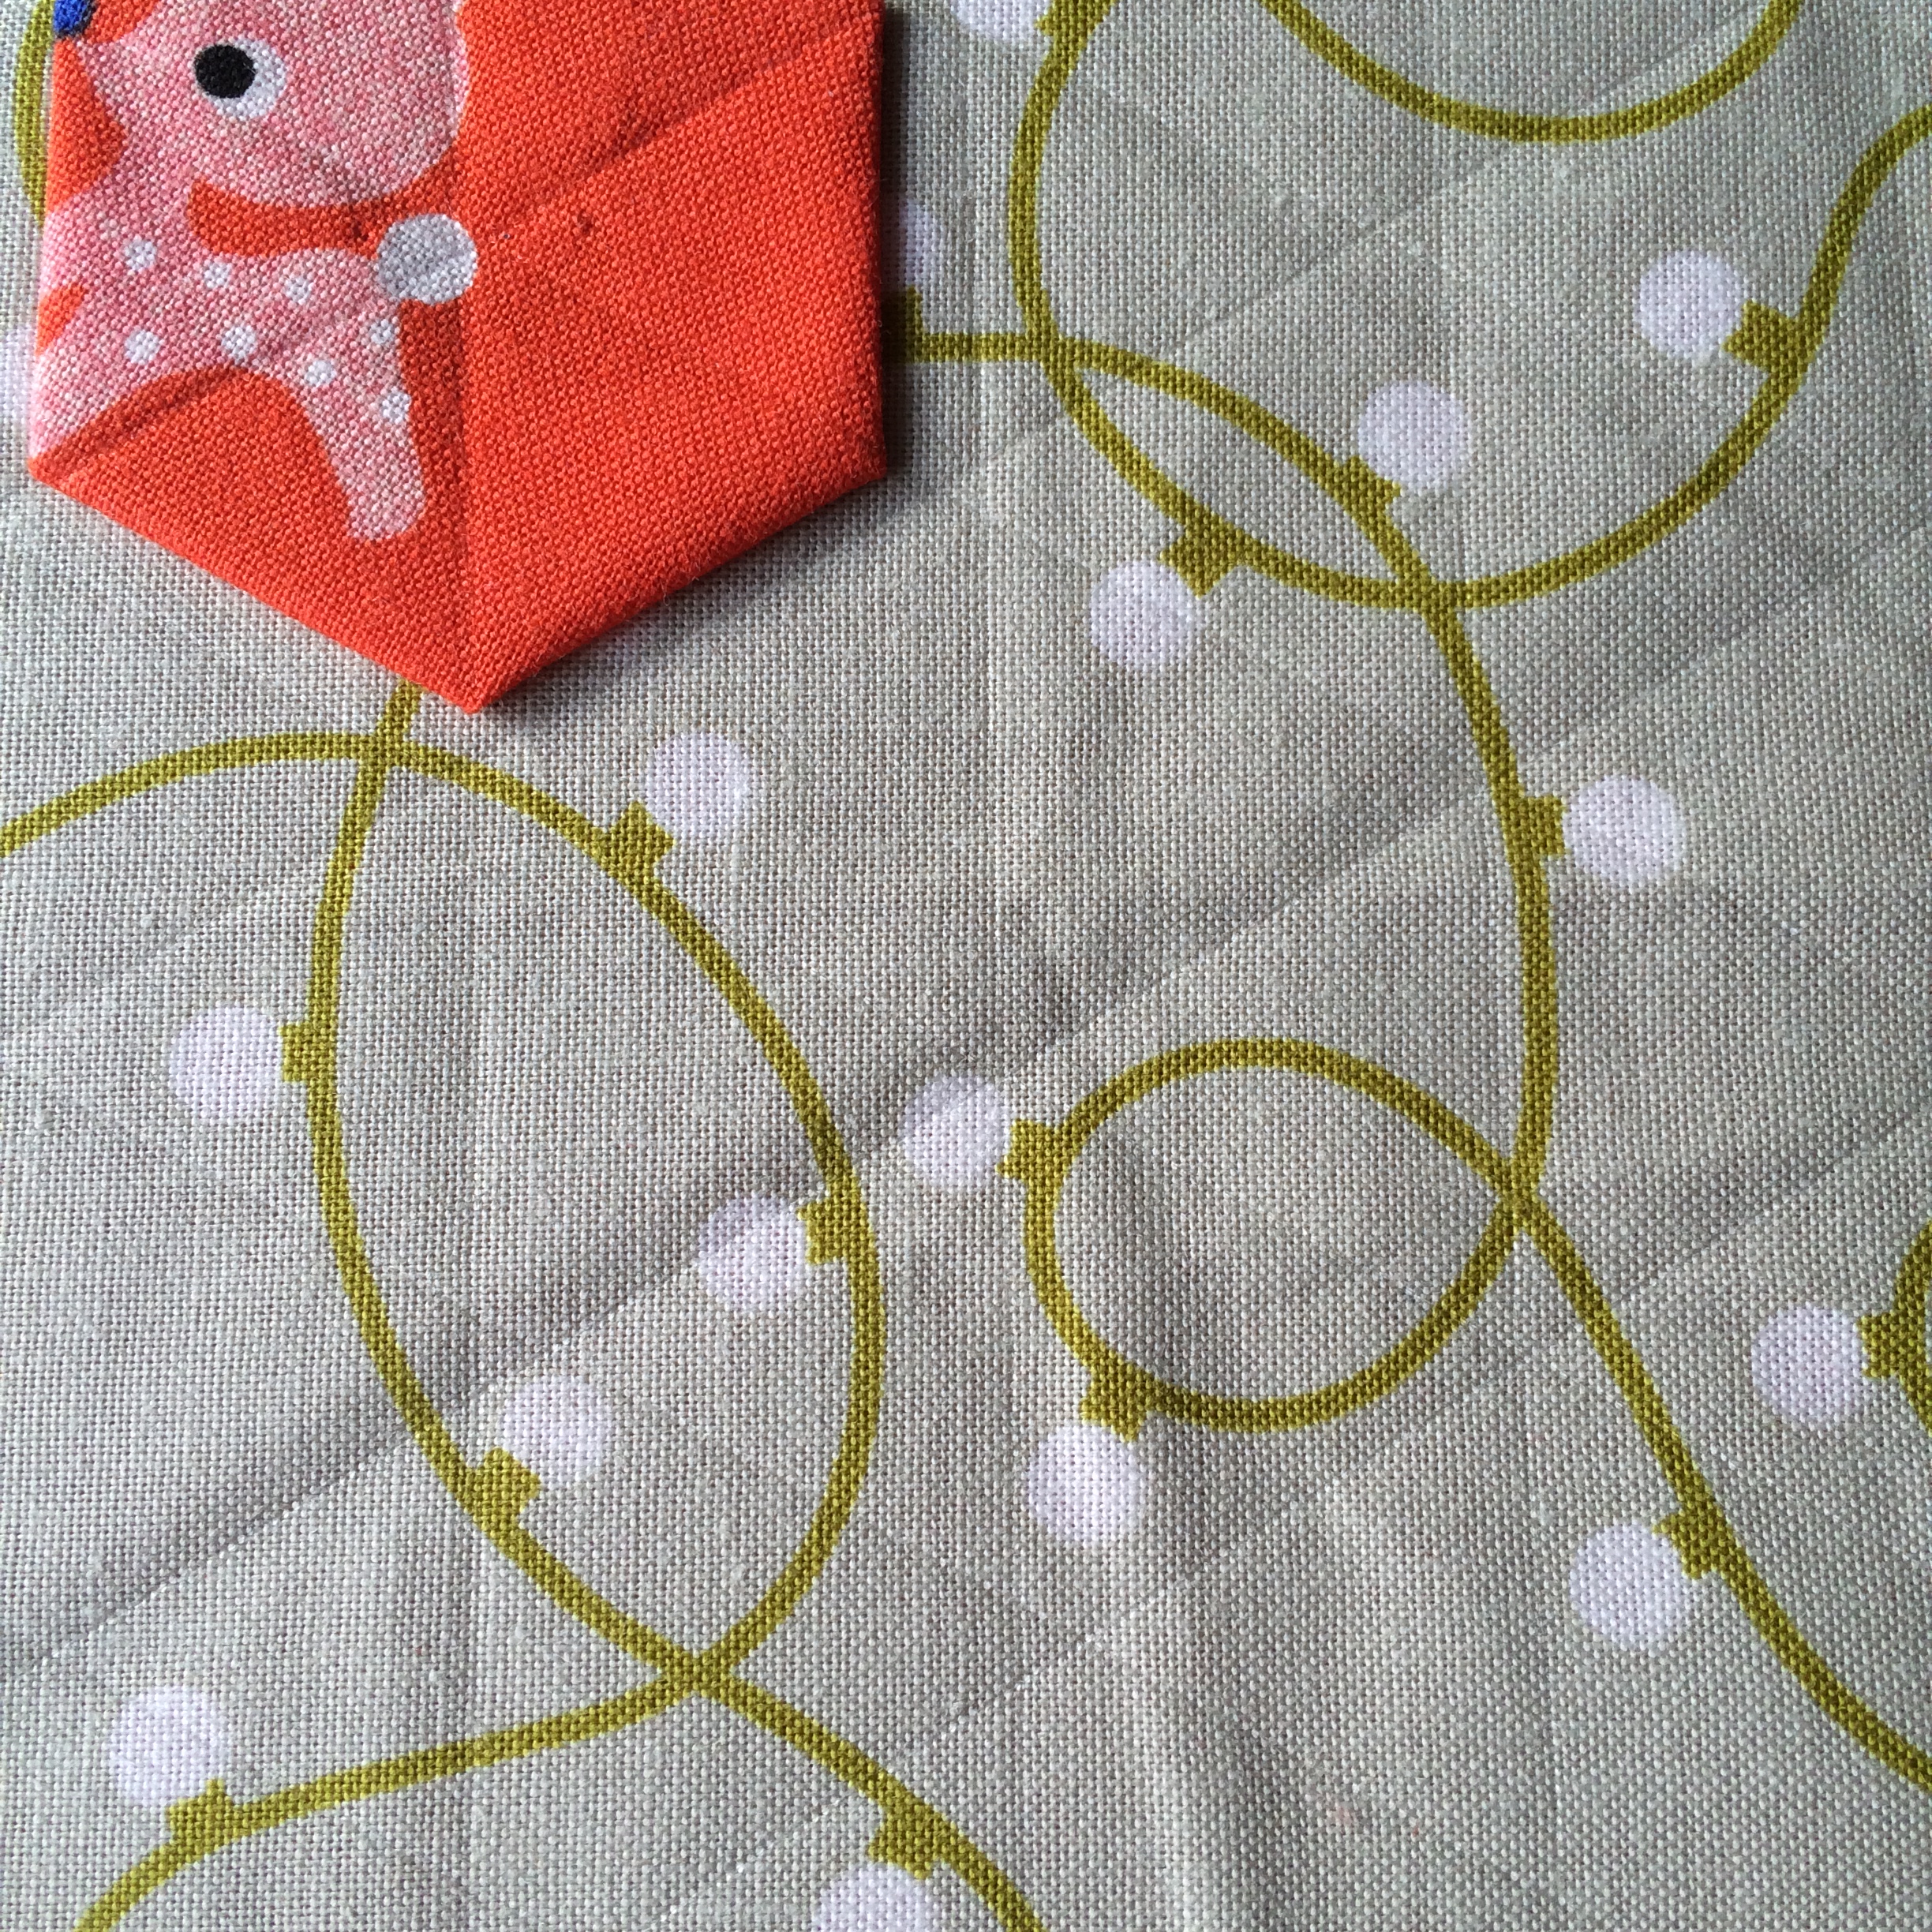
5.Pick one hexie up at a time and on the back draw a thin line of fabric glue around all of the sides.
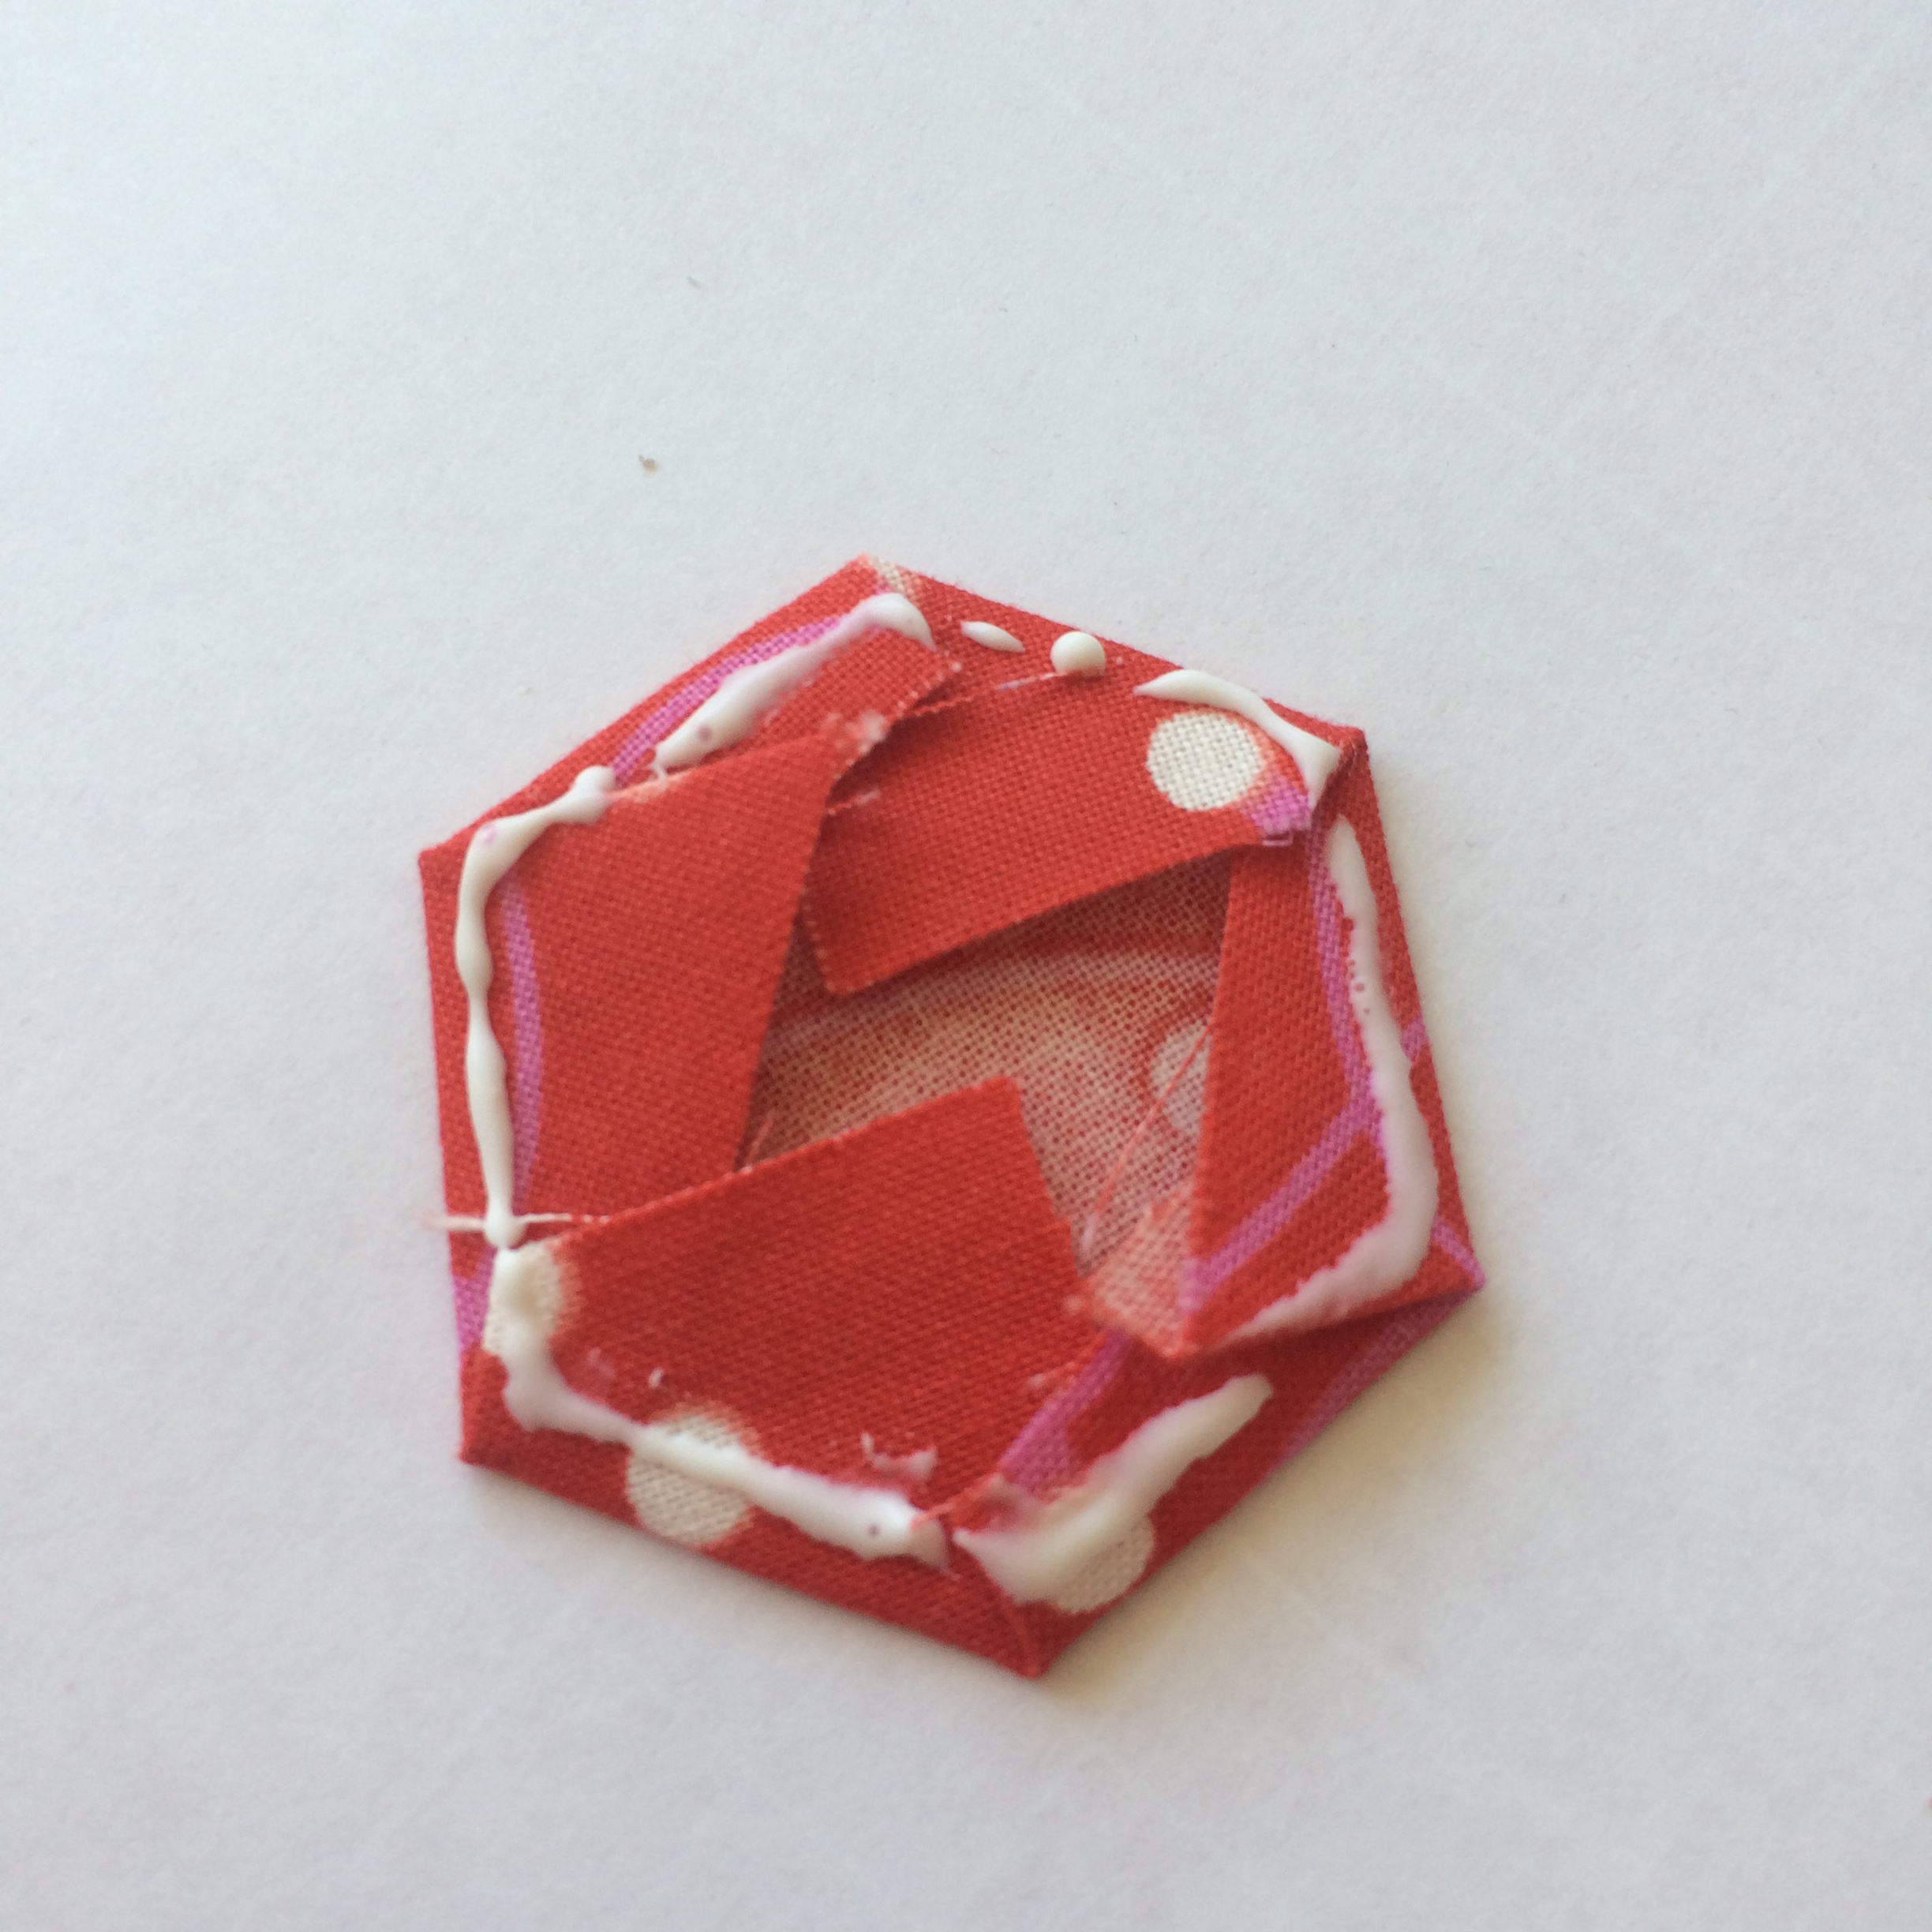
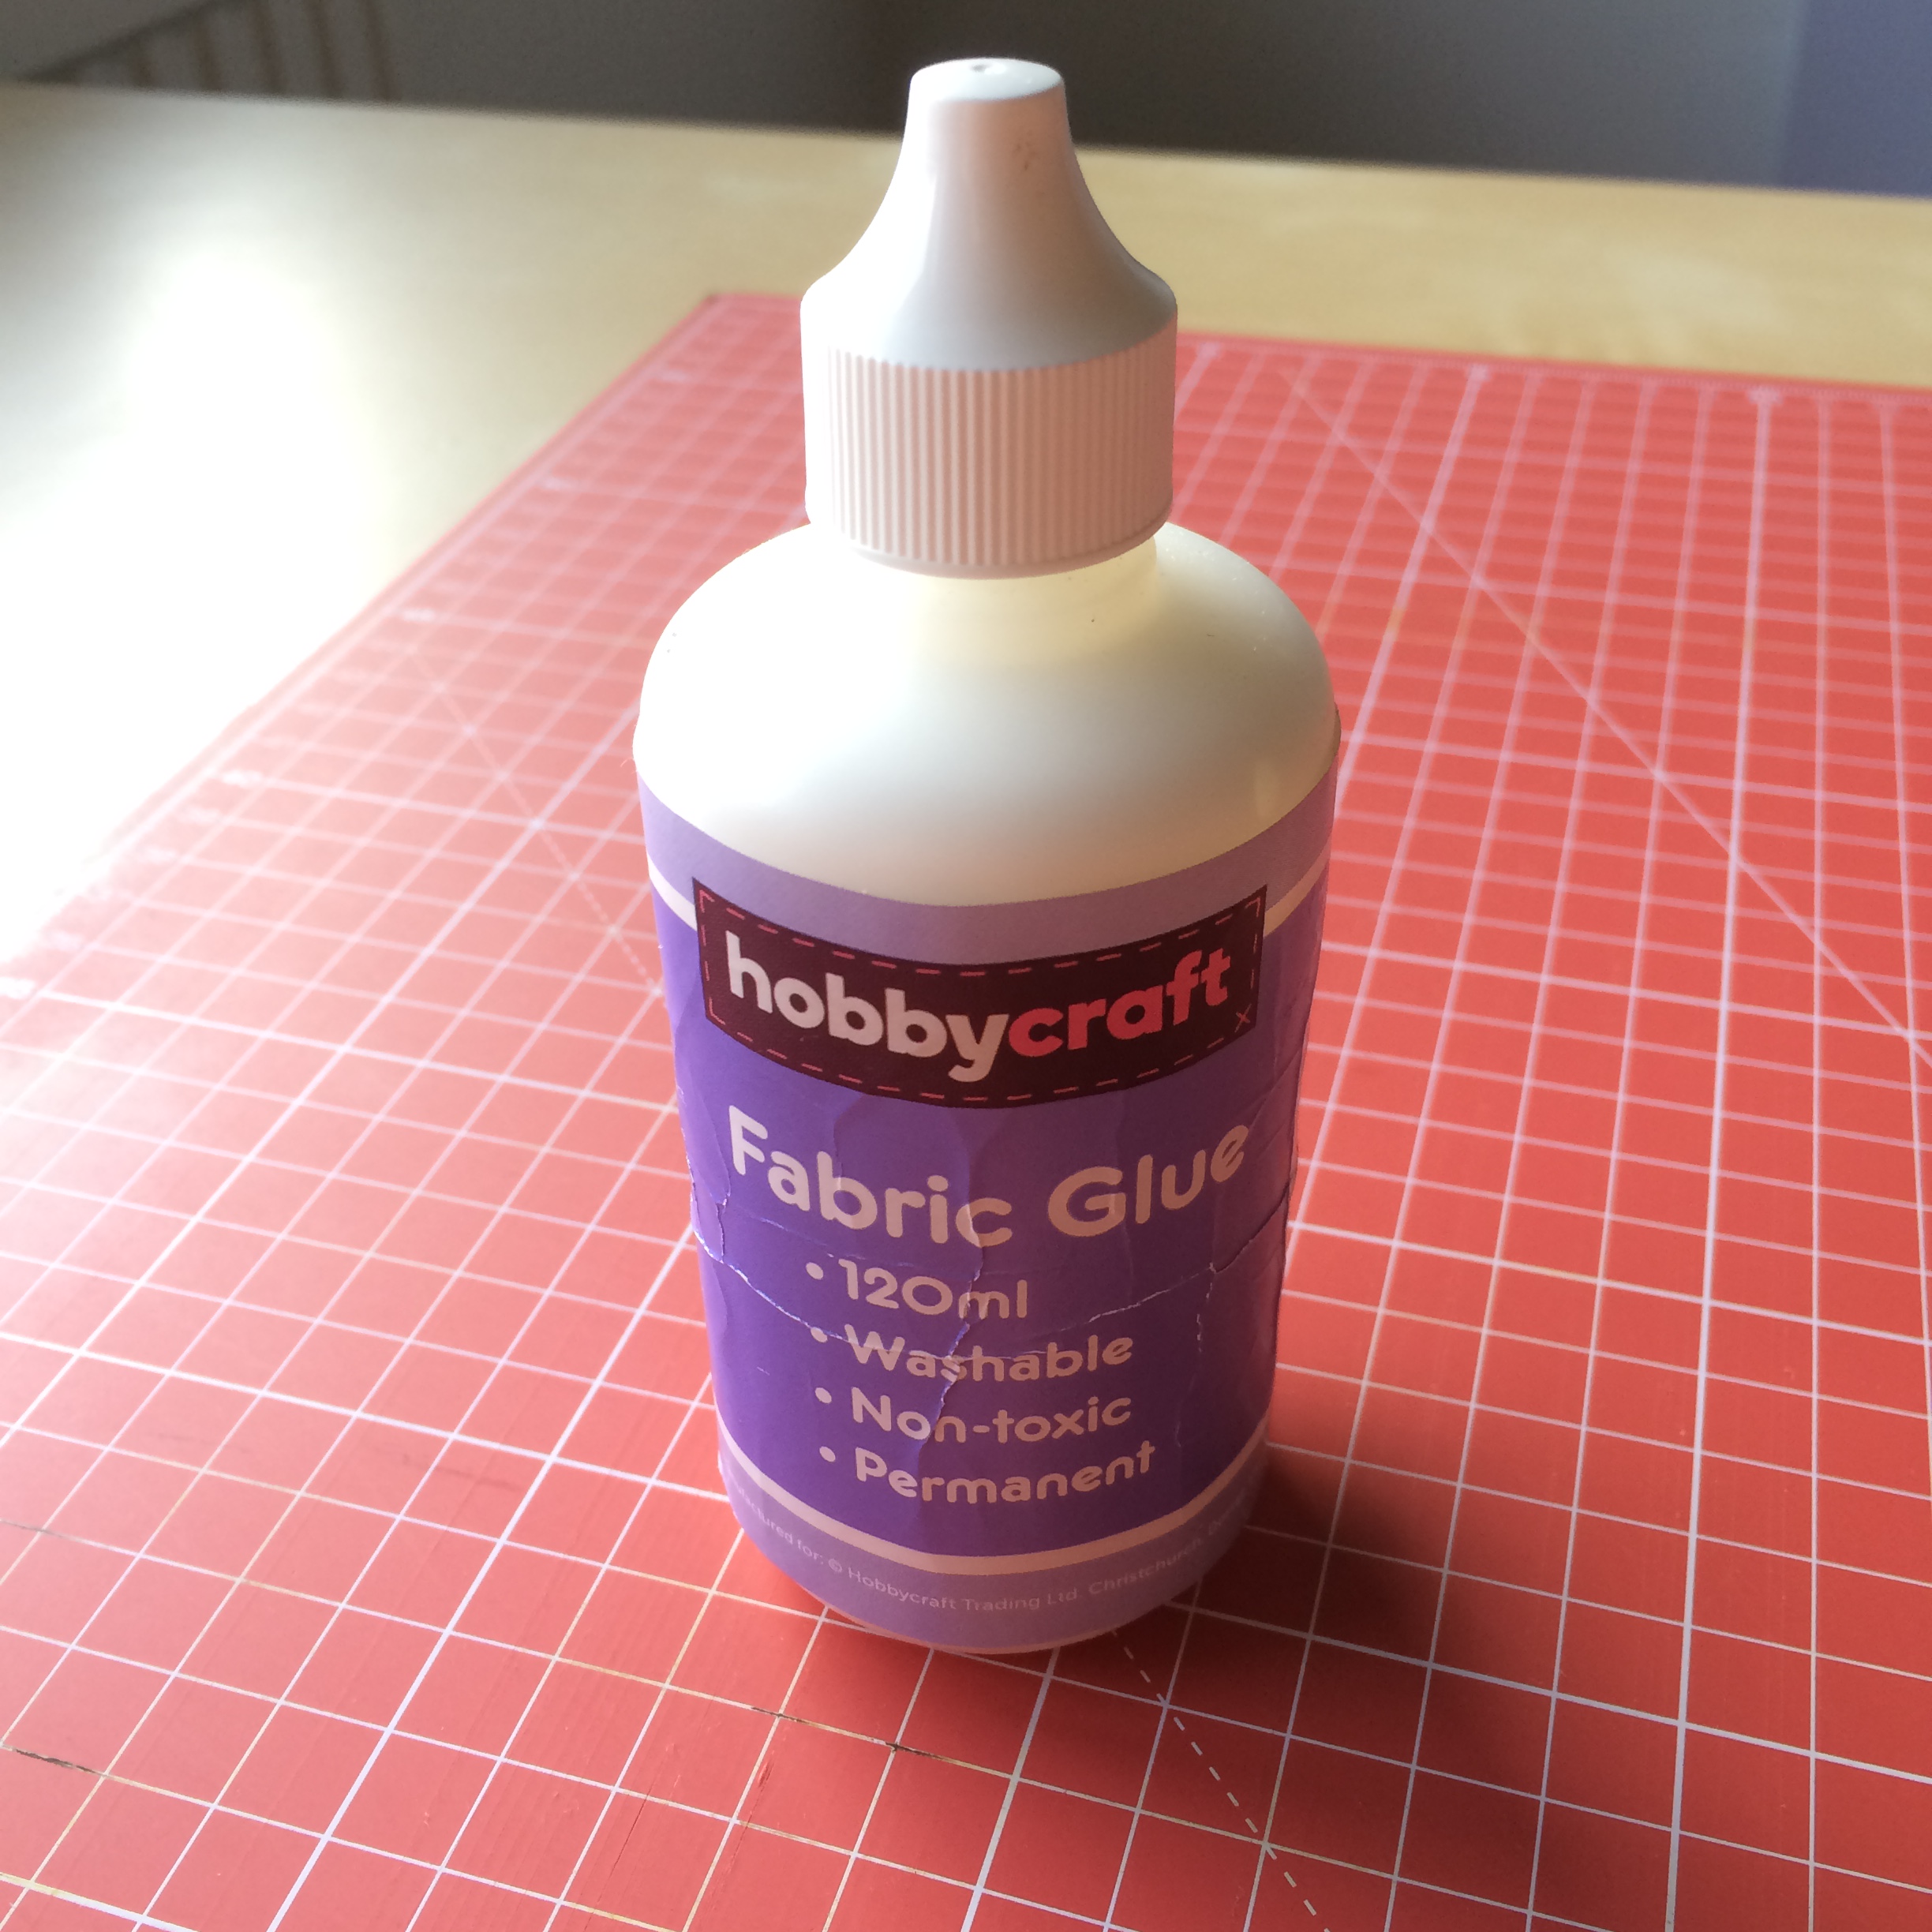
Place the hexie back in its position and press down firmly with your hand. Continue until all hexies are glued down and leave to dry. Tip: Place some scrap paper under your project as the glue tends to soak through a little and may stick to your work surface.
6.Now that the glue has dried you will need to draw on the lines for the top stitching. I used a ruler and a crease maker which creates a crease in the fabric rather than marking it with ink.
Your lines will need to go across each point of the hexie. Make sure you continue to draw the lines onto the background fabric as this will create a nice pattern in the negative space surrounding the hexies, which will be visible when your project is inside its hoop.
7.Cut out a piece of wadding the same size as your background fabric. Now cut out a piece of fabric that will be used for the back of your project. This also needs to be the same size as your background fabric/wadding. I chose calico as it’s cheap and once the project is finished it won’t be seen.
8.Sandwich all three pieces together. To do this put the front piece on top of the wadding with hexies facing up, and then place the backing fabric underneath. Pin all over to keep it all together.
9.Following the lines that you have drawn with the crease maker, use a sewing machine to stitch the three layers together which will also secure down the hexies.

10.Remove the pins and put inside the hoop, I used a 12” hoop. Then trim off some of the excess fabric from the back, leaving about 5cm all the way around and do a running stitch all the way around. You will then need to pull the thread and tie a knot which will keep the fabric pulled tightly in.
11. Hang it up and celebrate Christmas!