Posted by The Fabric Fox on 23rd Jan 2024
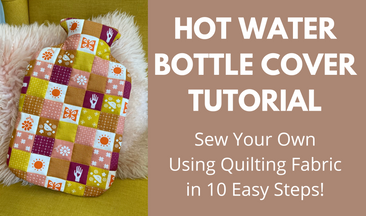
Hot Water Bottle Cover Tutorial | Sew Your Own Using Quilting Fabric in 10 Easy Steps
In the chilly winter months, a hot water bottle becomes your best friend, providing warmth and comfort. However, a hot water bottle is nothing without a snug, cozy cover. If you dream of personalising your own hot water bottle, here is how you can sew your own hot water bottle cover using quilting fabric in 10 easy steps!
Jump to:
• Supplies
• Template
• Cutting Out the Fabric Pieces
• Sewing the Hot Water Bottle Cover
Hot Water Bottle Cover Supplies
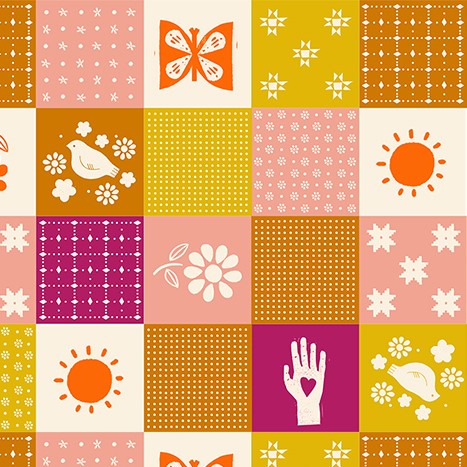
• Fat quarter of main fabric: we used the Songbird Patchwork Melon print by Ruby Star Society because it's a patchwork cheat print (see Step 6 for more info...)
• Fat quarter of lining fabric: This fabric won't be seen so you can use any fabric you like.
• Wadding/batting
• Matching thread
• Hot water bottle
• Paper
• Pencil
• Tape
• Paper scissors
• Fabric scissors
• Pins
• Fabric clips
• Sewing machine (or hand sew)
Hot Water Bottle Cover Template
Step 1: Make the Template
Tape 2 pieces of A4 paper together and place the hot water bottle in the centre. Trace around the hot water bottle, making sure there’s 1 inch of extra spacing around the hot water bottle.
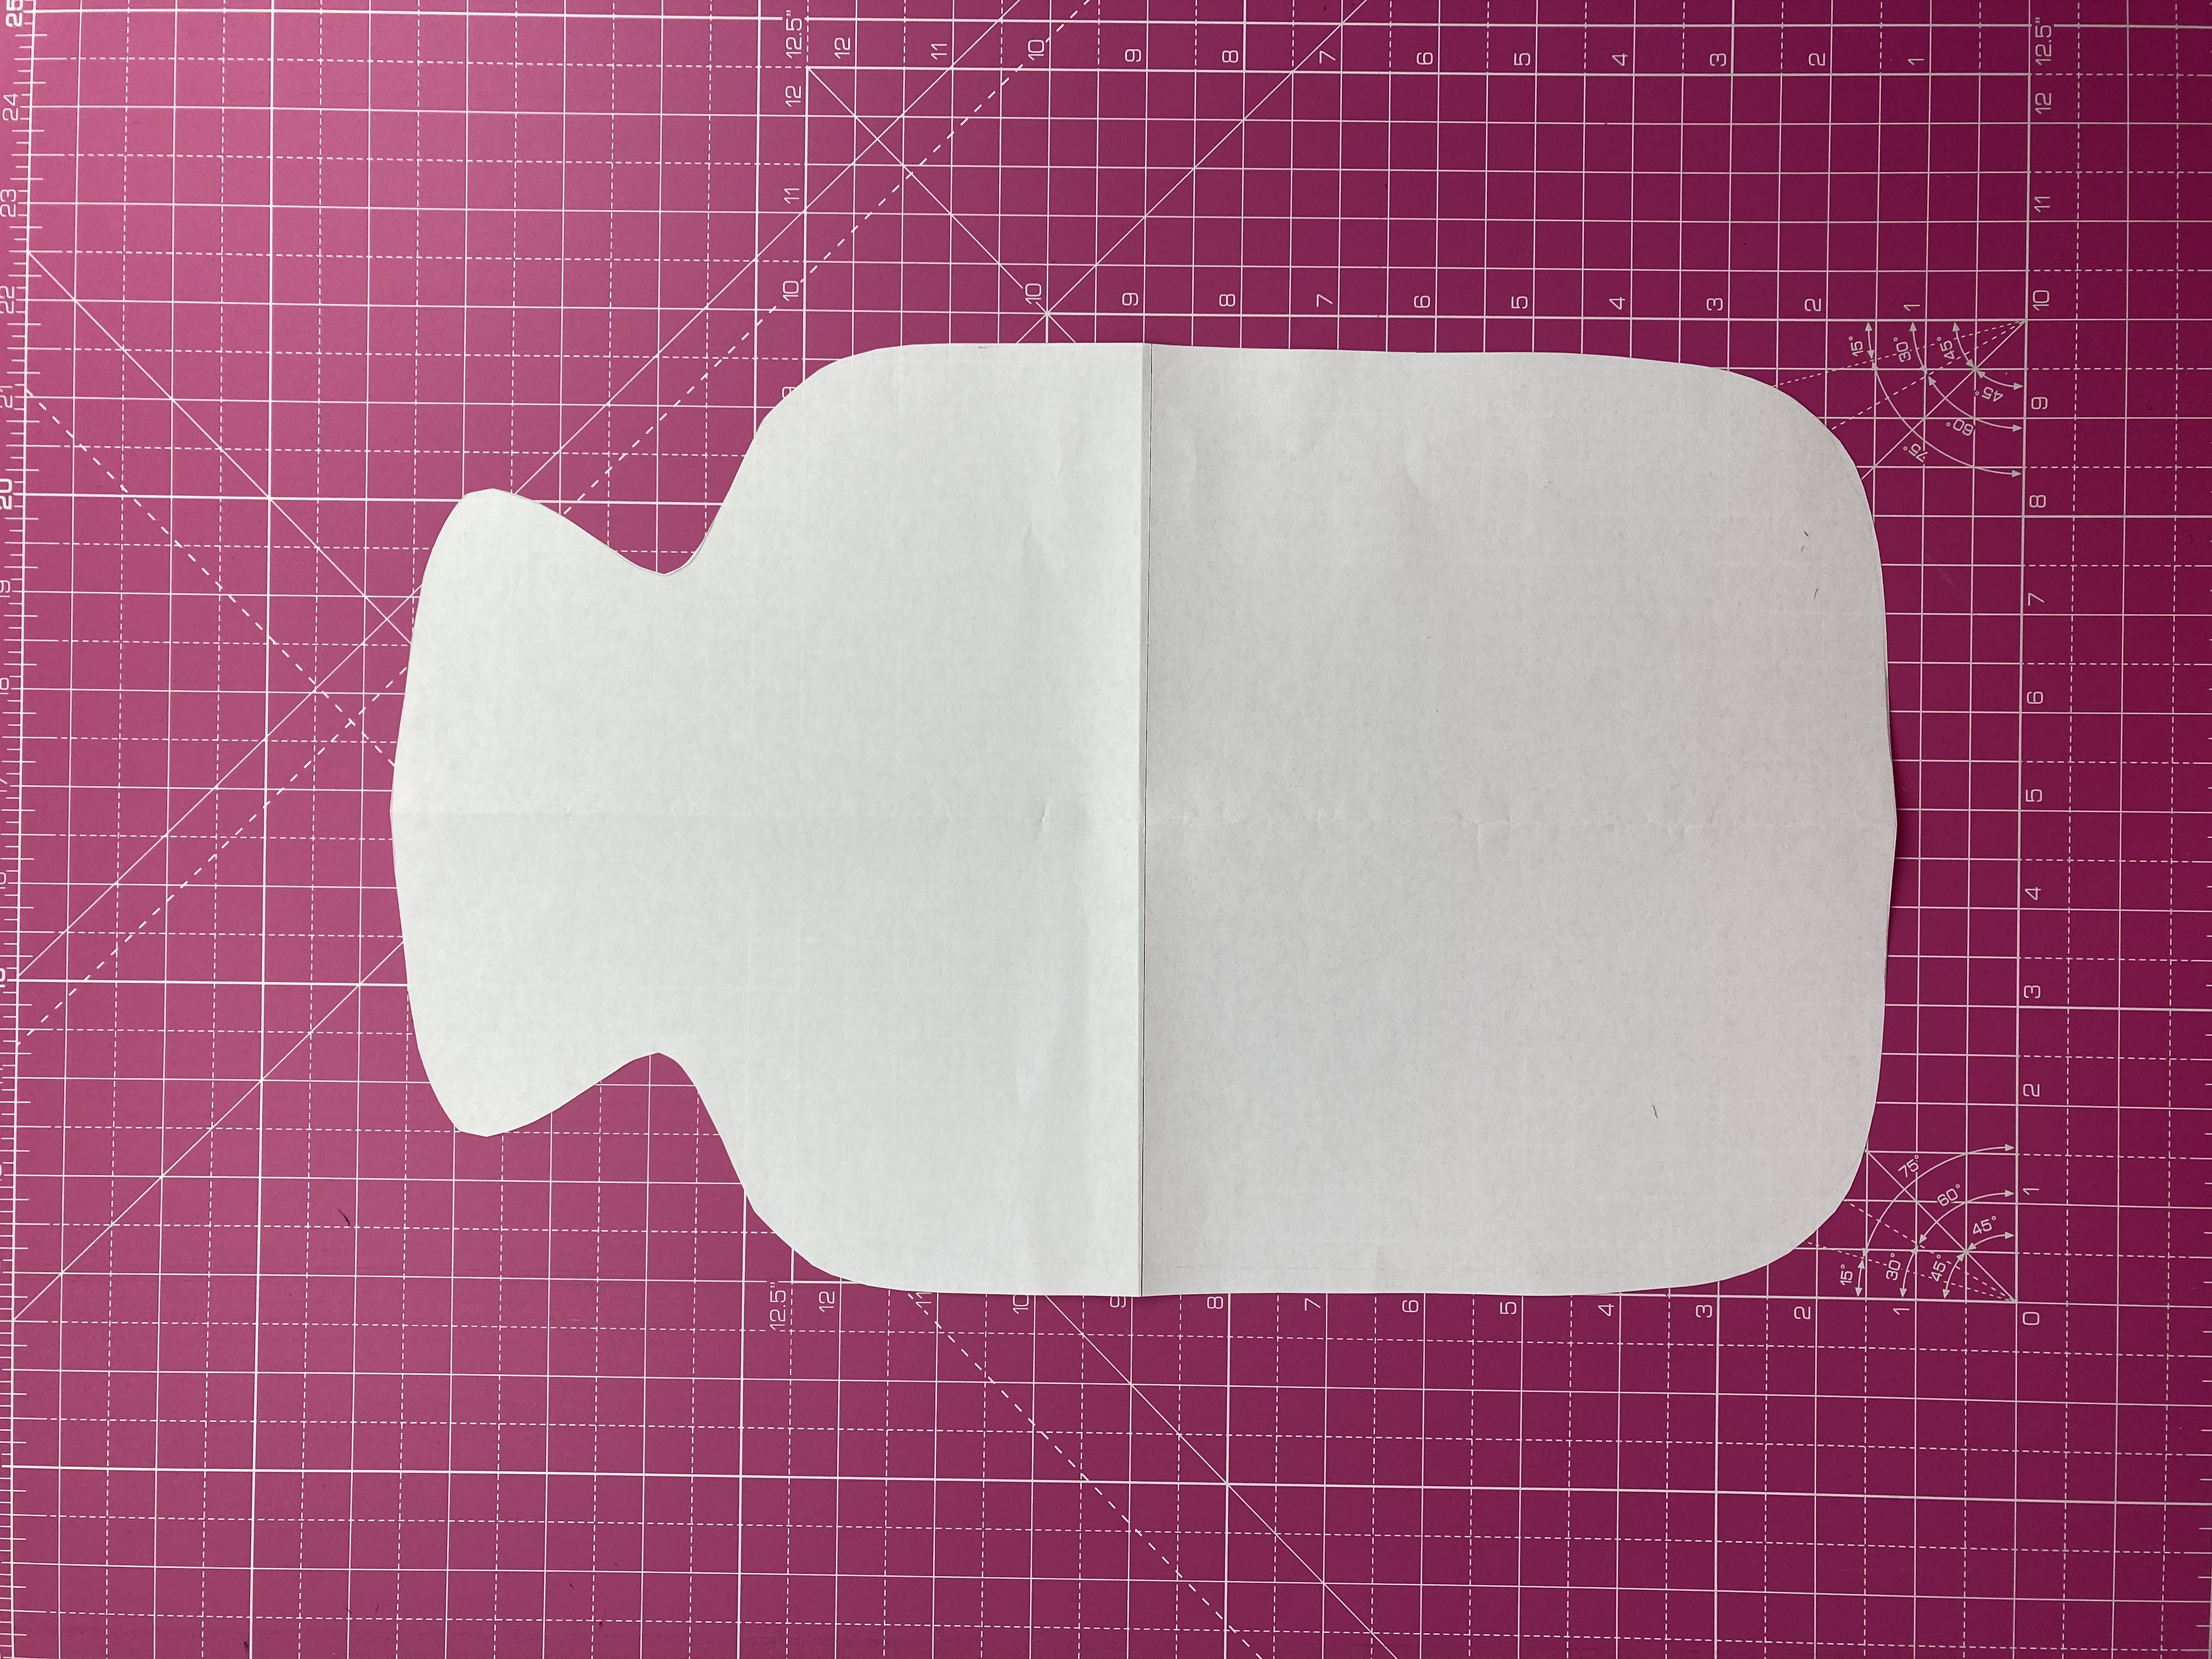
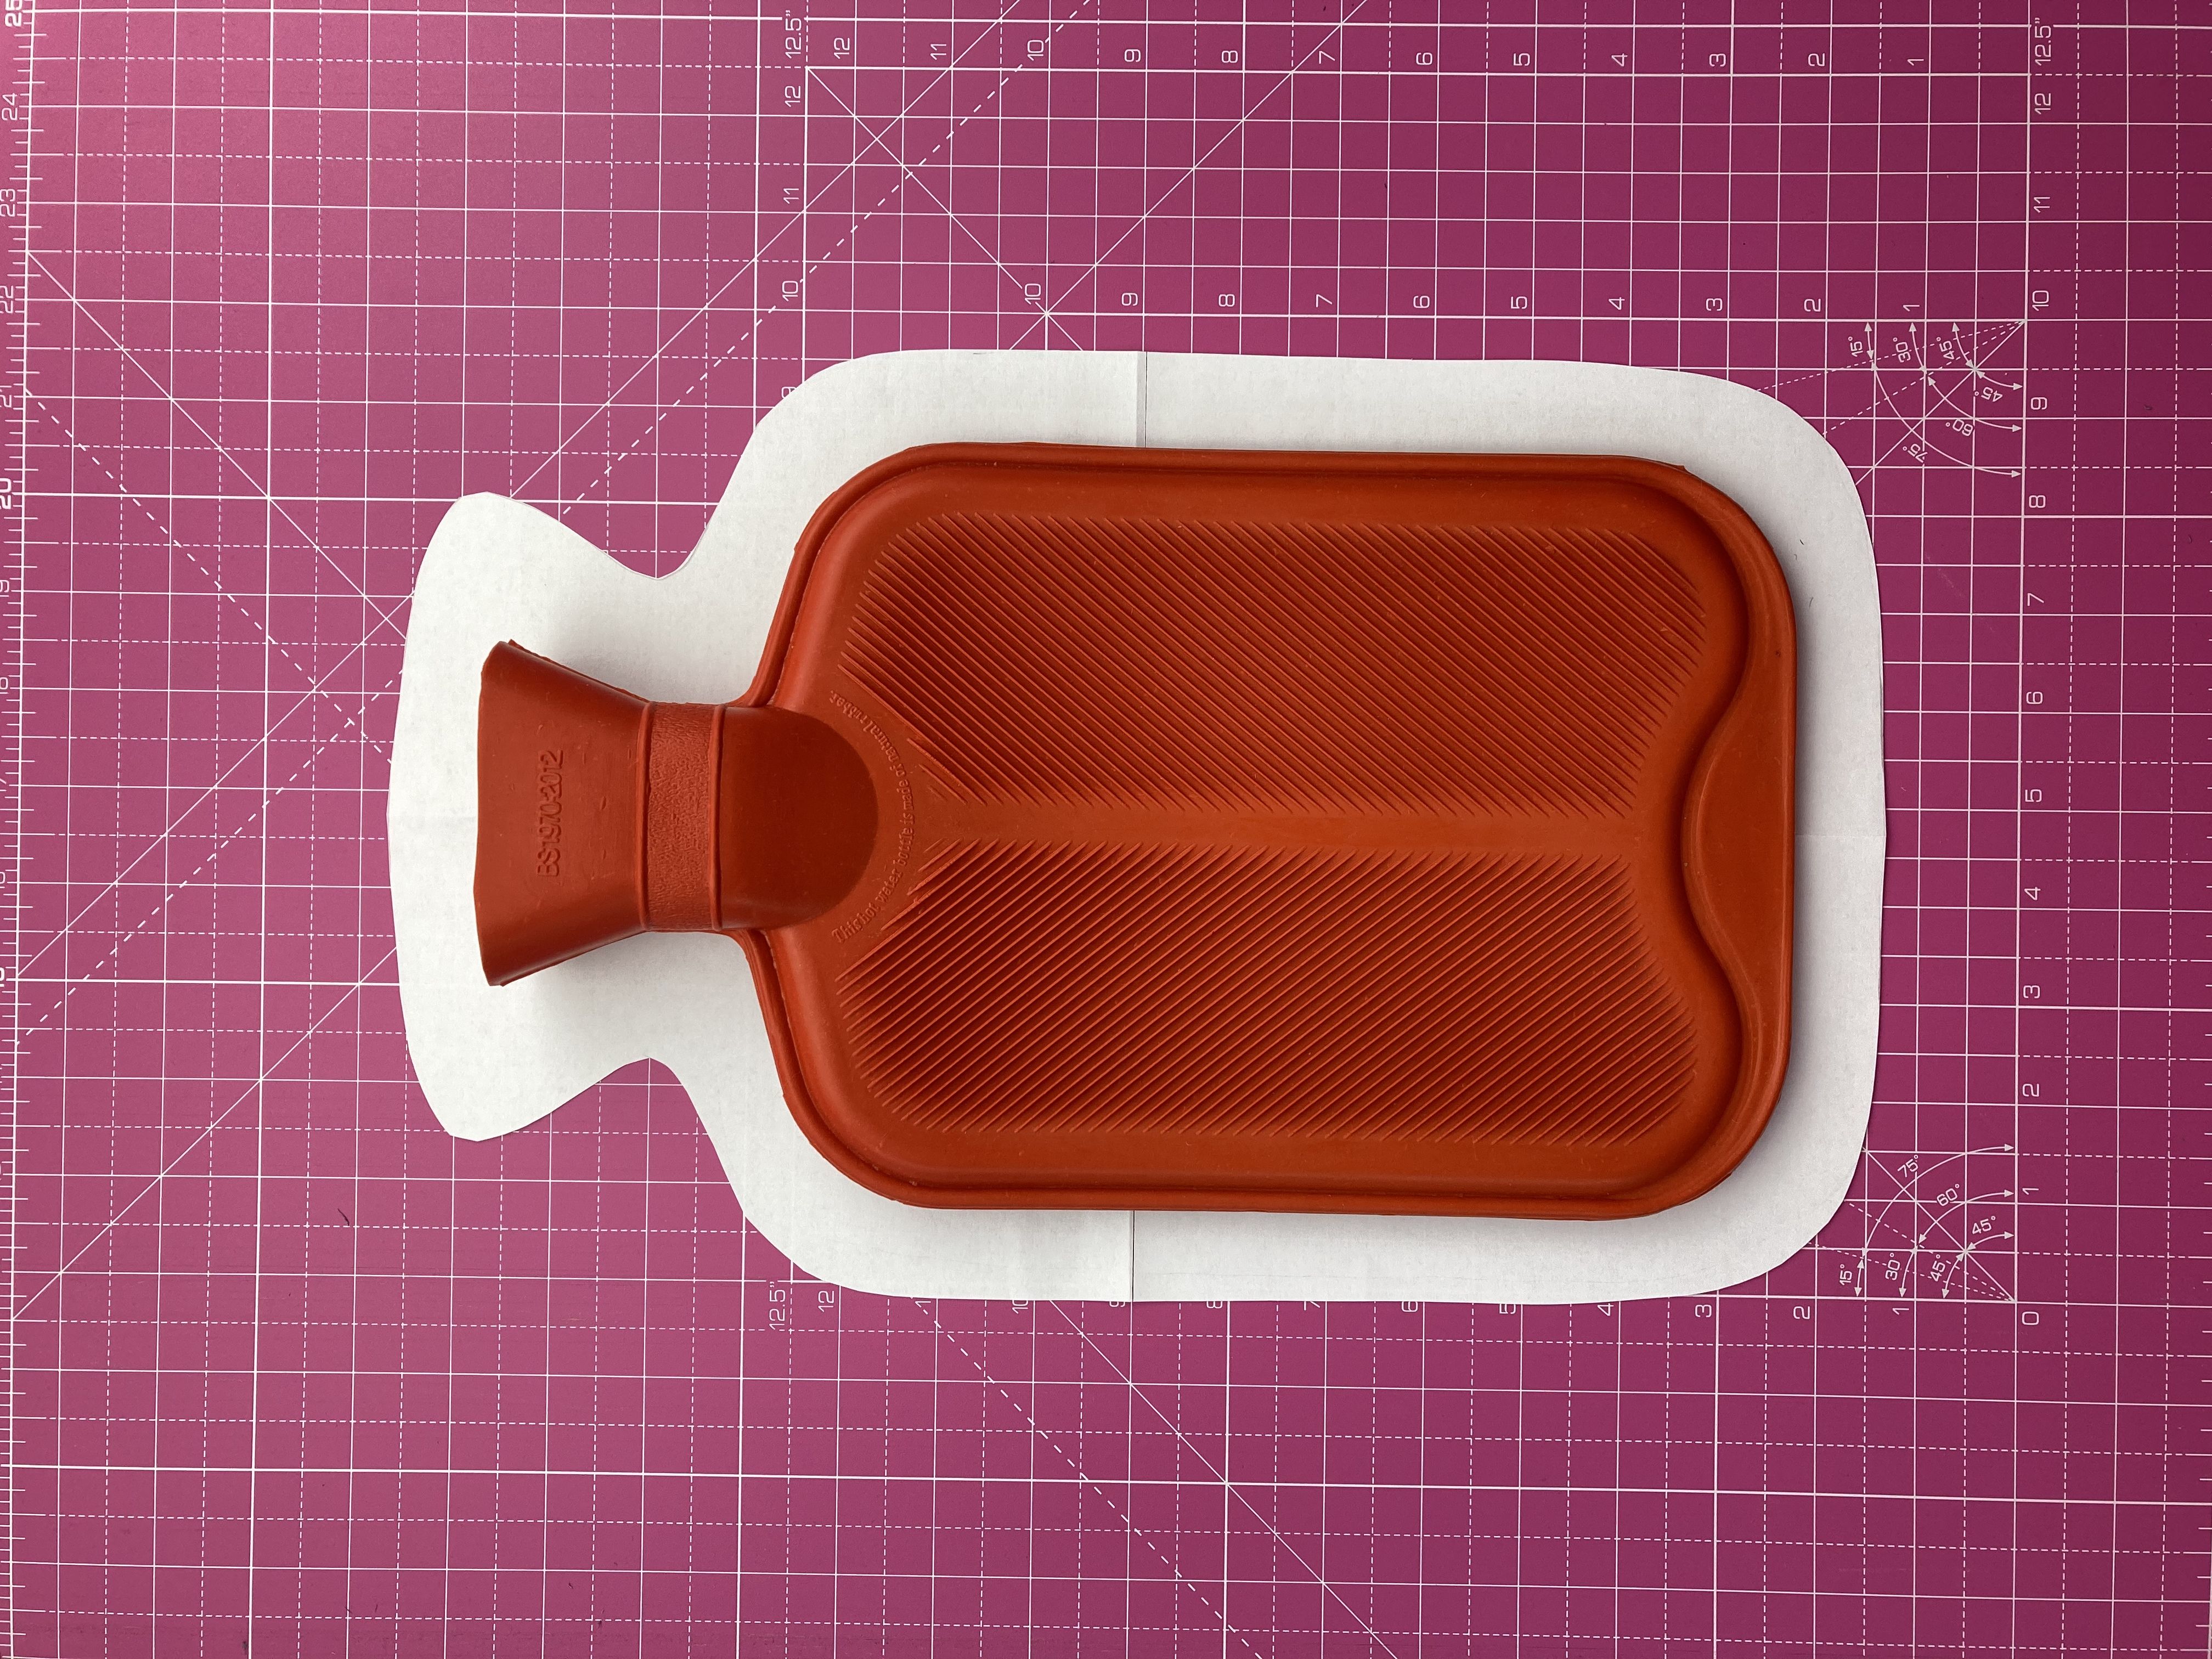
Fold the paper vertically in half and cut it out. This will give you a nice symmetrical template you can use for the front piece and the two back pieces.
Step 2: Form the Backing Template
As you will be using the same template for the two back pieces, you need to draw some lines to help you cut them out correctly to make an envelope fold.
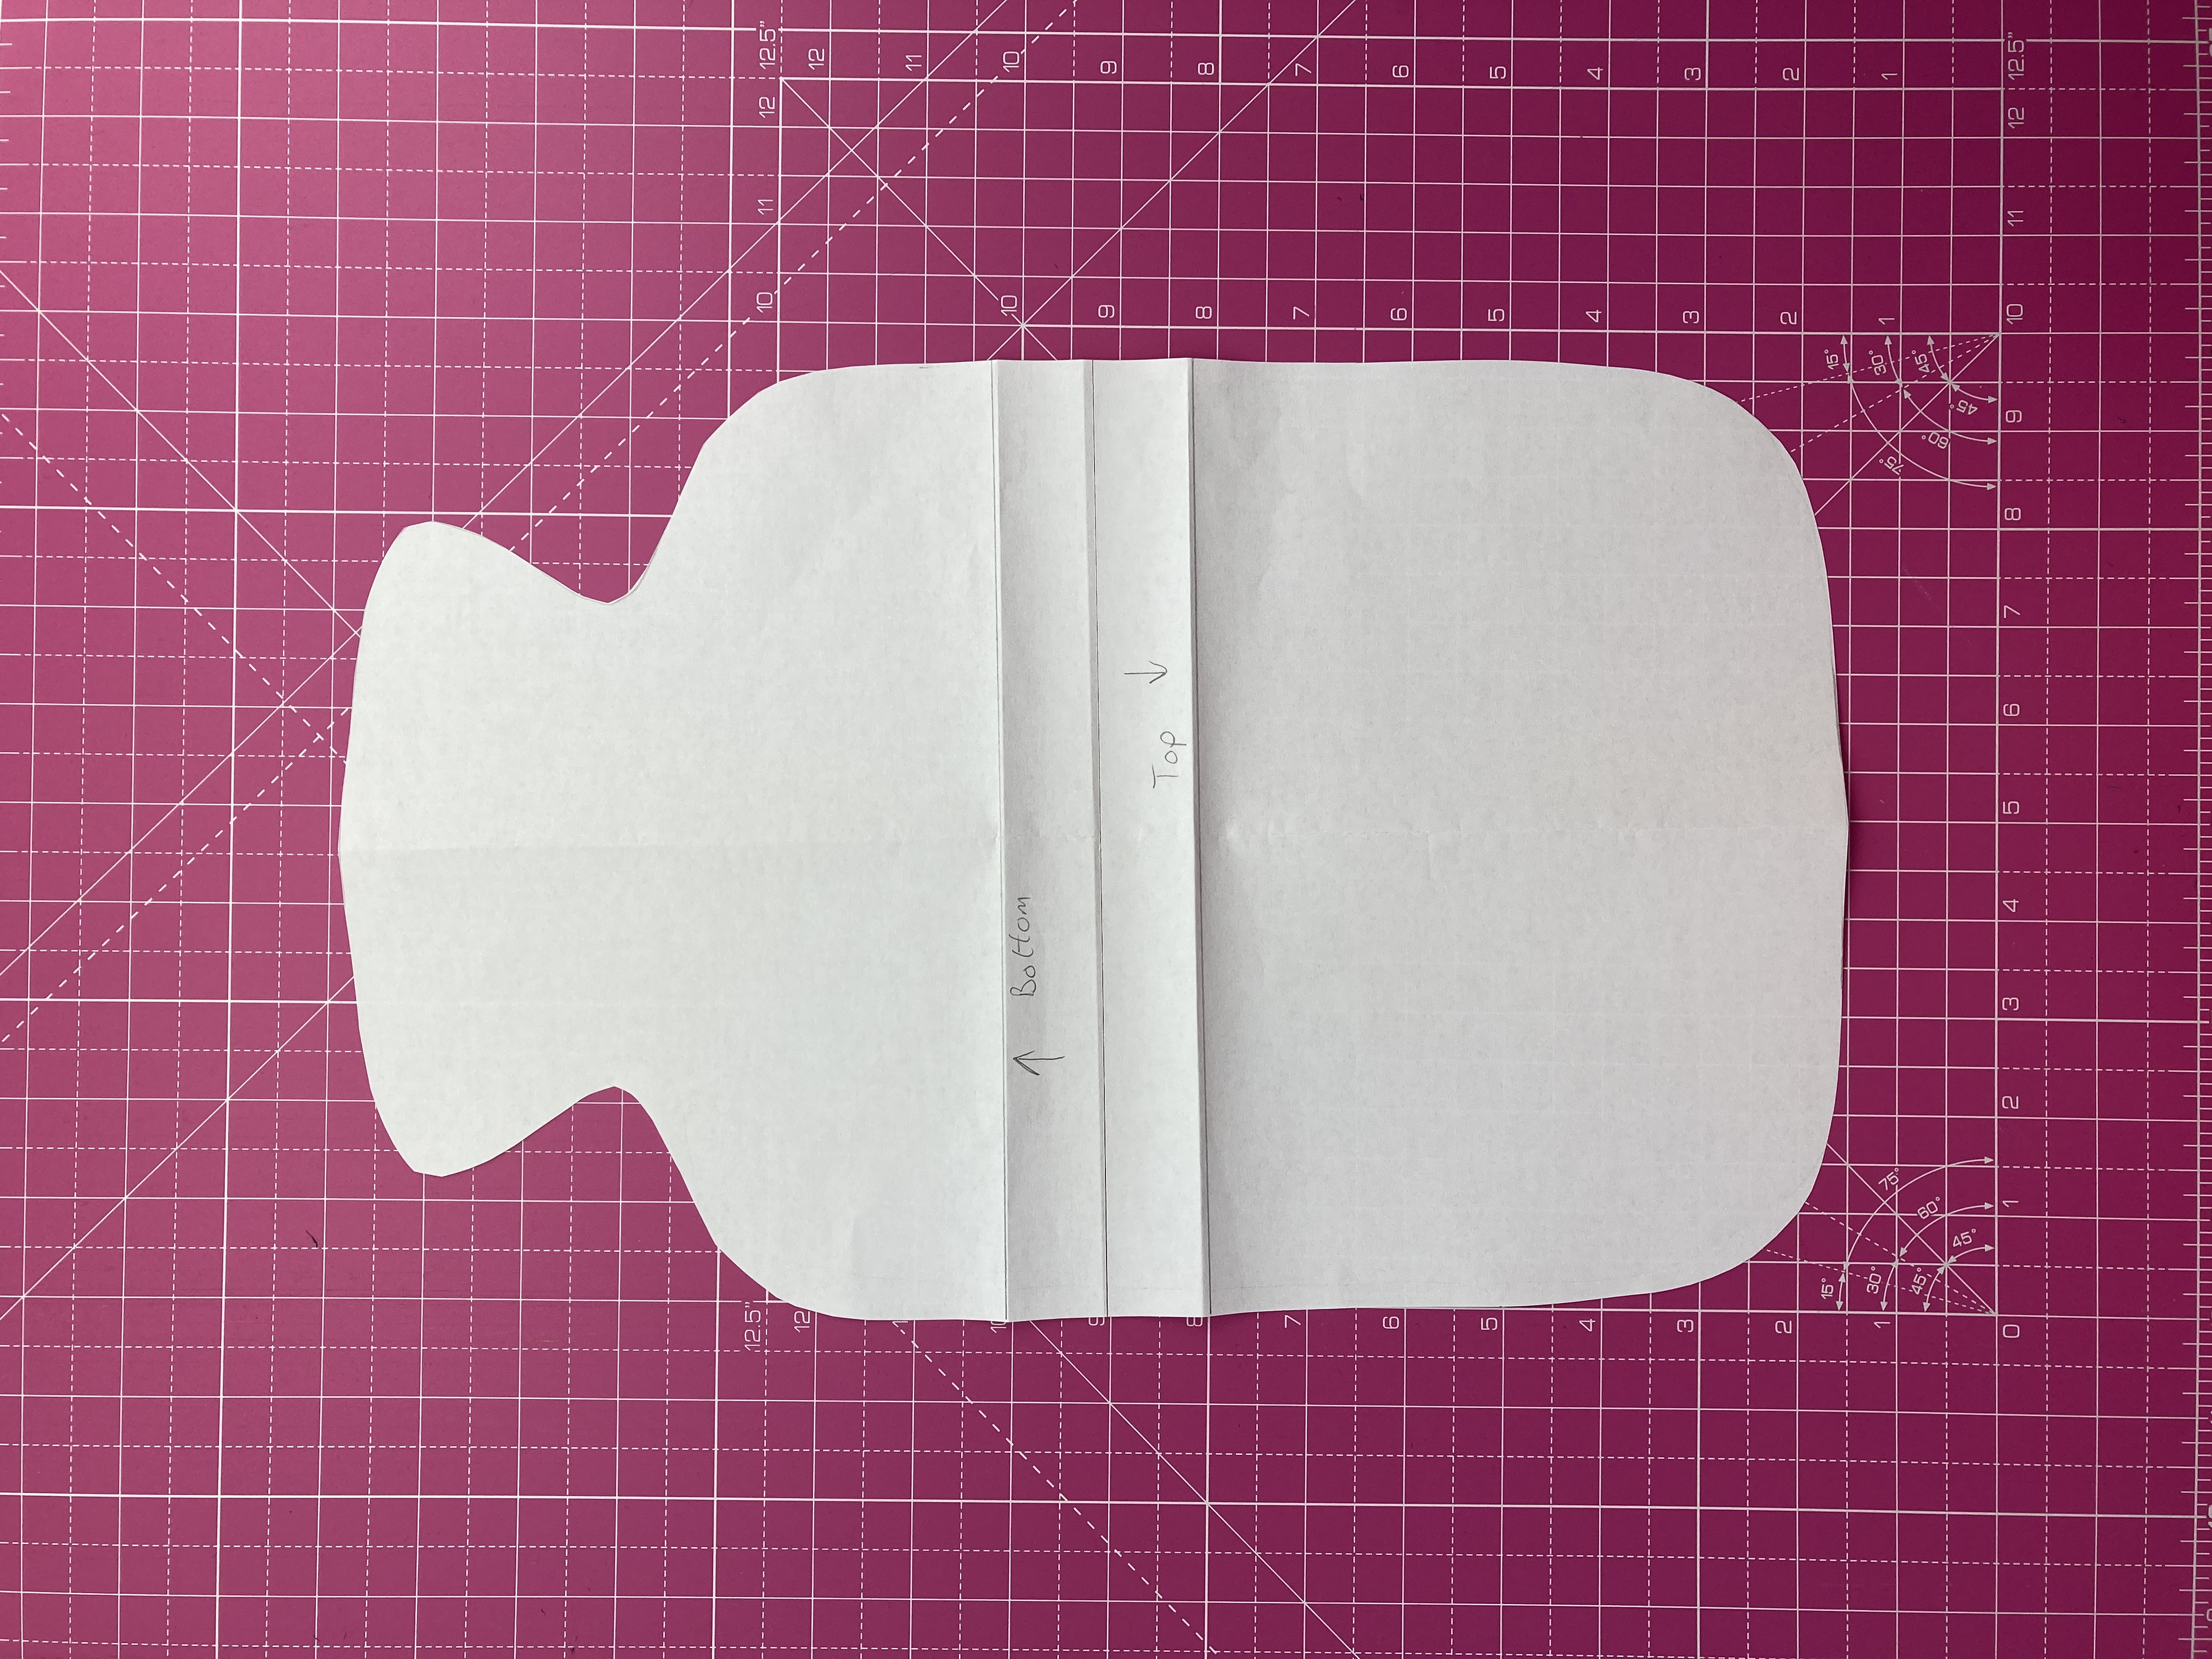
Fold the template horizontally in half. Draw a horizontal line across the template 1 inch above the fold line. Draw another horizontal line 1 inch below the fold line.
The top back piece will measure from the top of the template down to the lower folded line. The bottom back piece will measure from the bottom of the template up to the upper folded line. When you come to cut out the two back pieces, this will ensure the two pieces will overlap to create the envelope fold (Steps 4 and 5).
Cutting Out the Fabric Pieces
Step 3: Cut Out the Front Piece
Securely pin the template to your fabric and cut around it.
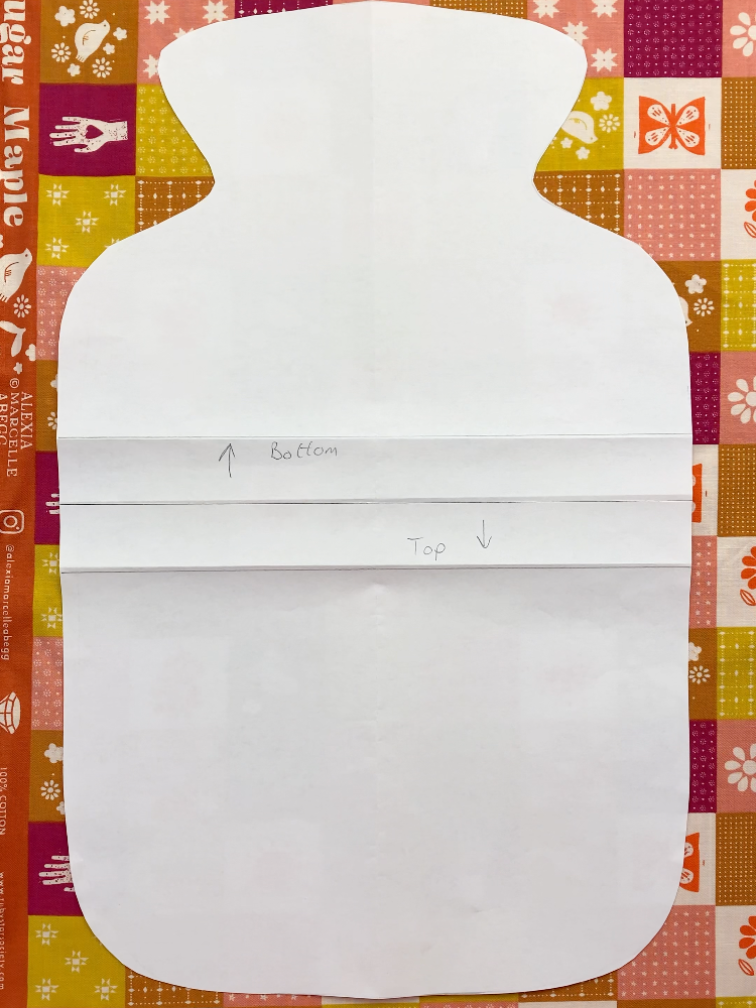
Repeat with the lining and wadding.
Step 4: Cut Out the Top Back Piece
Fold the template across the bottom horizontal line and securely pin it to your fabric. Cut around it. This will be your top back piece.
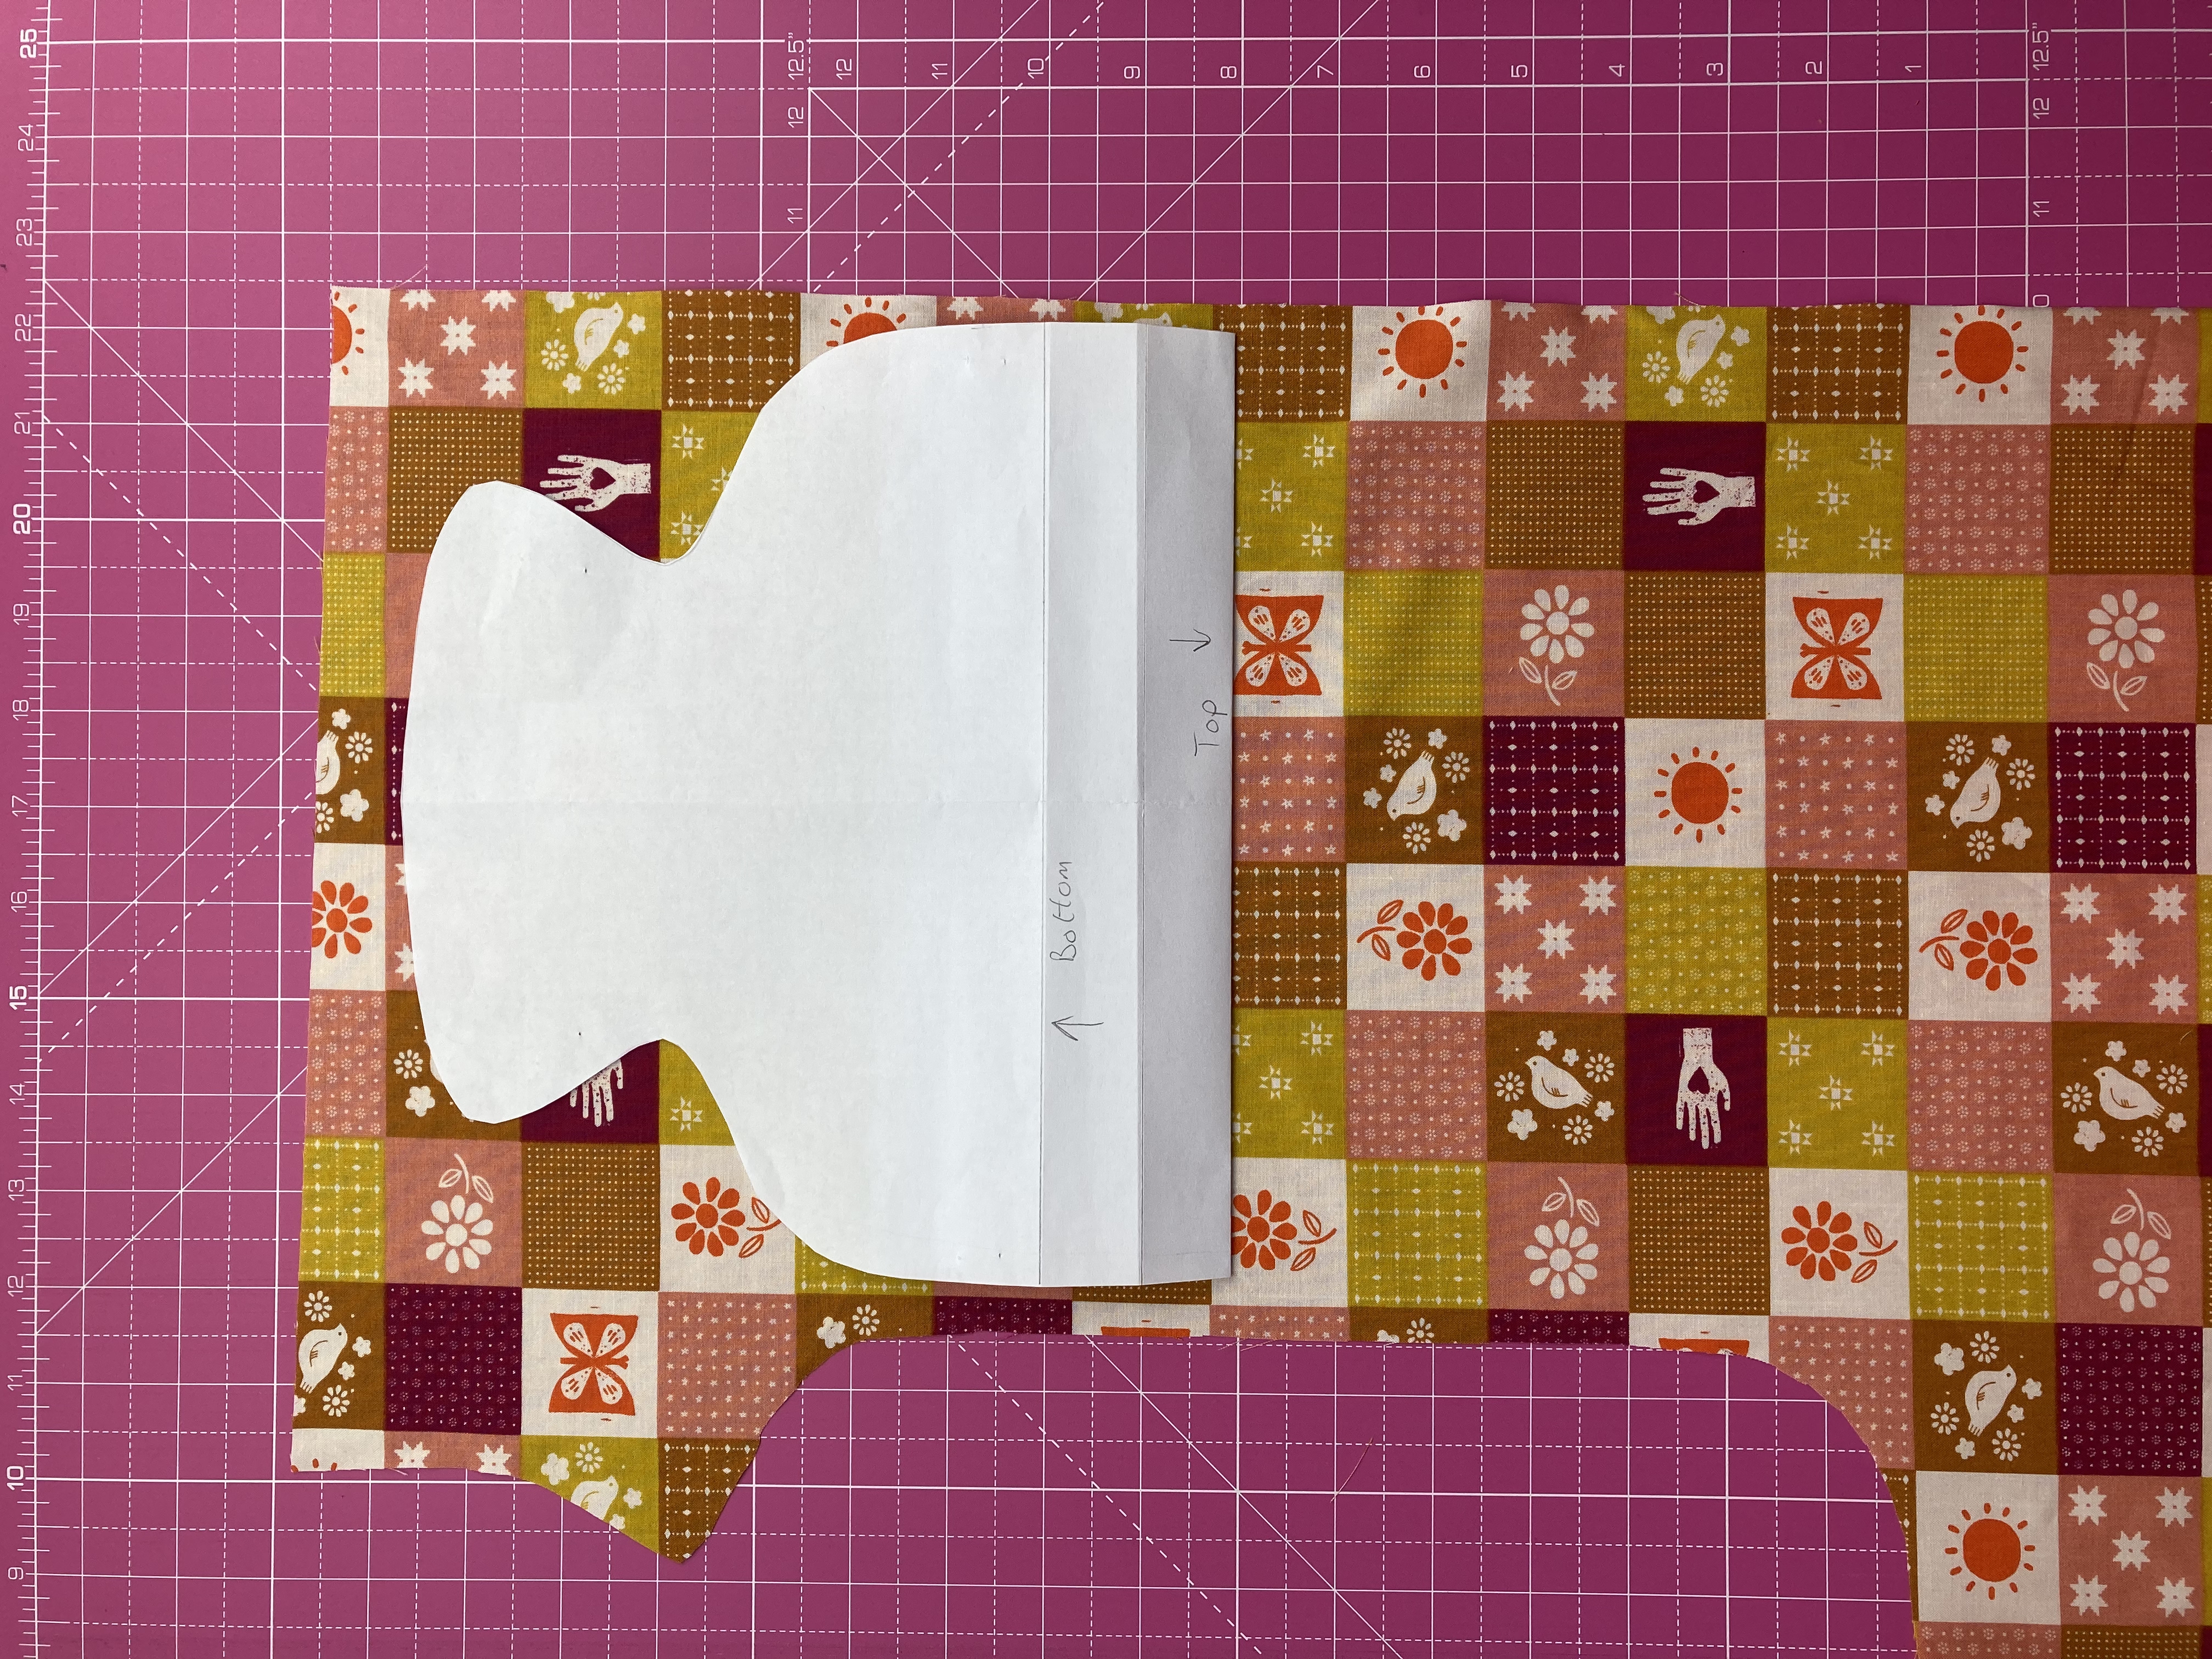
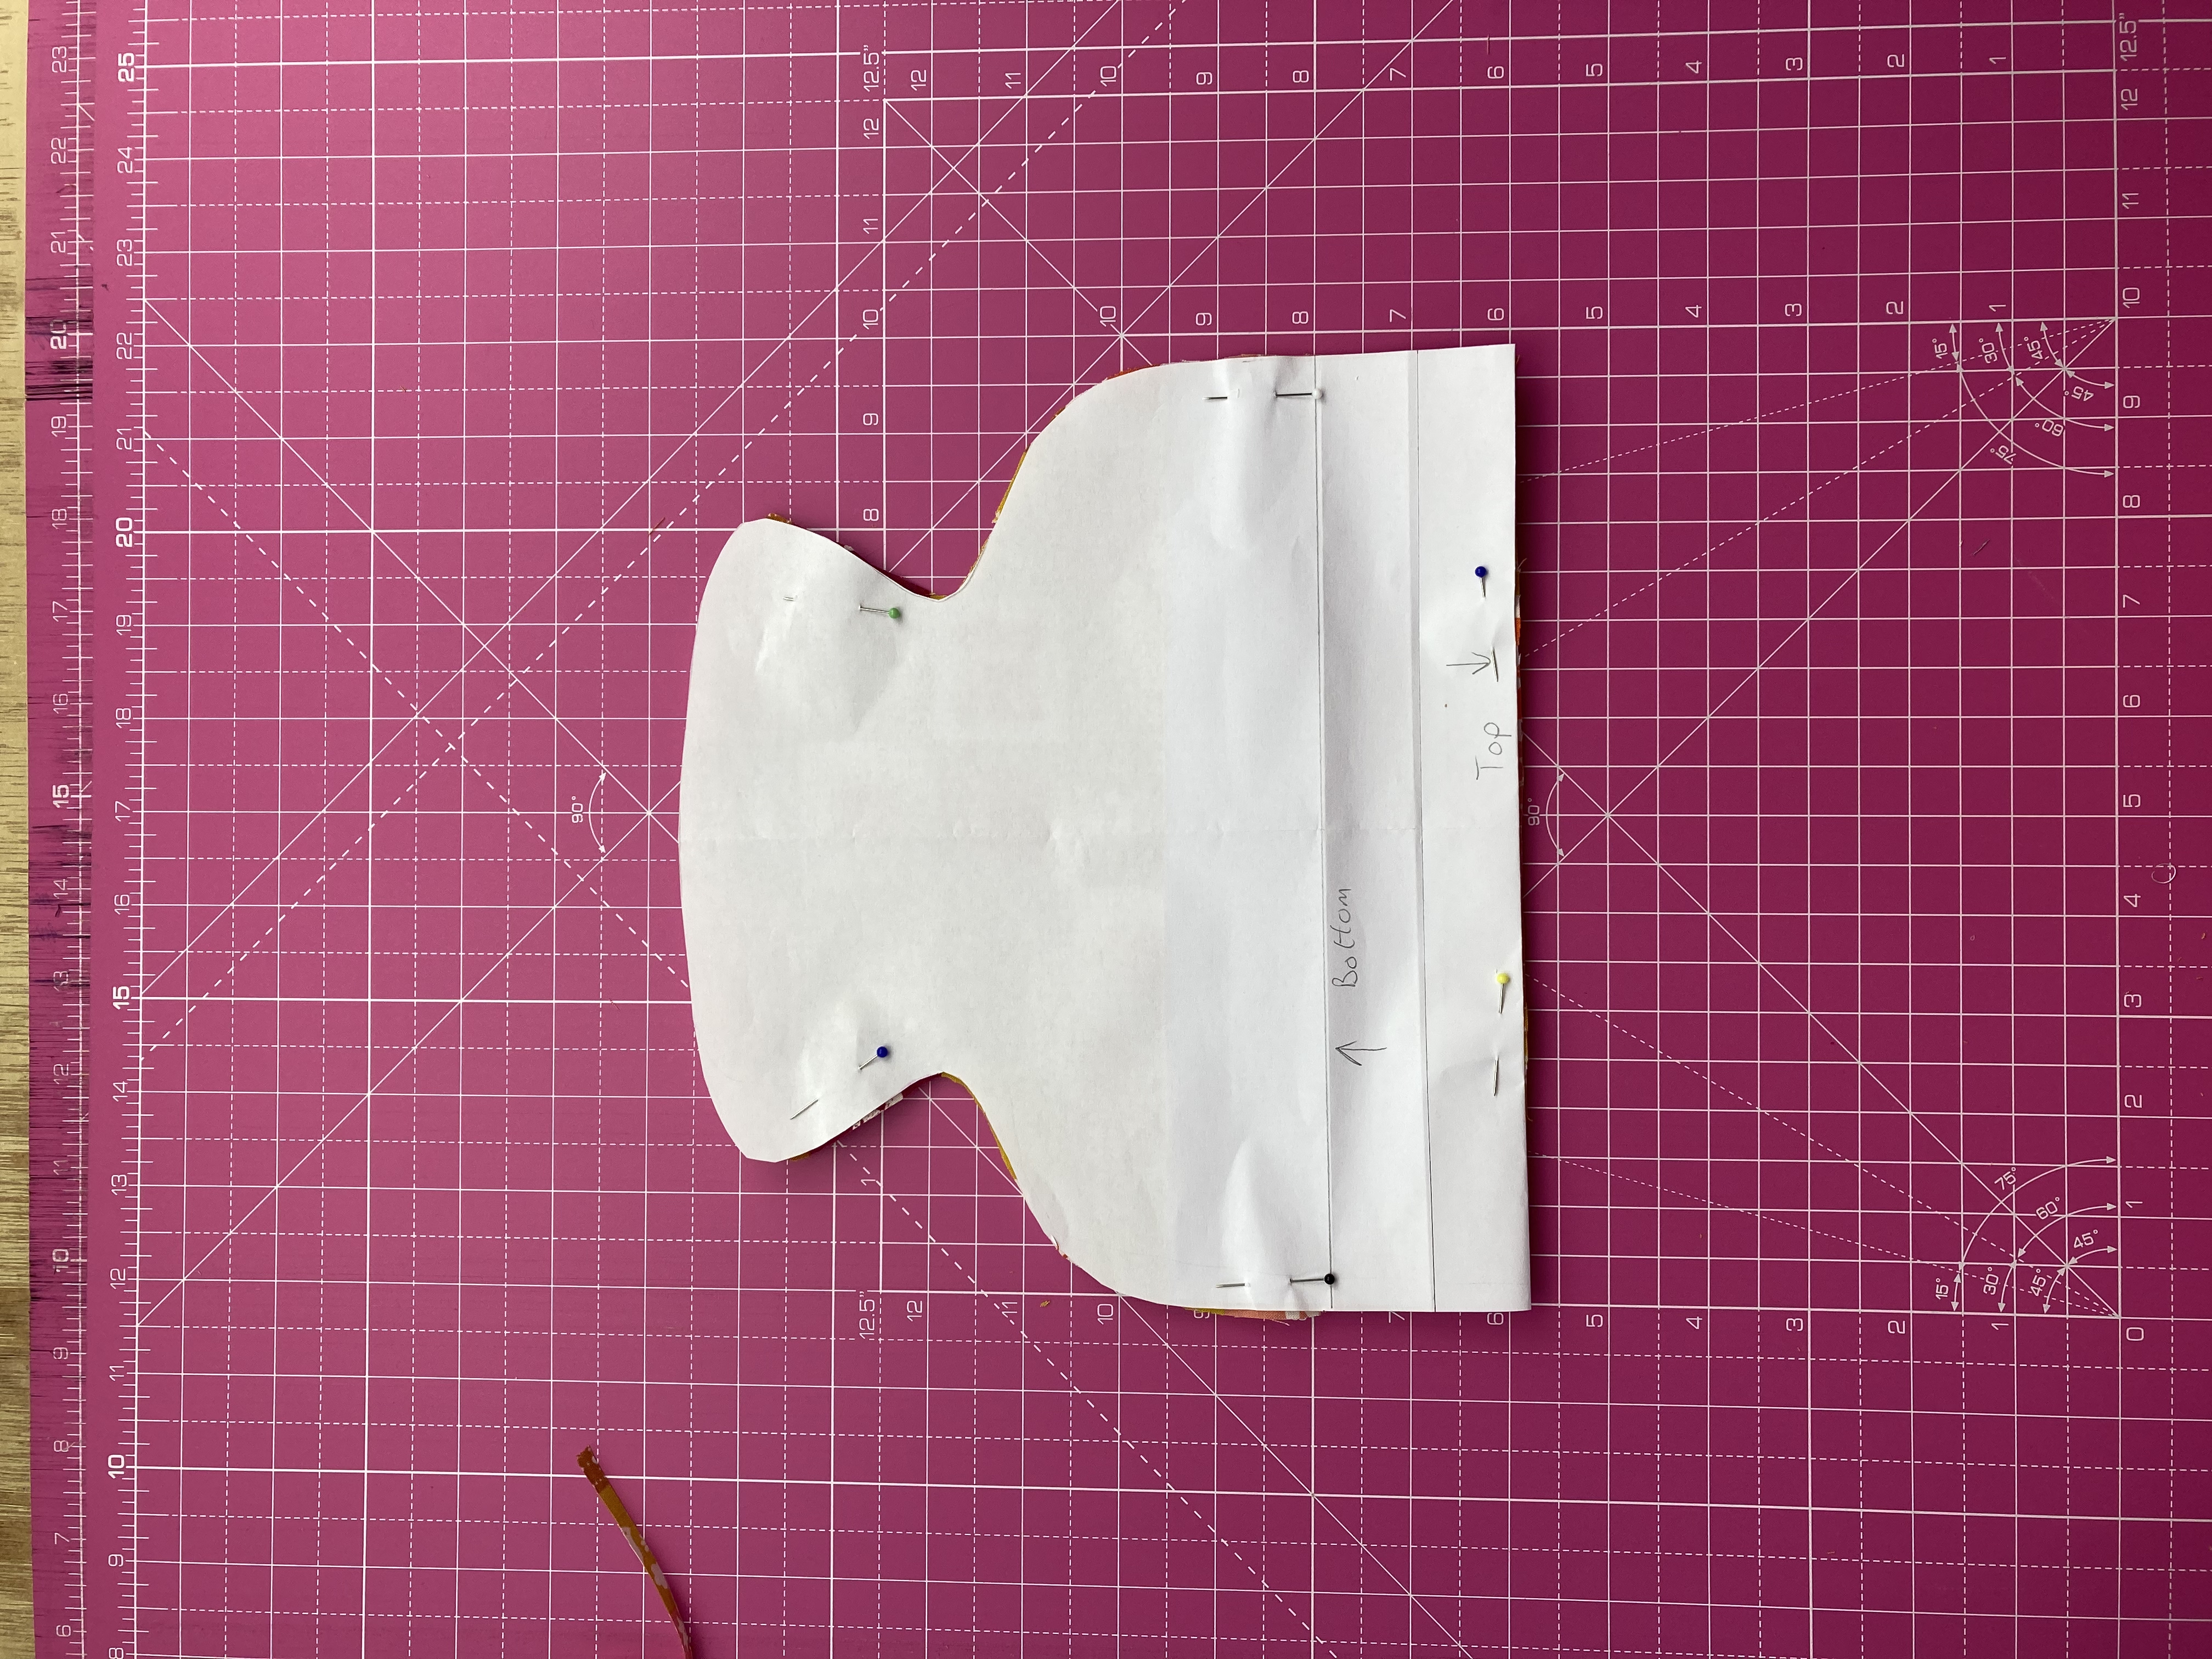
Repeat with the lining and wadding.
Step 5: Cut Out the Bottom Back Piece
Fold the template across the top horizontal line and securely pin it to your fabric. Cut around it. This will be your bottom back piece.
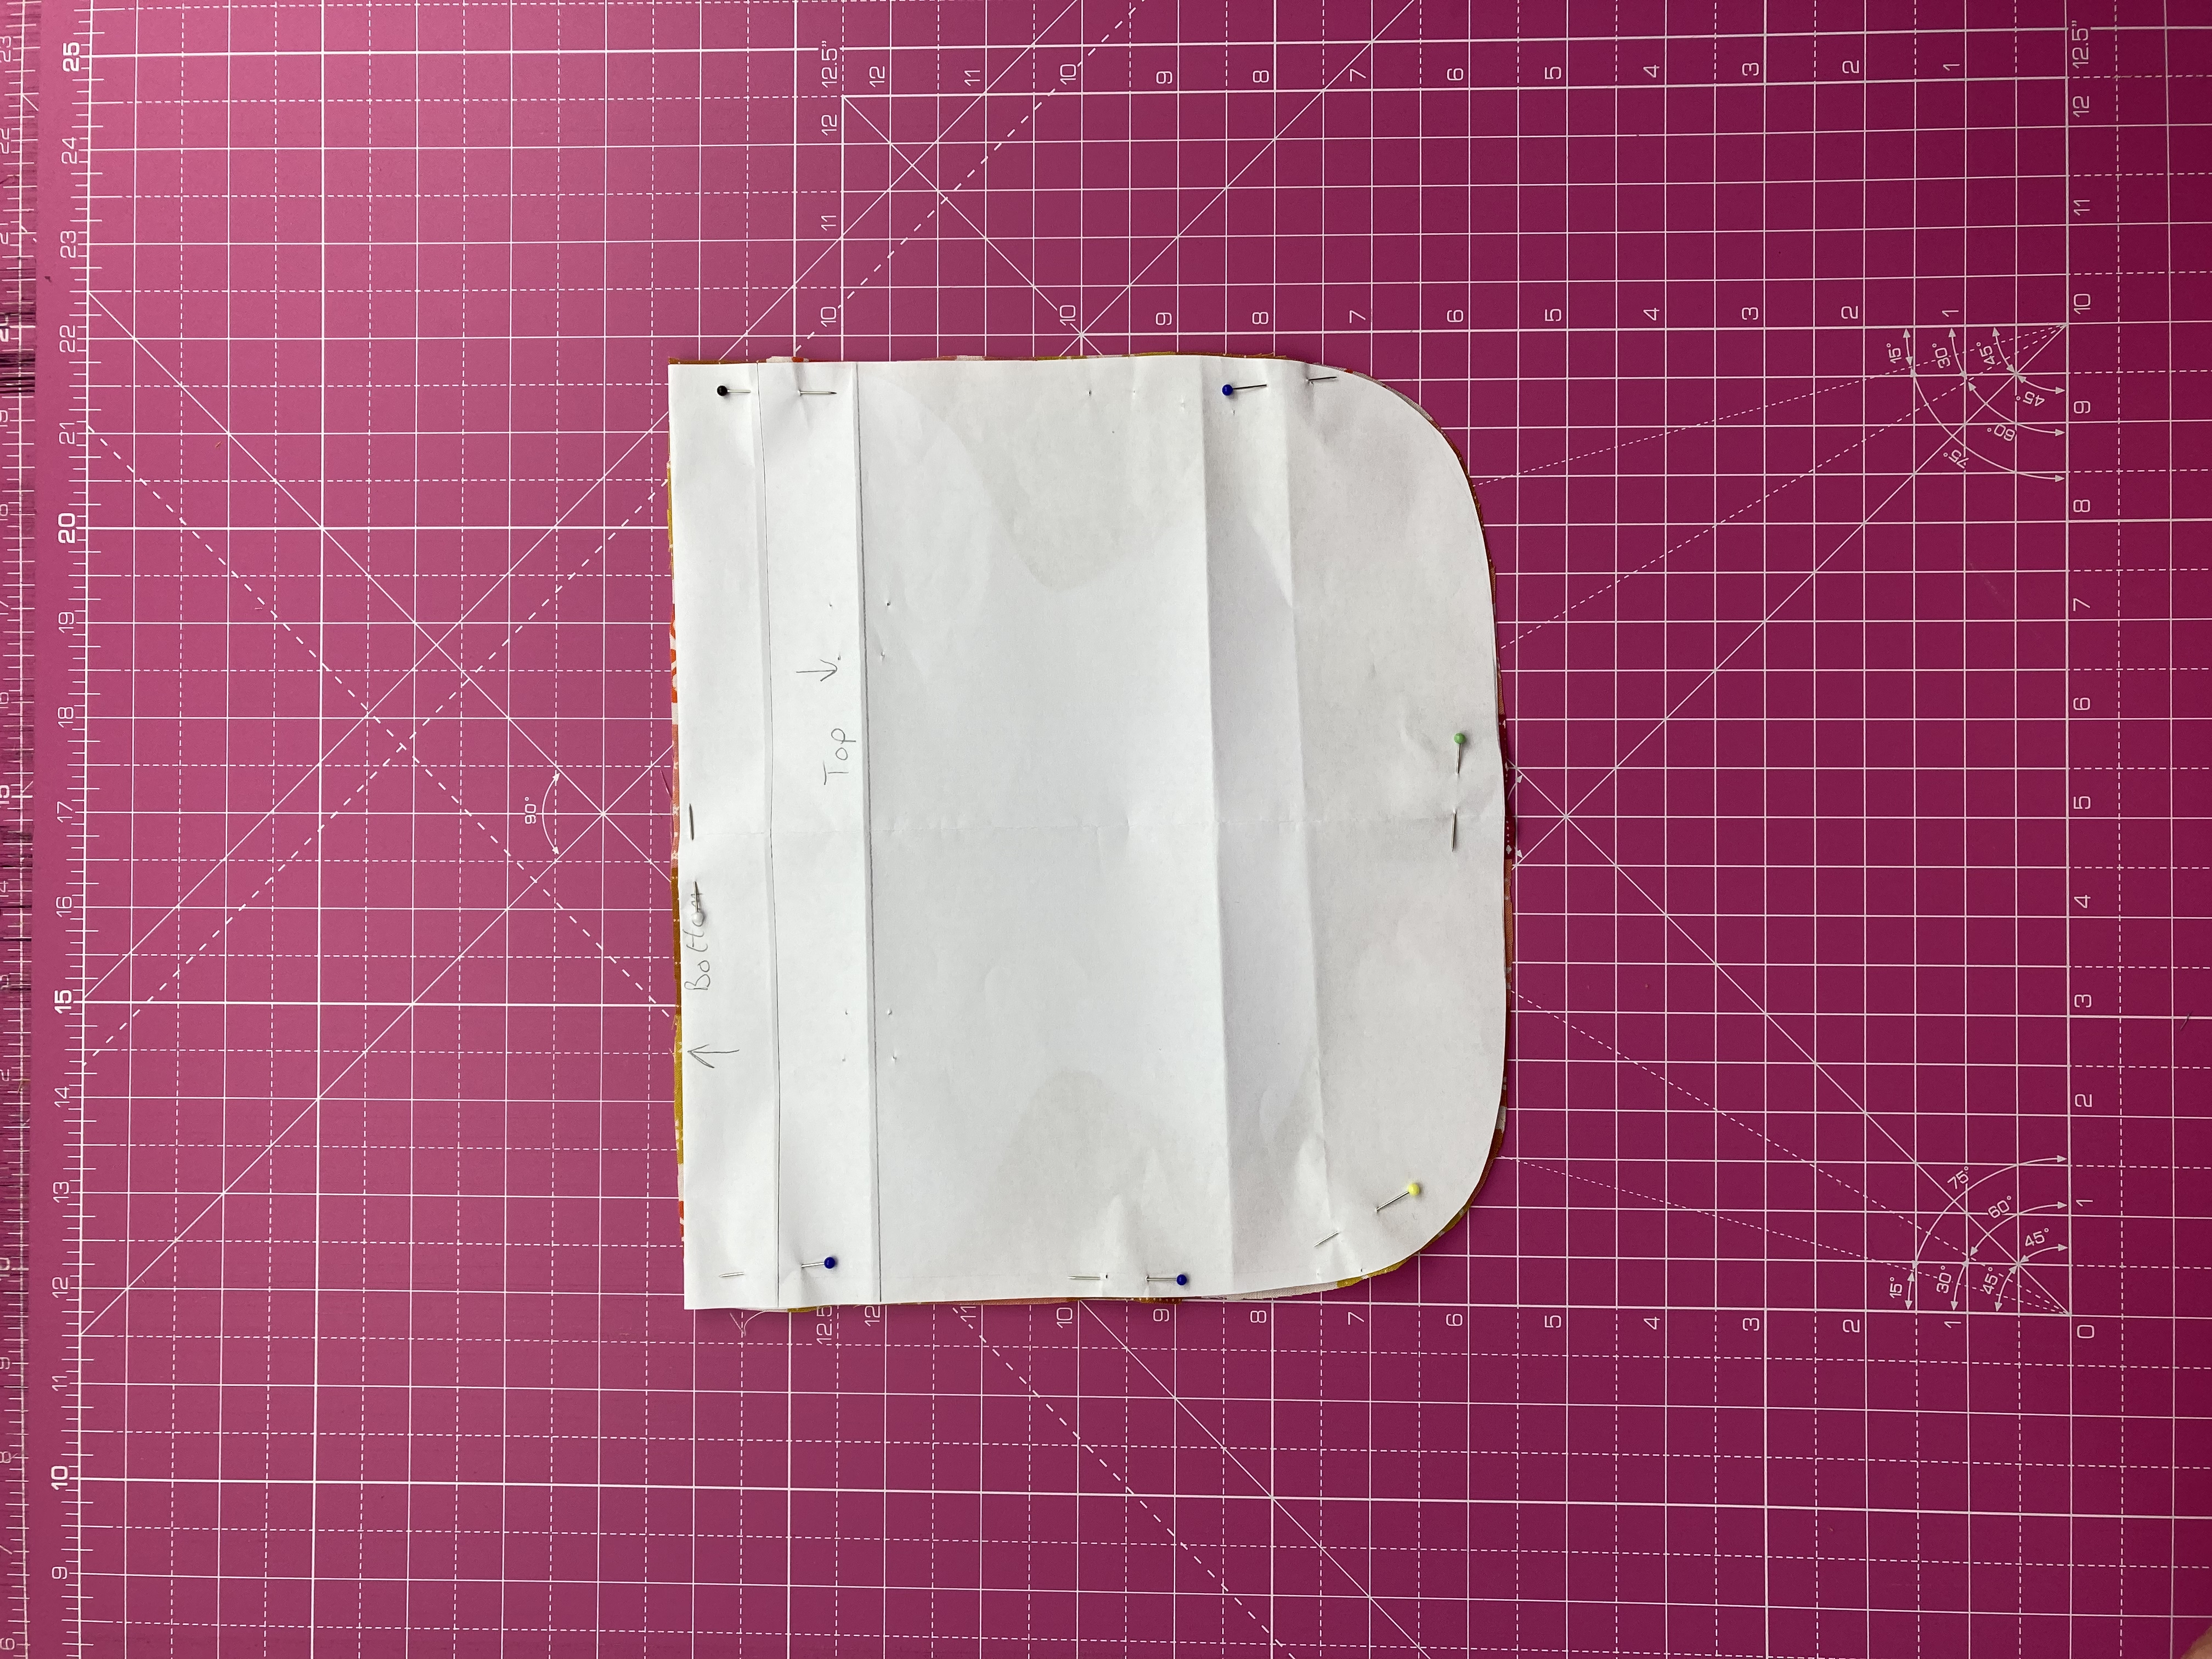
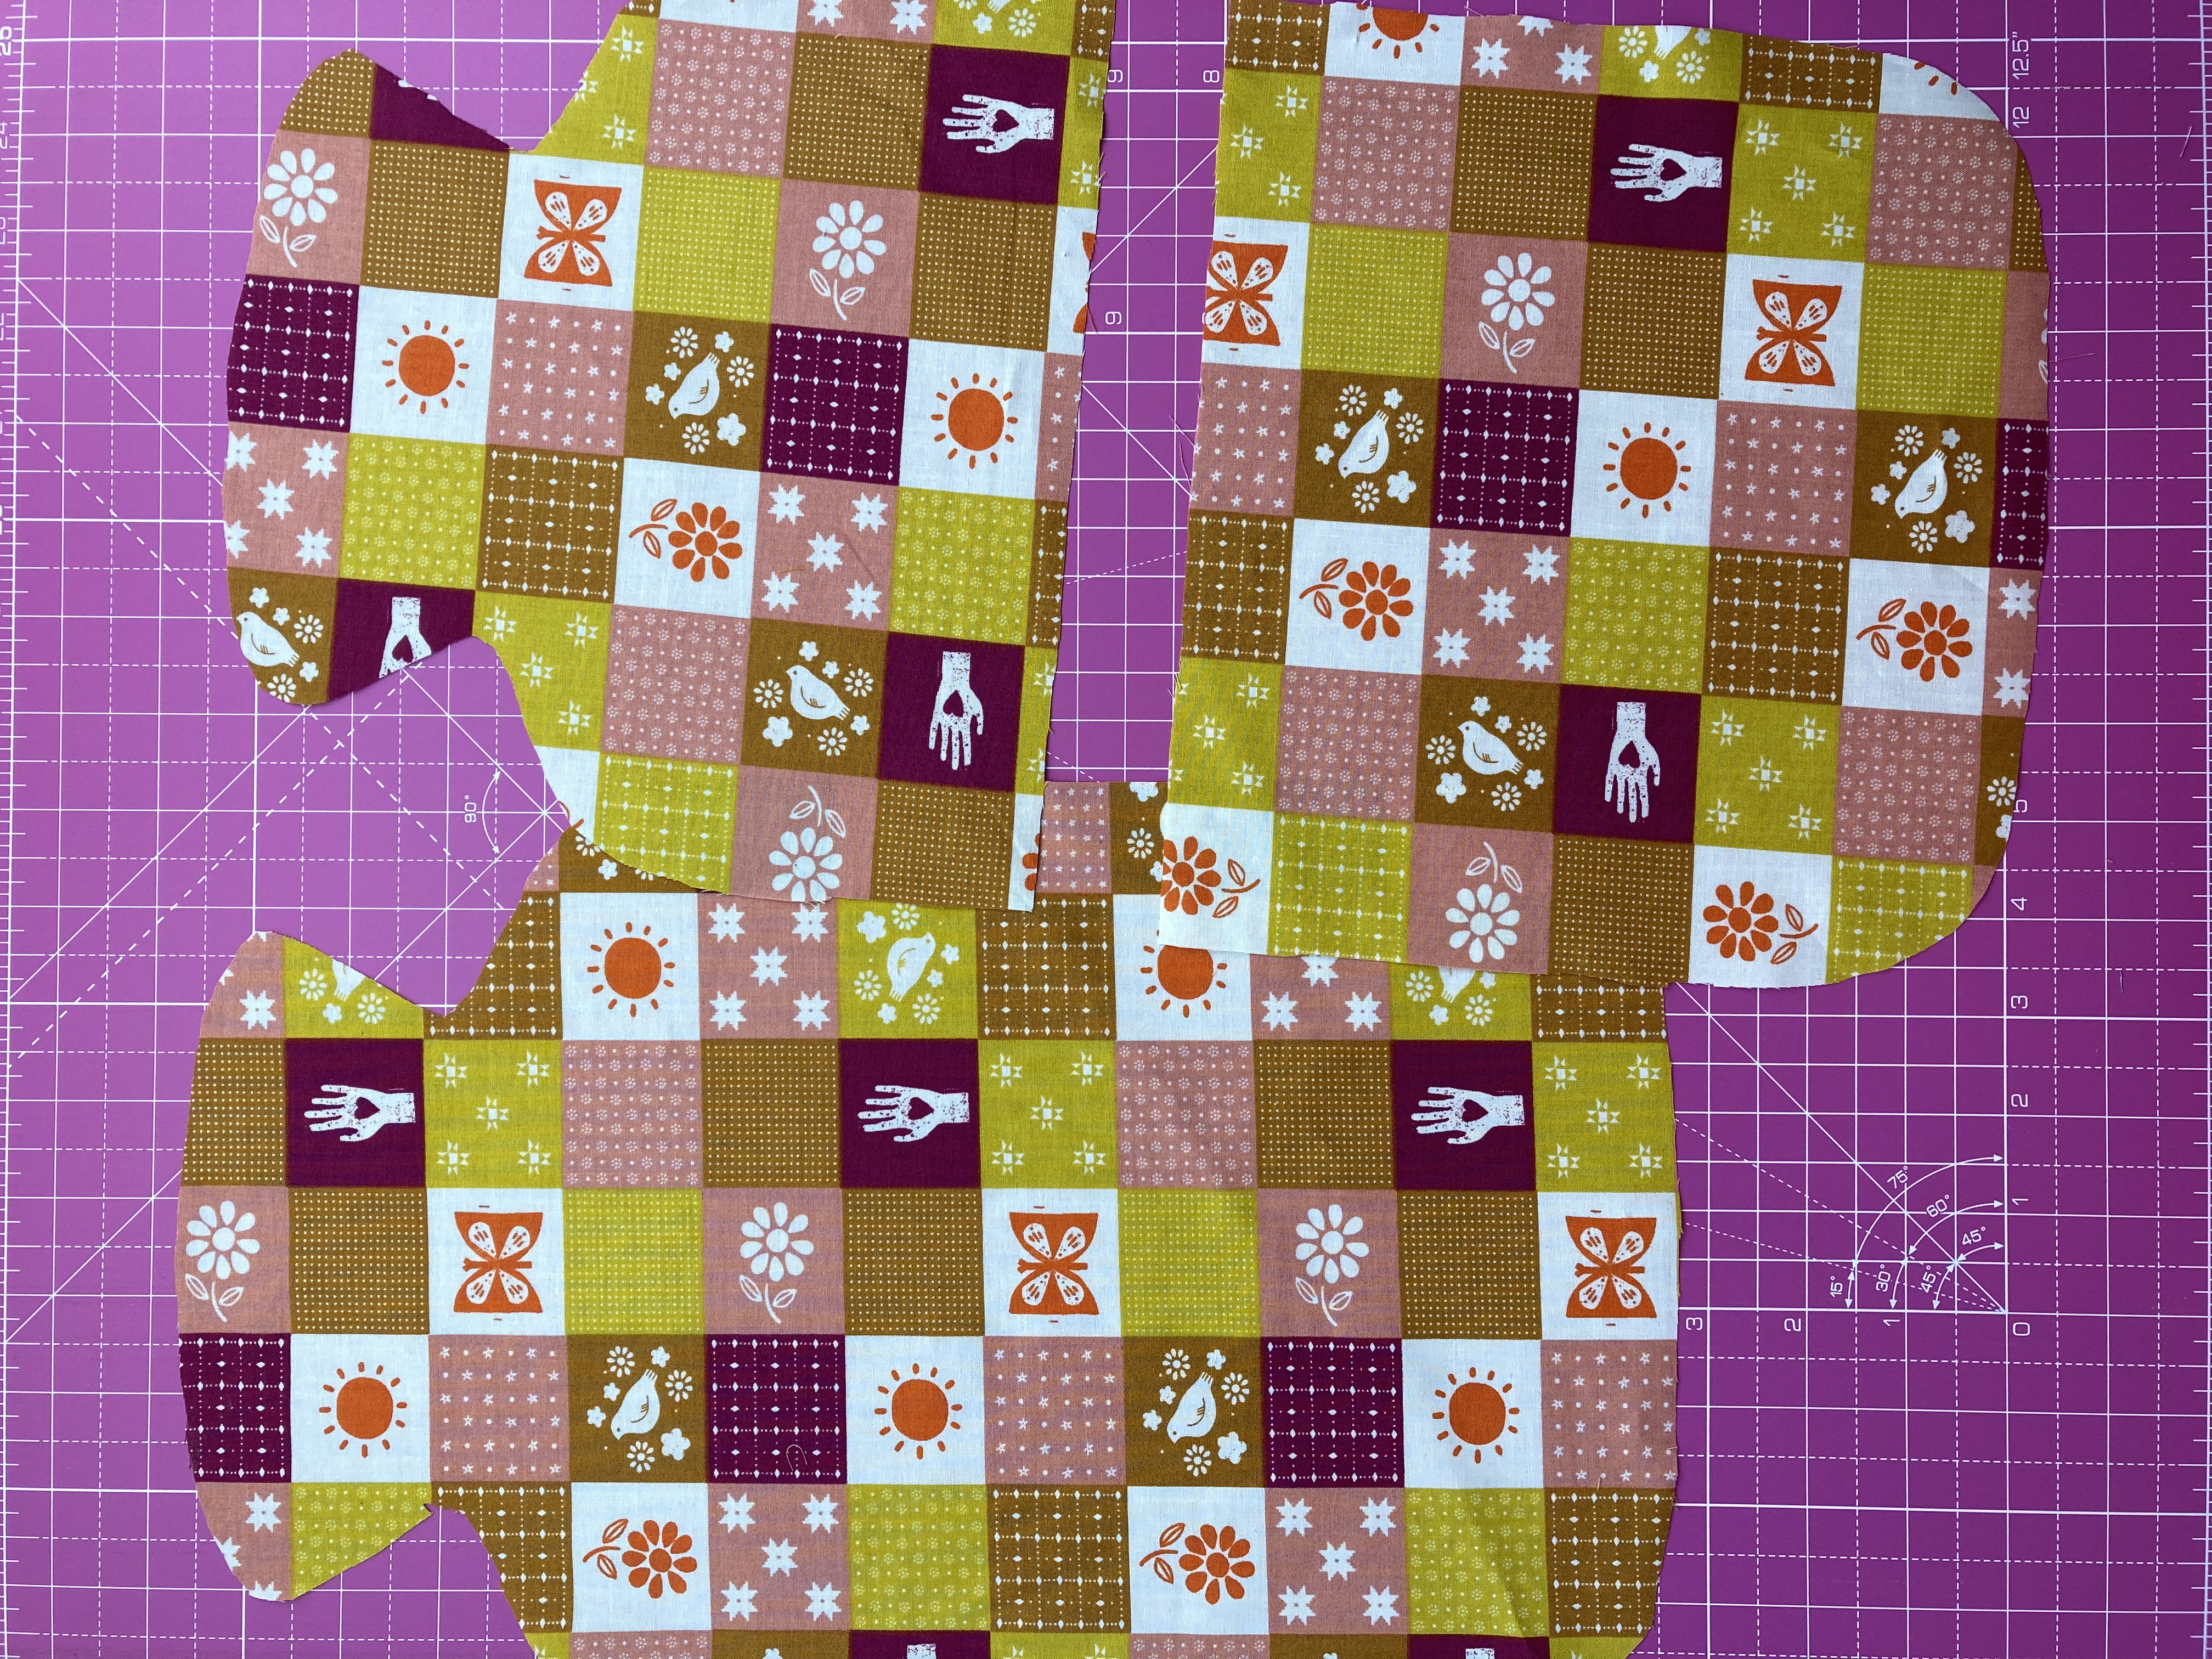
Repeat with the lining and wadding.
Quilting the Fabric Pieces
Step 6: Make the Quilt Sandwiches
Before quilting your fabric pieces, make sure you have created your 'quilt sandwiches'. A 'quilt sandwich' is when your wadding layer is sandwiched between your main fabric and lining fabric.
To do this, first lay your lining fabric right side facing down then place your wadding and then your main fabric right side facing up on top and secure the three layers together by pinning around the edge.
Step 7: Quilt the Fabric Pieces
Now is the opportunity to quilt your fabric pieces. If you have chosen a patchwork fabric cheat print, use a sewing machine to stitch along the lines.
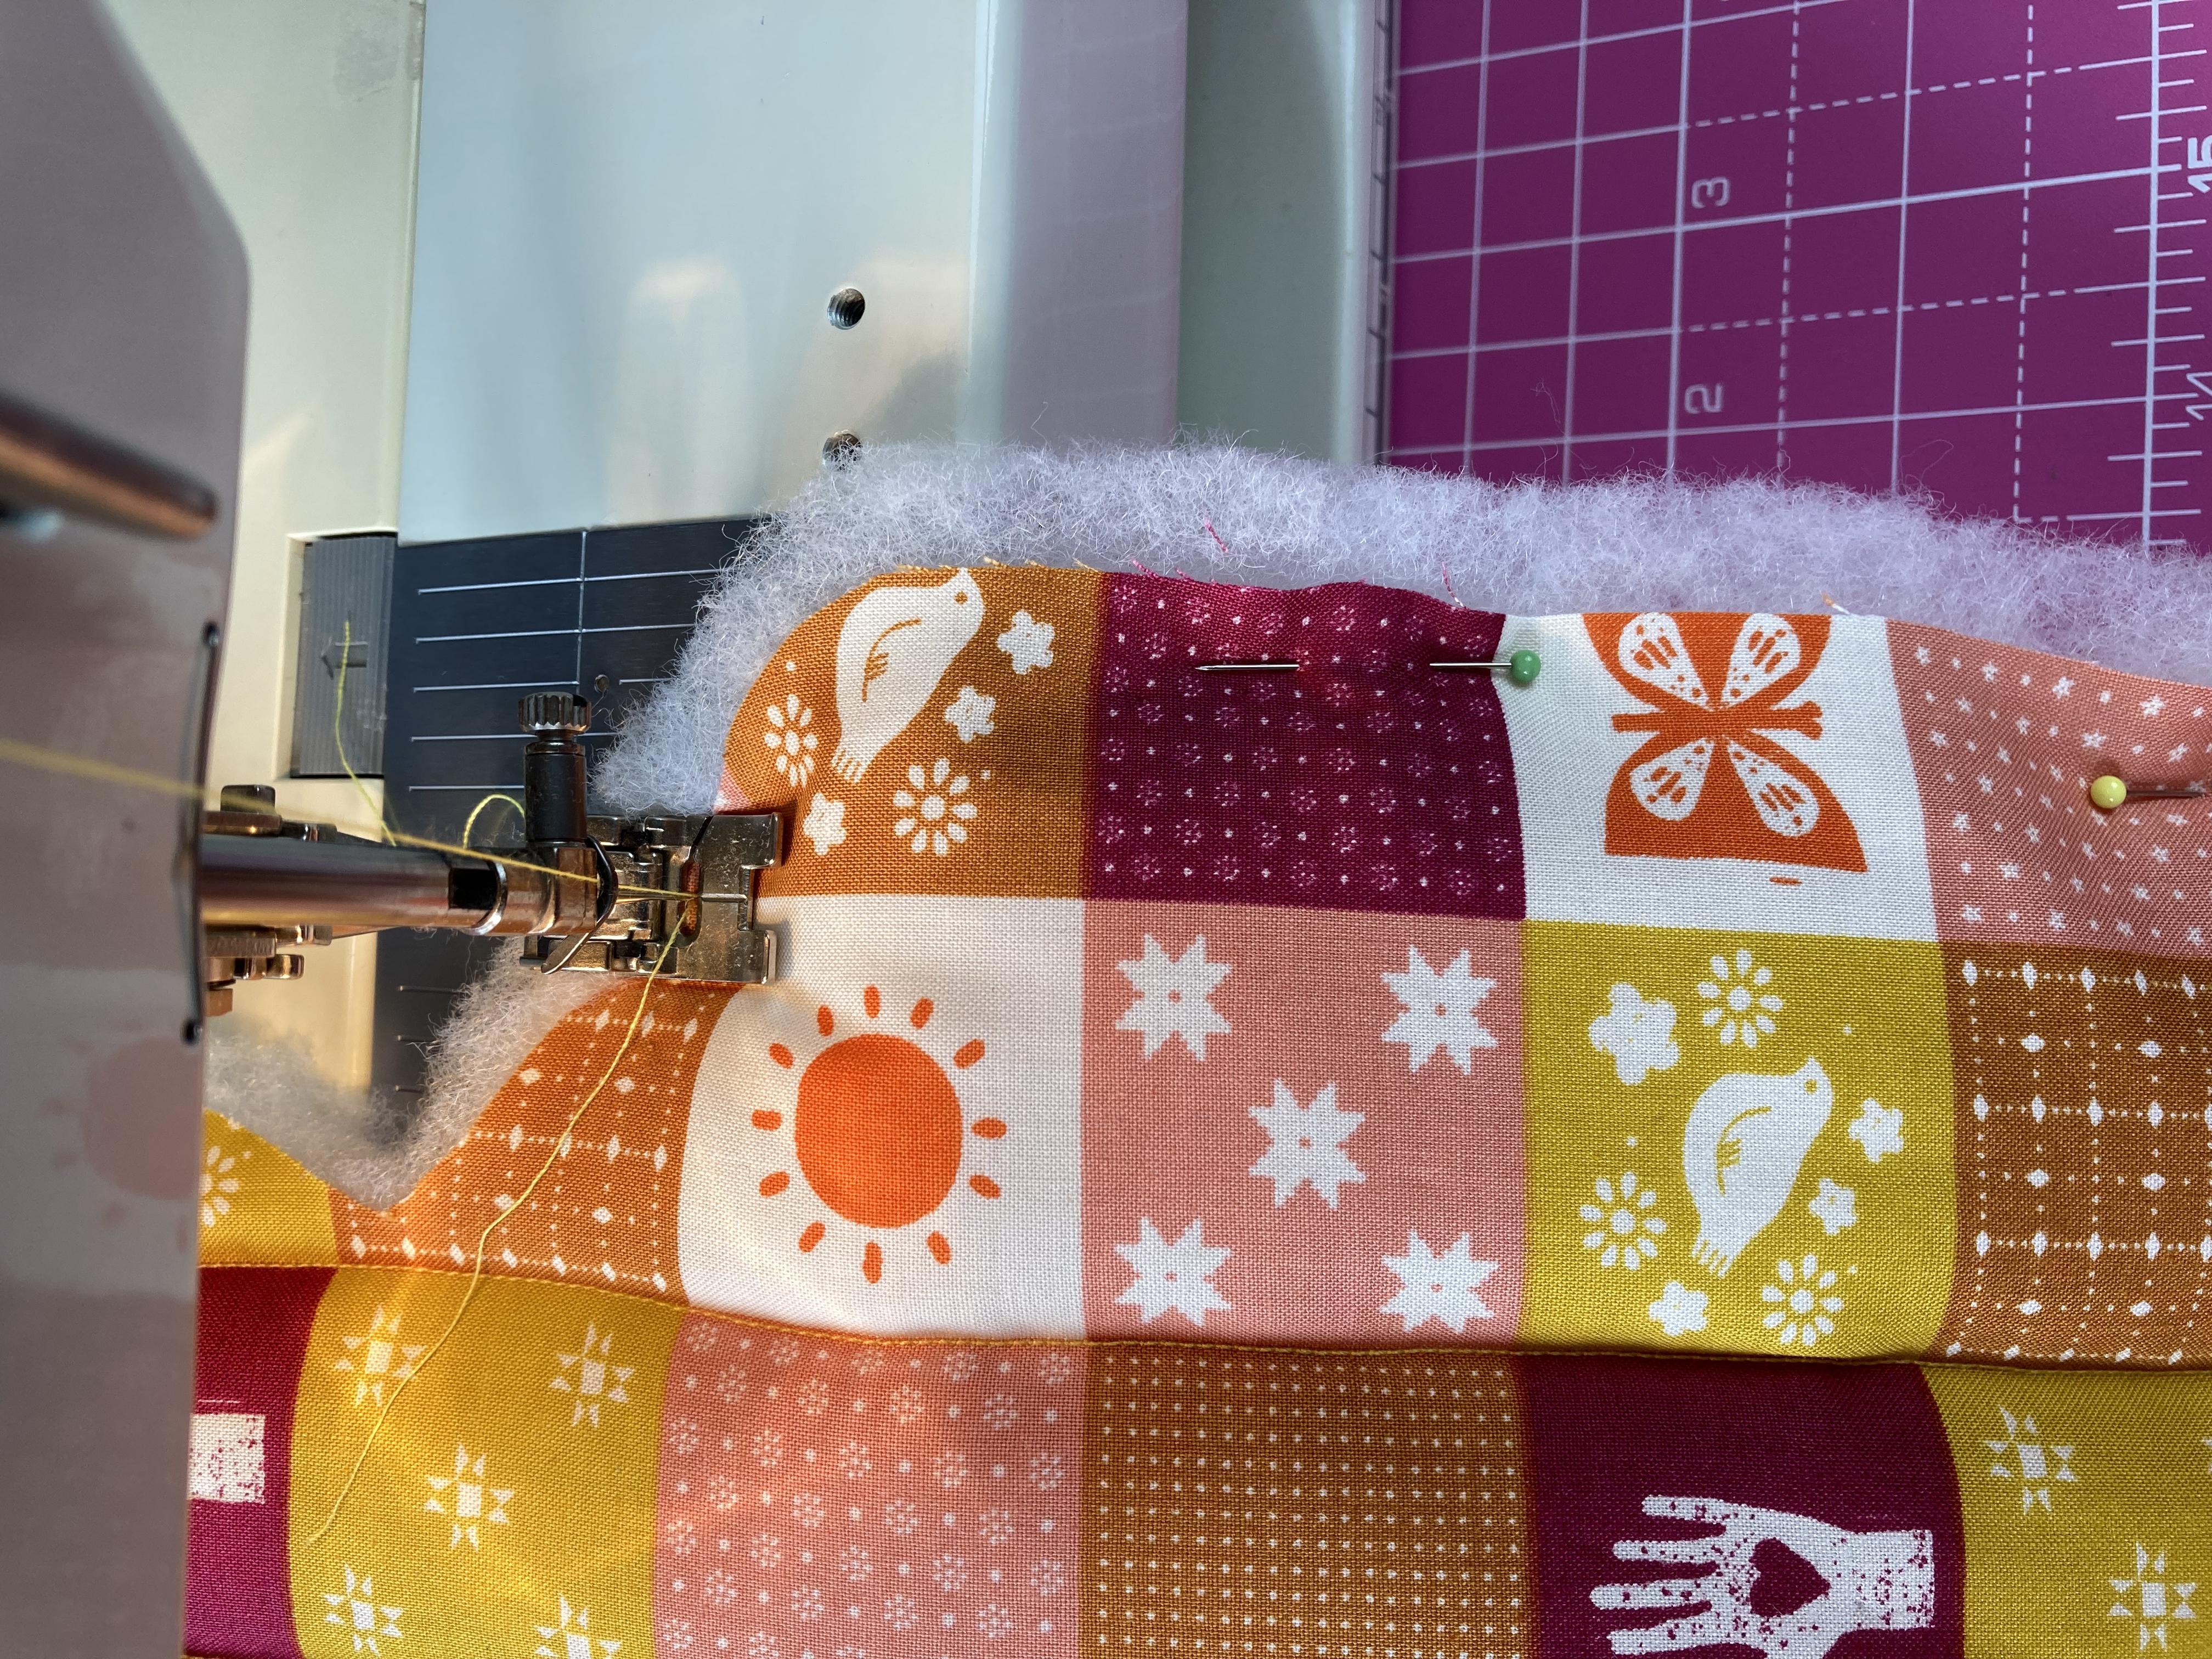
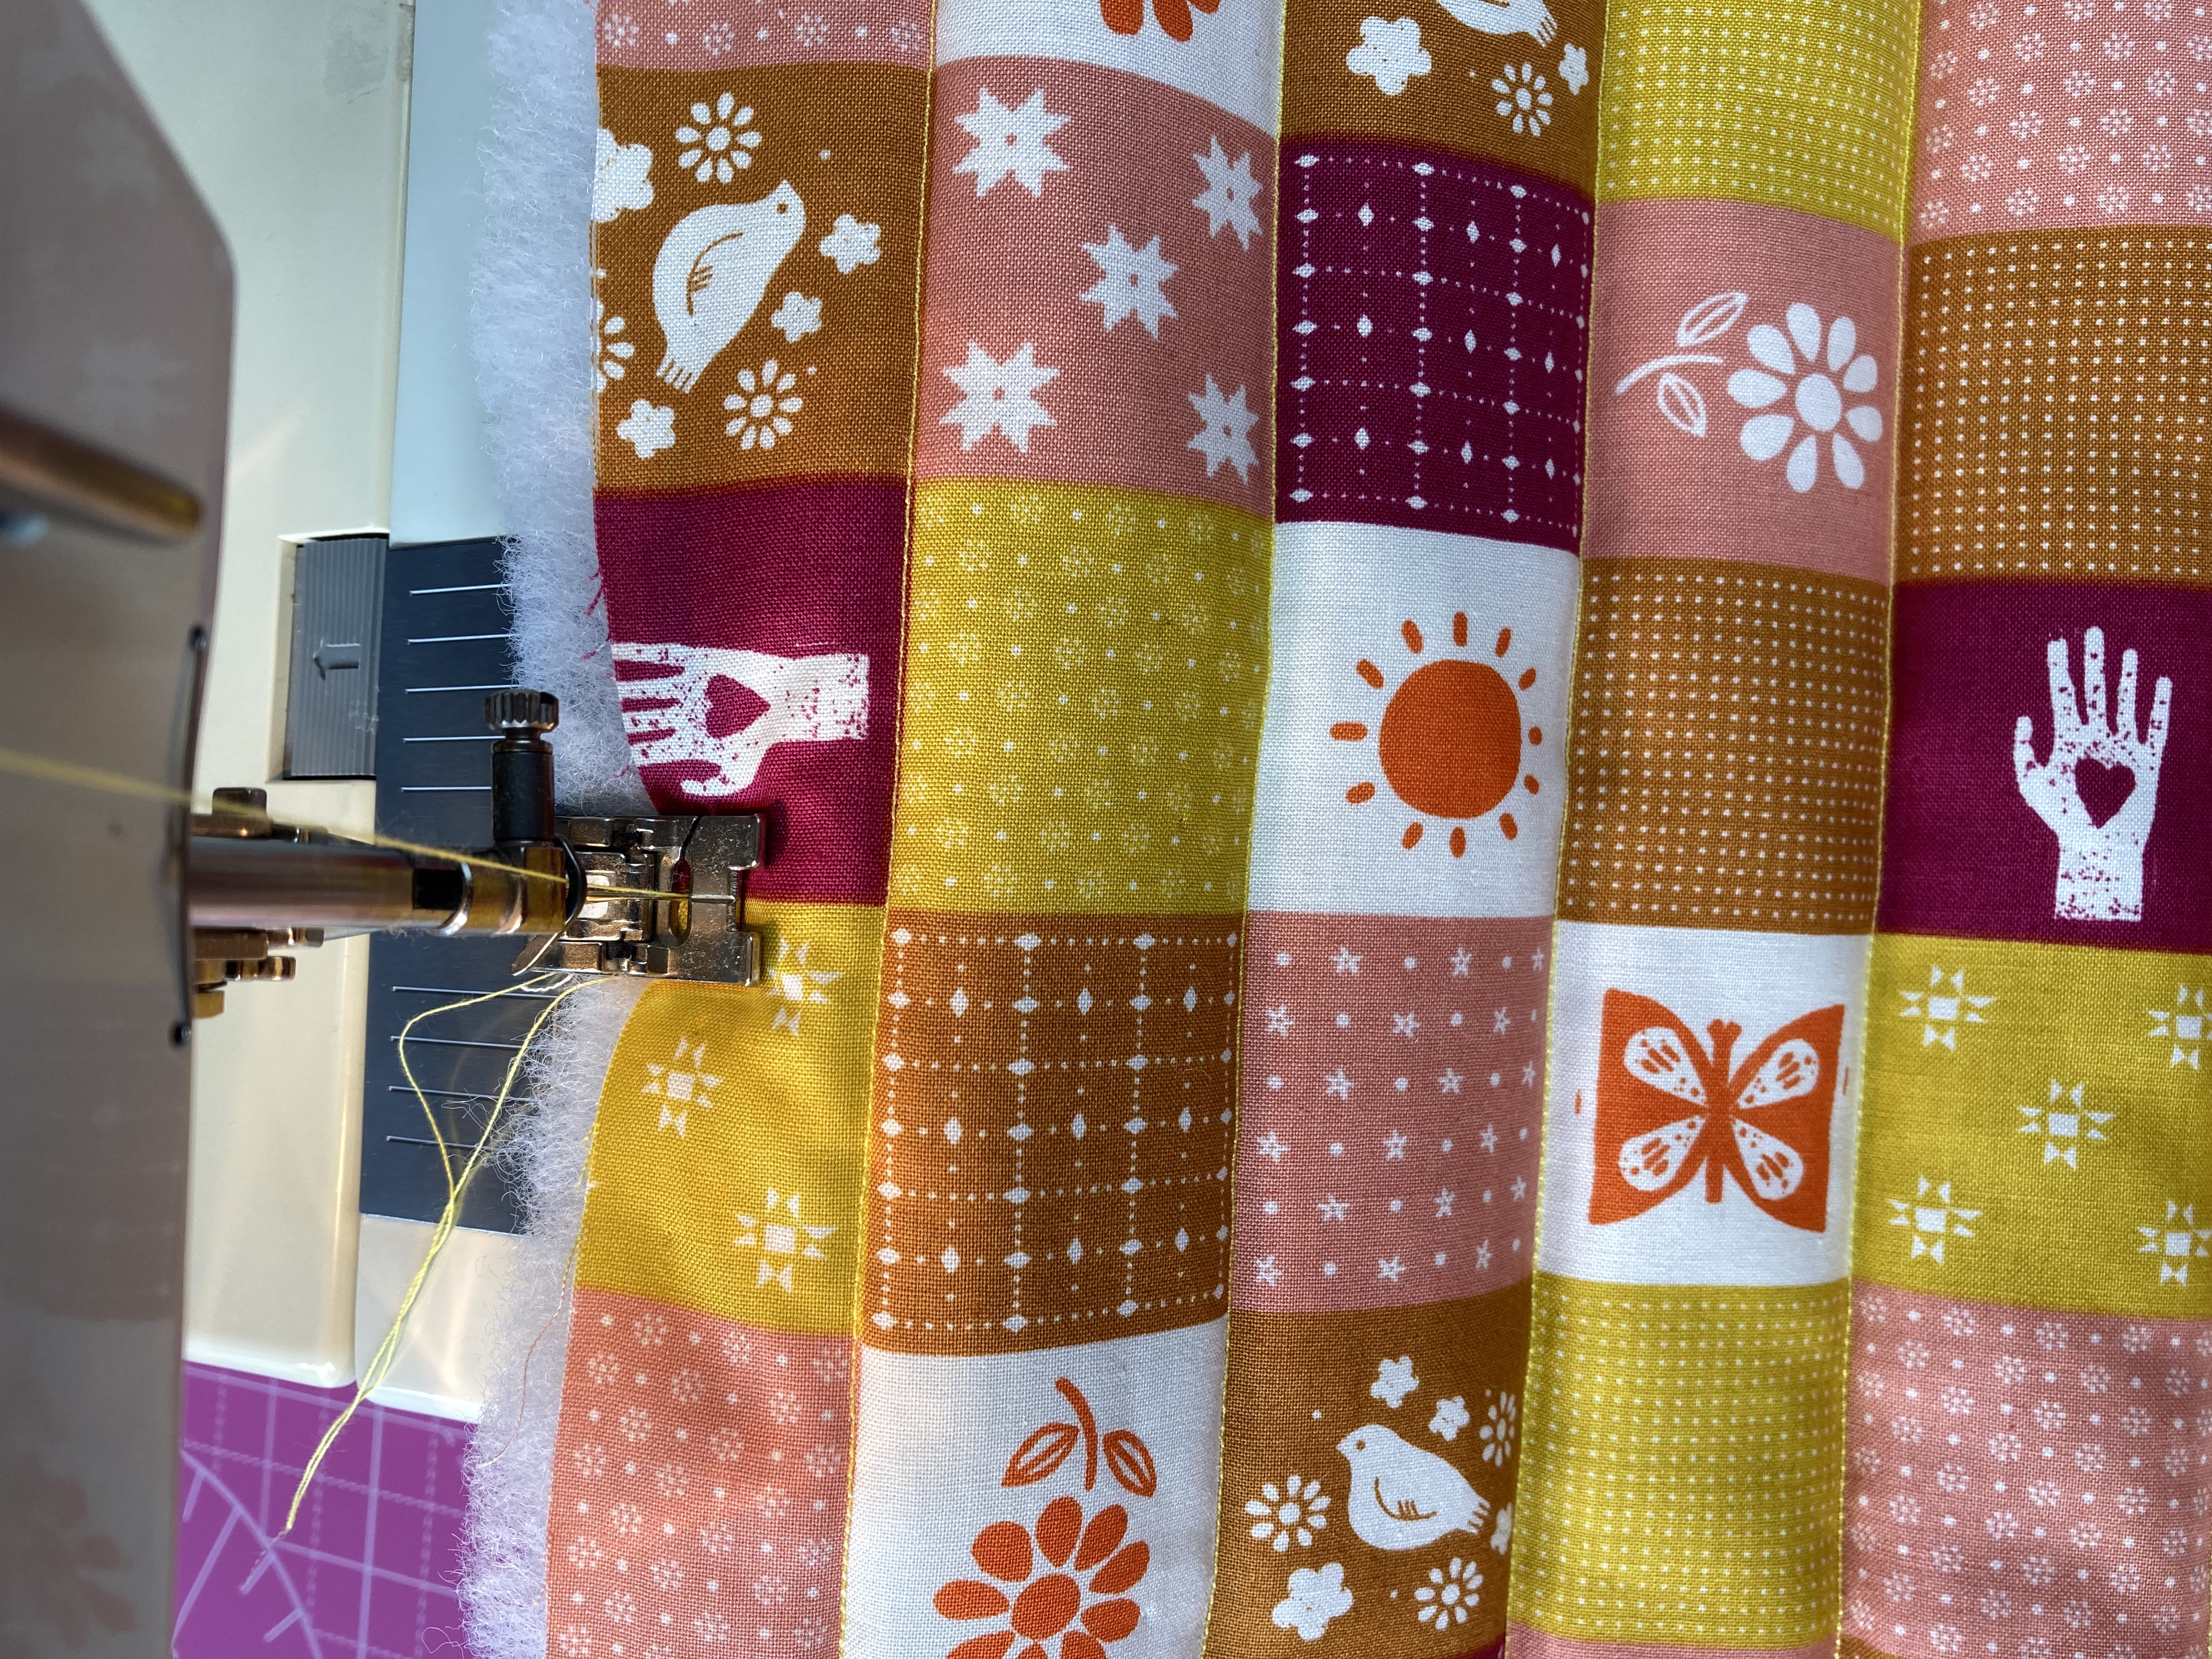
If you haven’t used a patchwork cheat print, you can quilt whatever pattern you like - either keep it basic like us or experiment with free motion quilting instead!
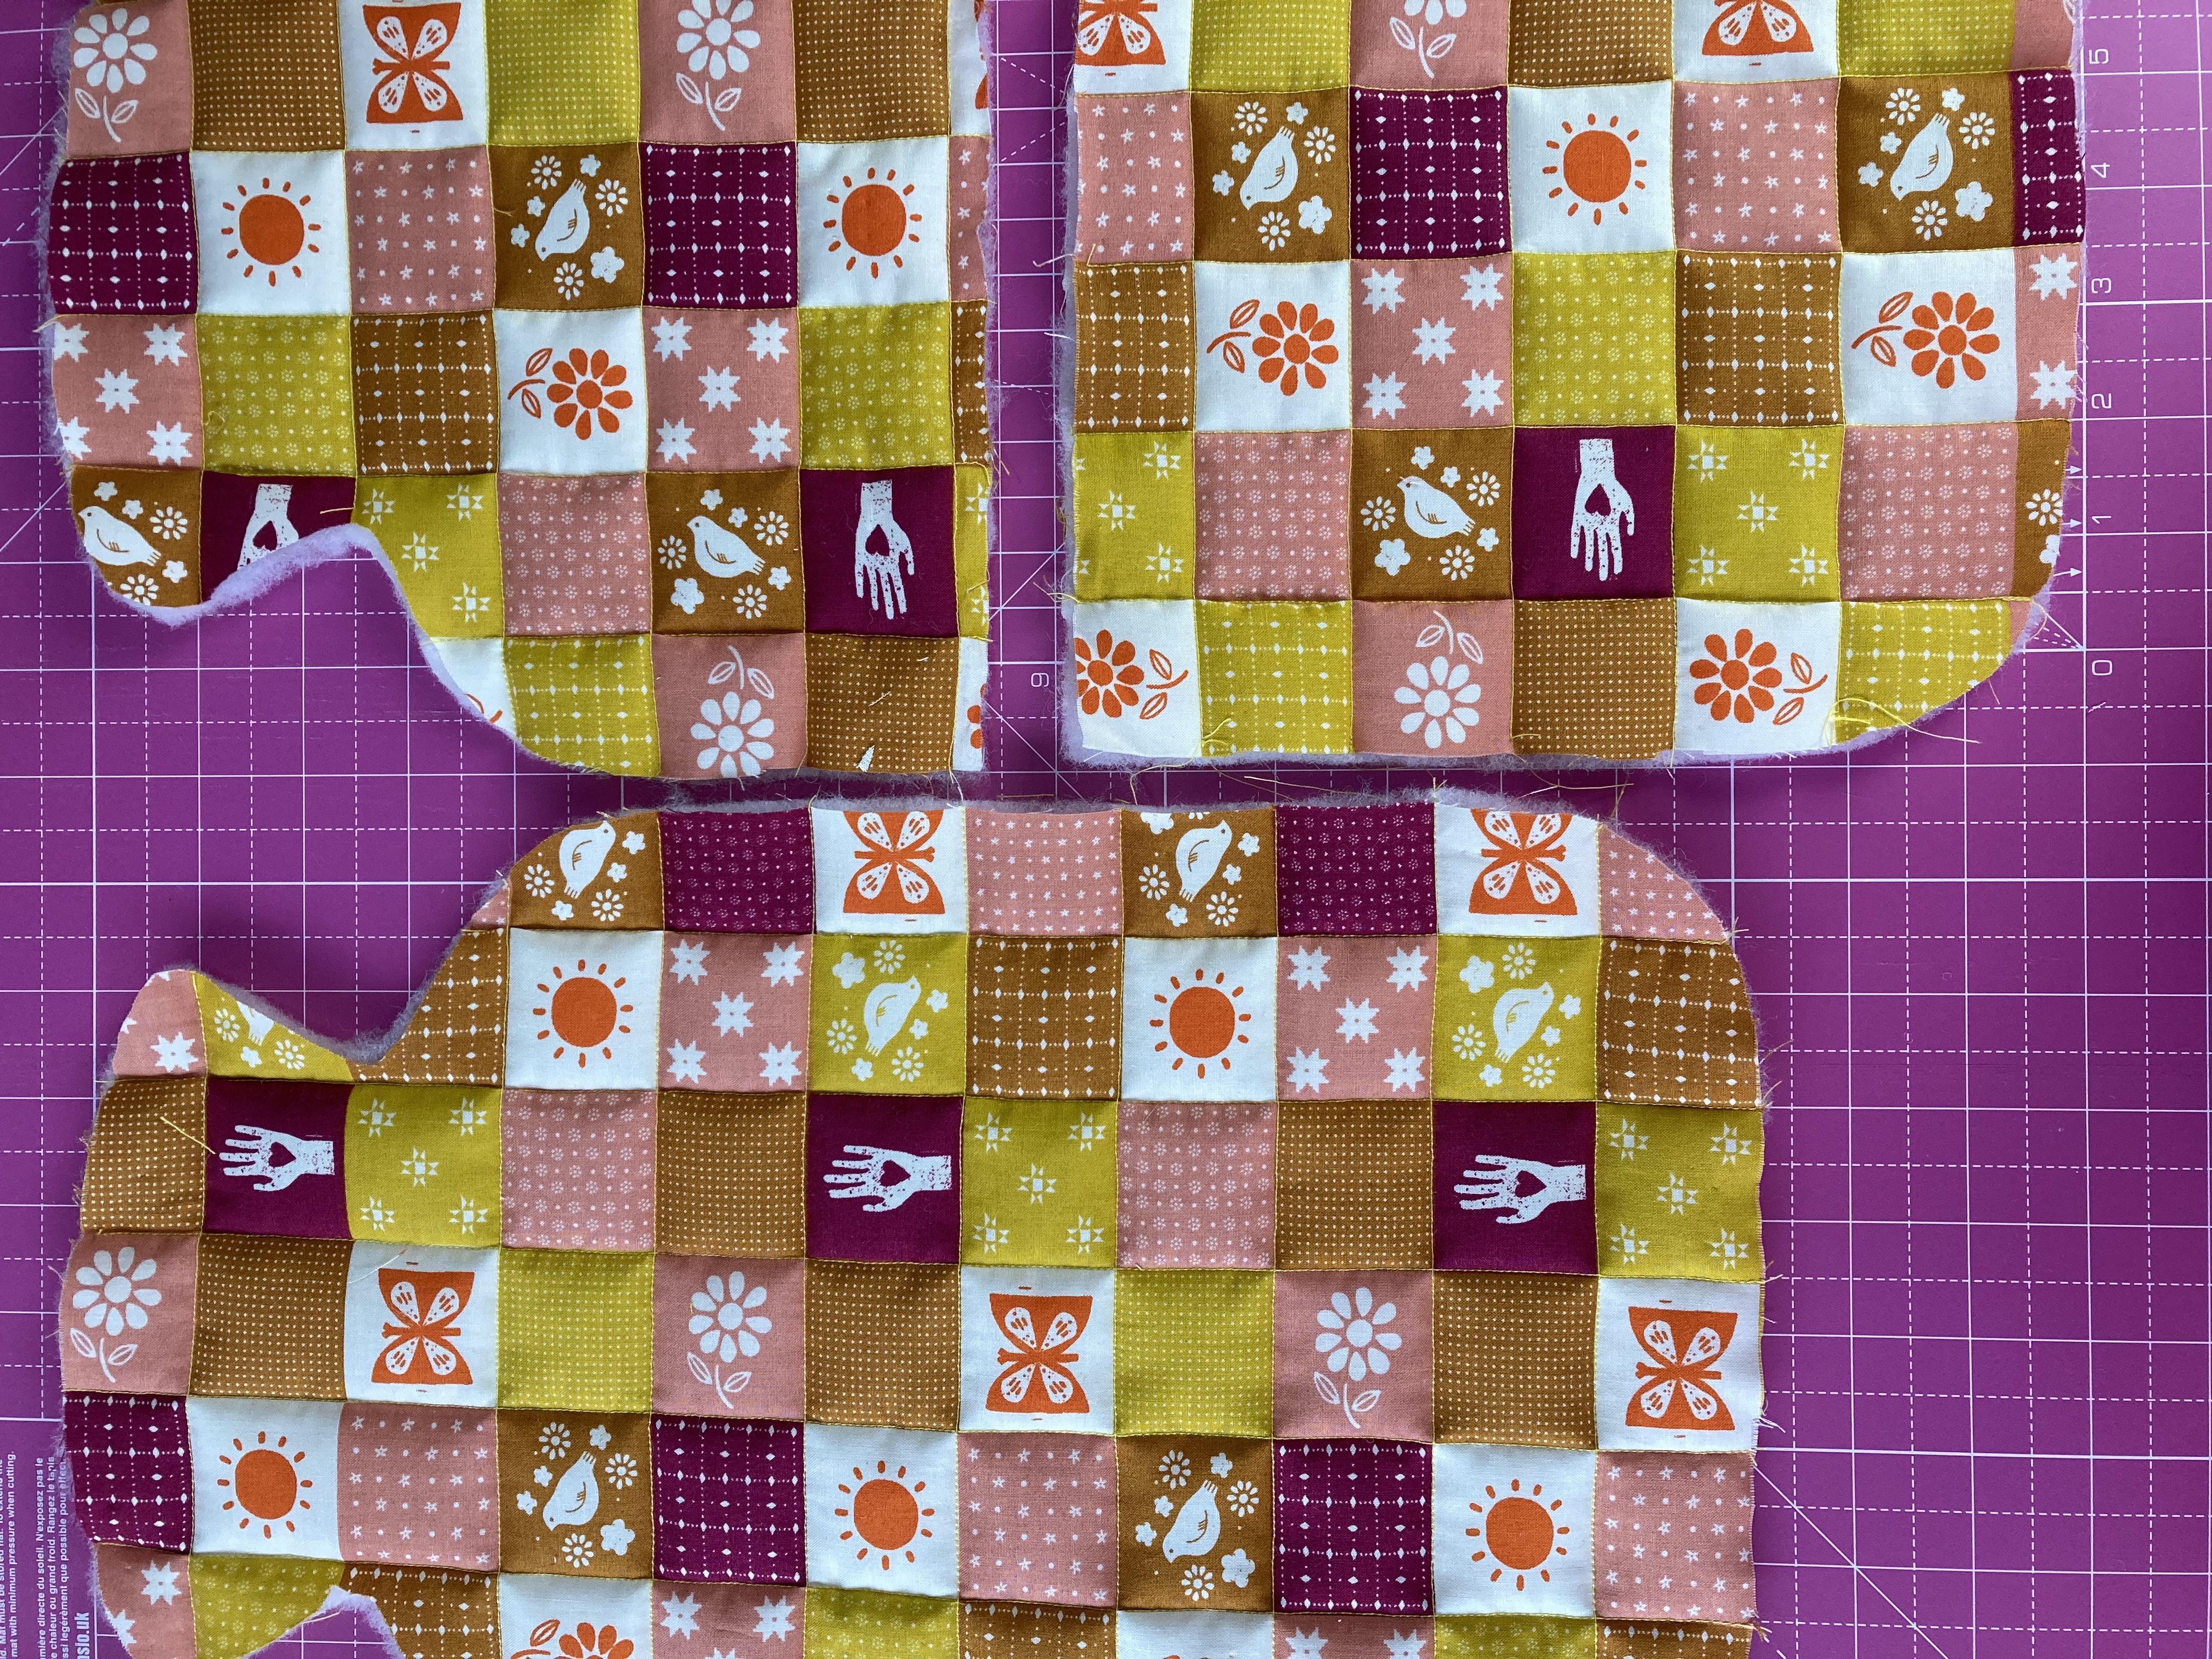
What Is a Patchwork Fabric Cheat Print?
A patchwork fabric cheat print is a quilting fabric with a symmetrical geometric pattern of squares, tringles or hexagons that gives you the full effect of patchworking without having to do any of the hard work. Simply sew along the pattern lines to achieve a quick and easy patchwork finish!
Sewing the Hot Water Bottle Cover
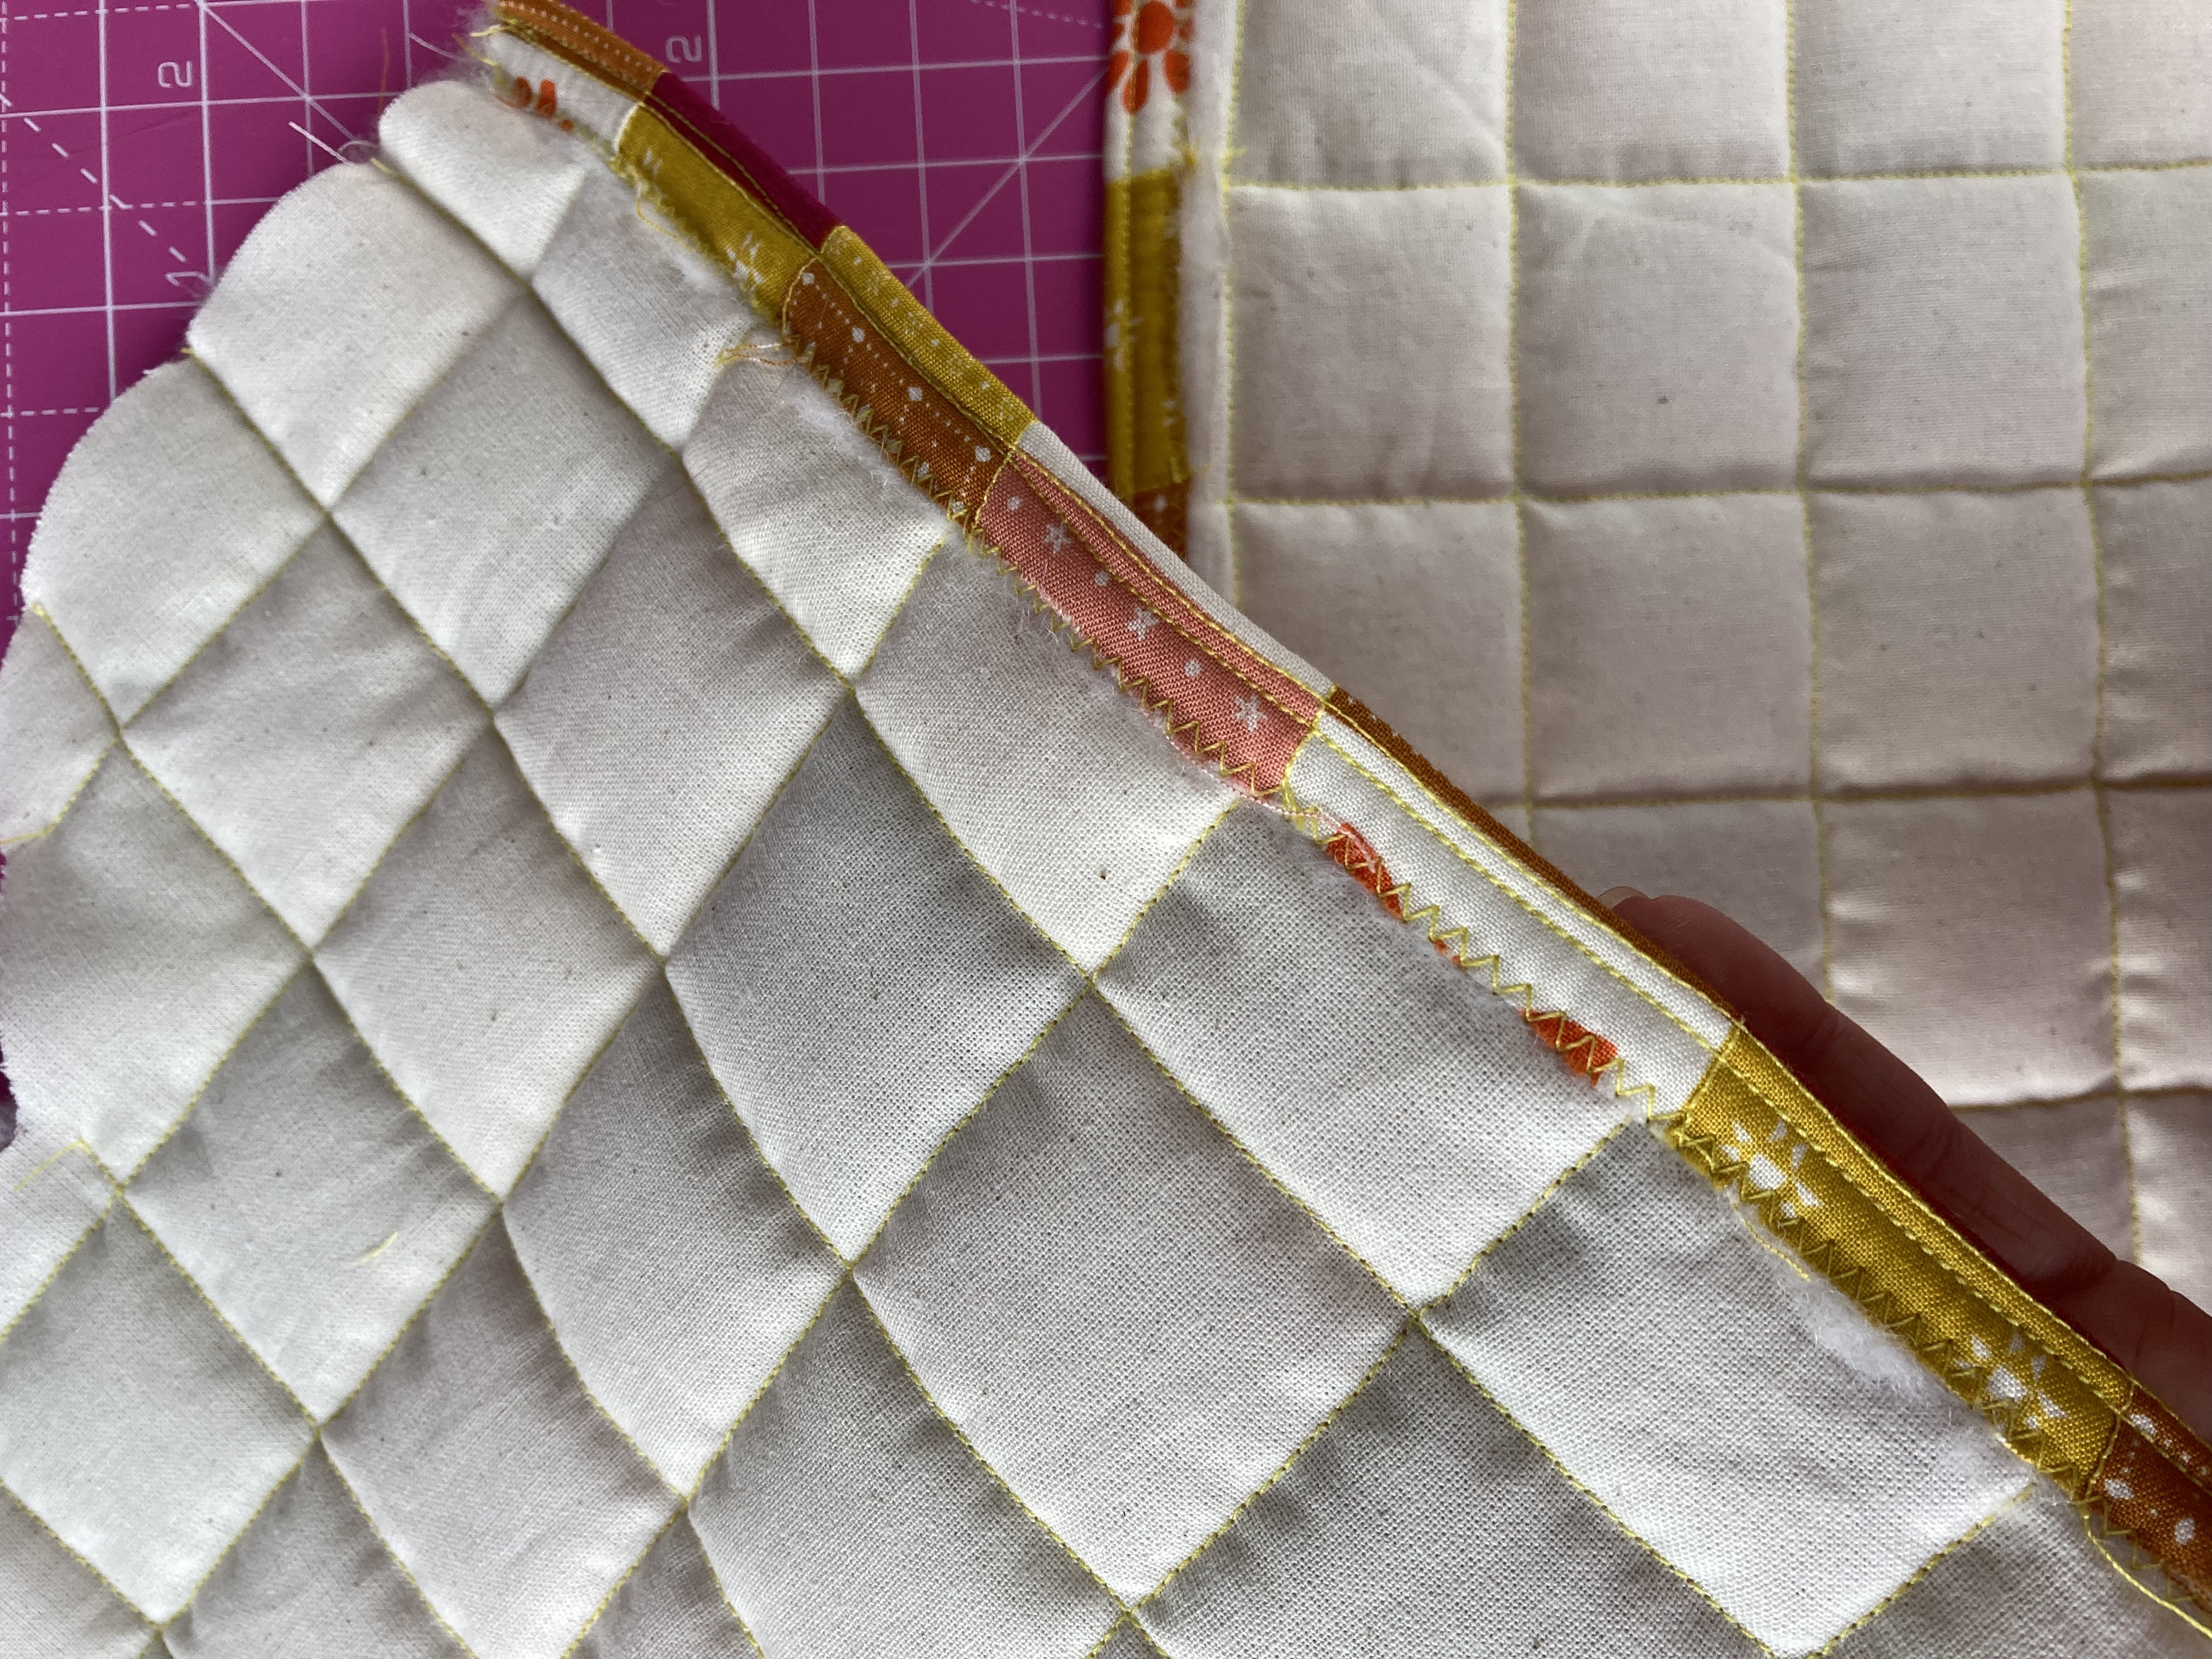
Step 8: Create the Envelope Folds
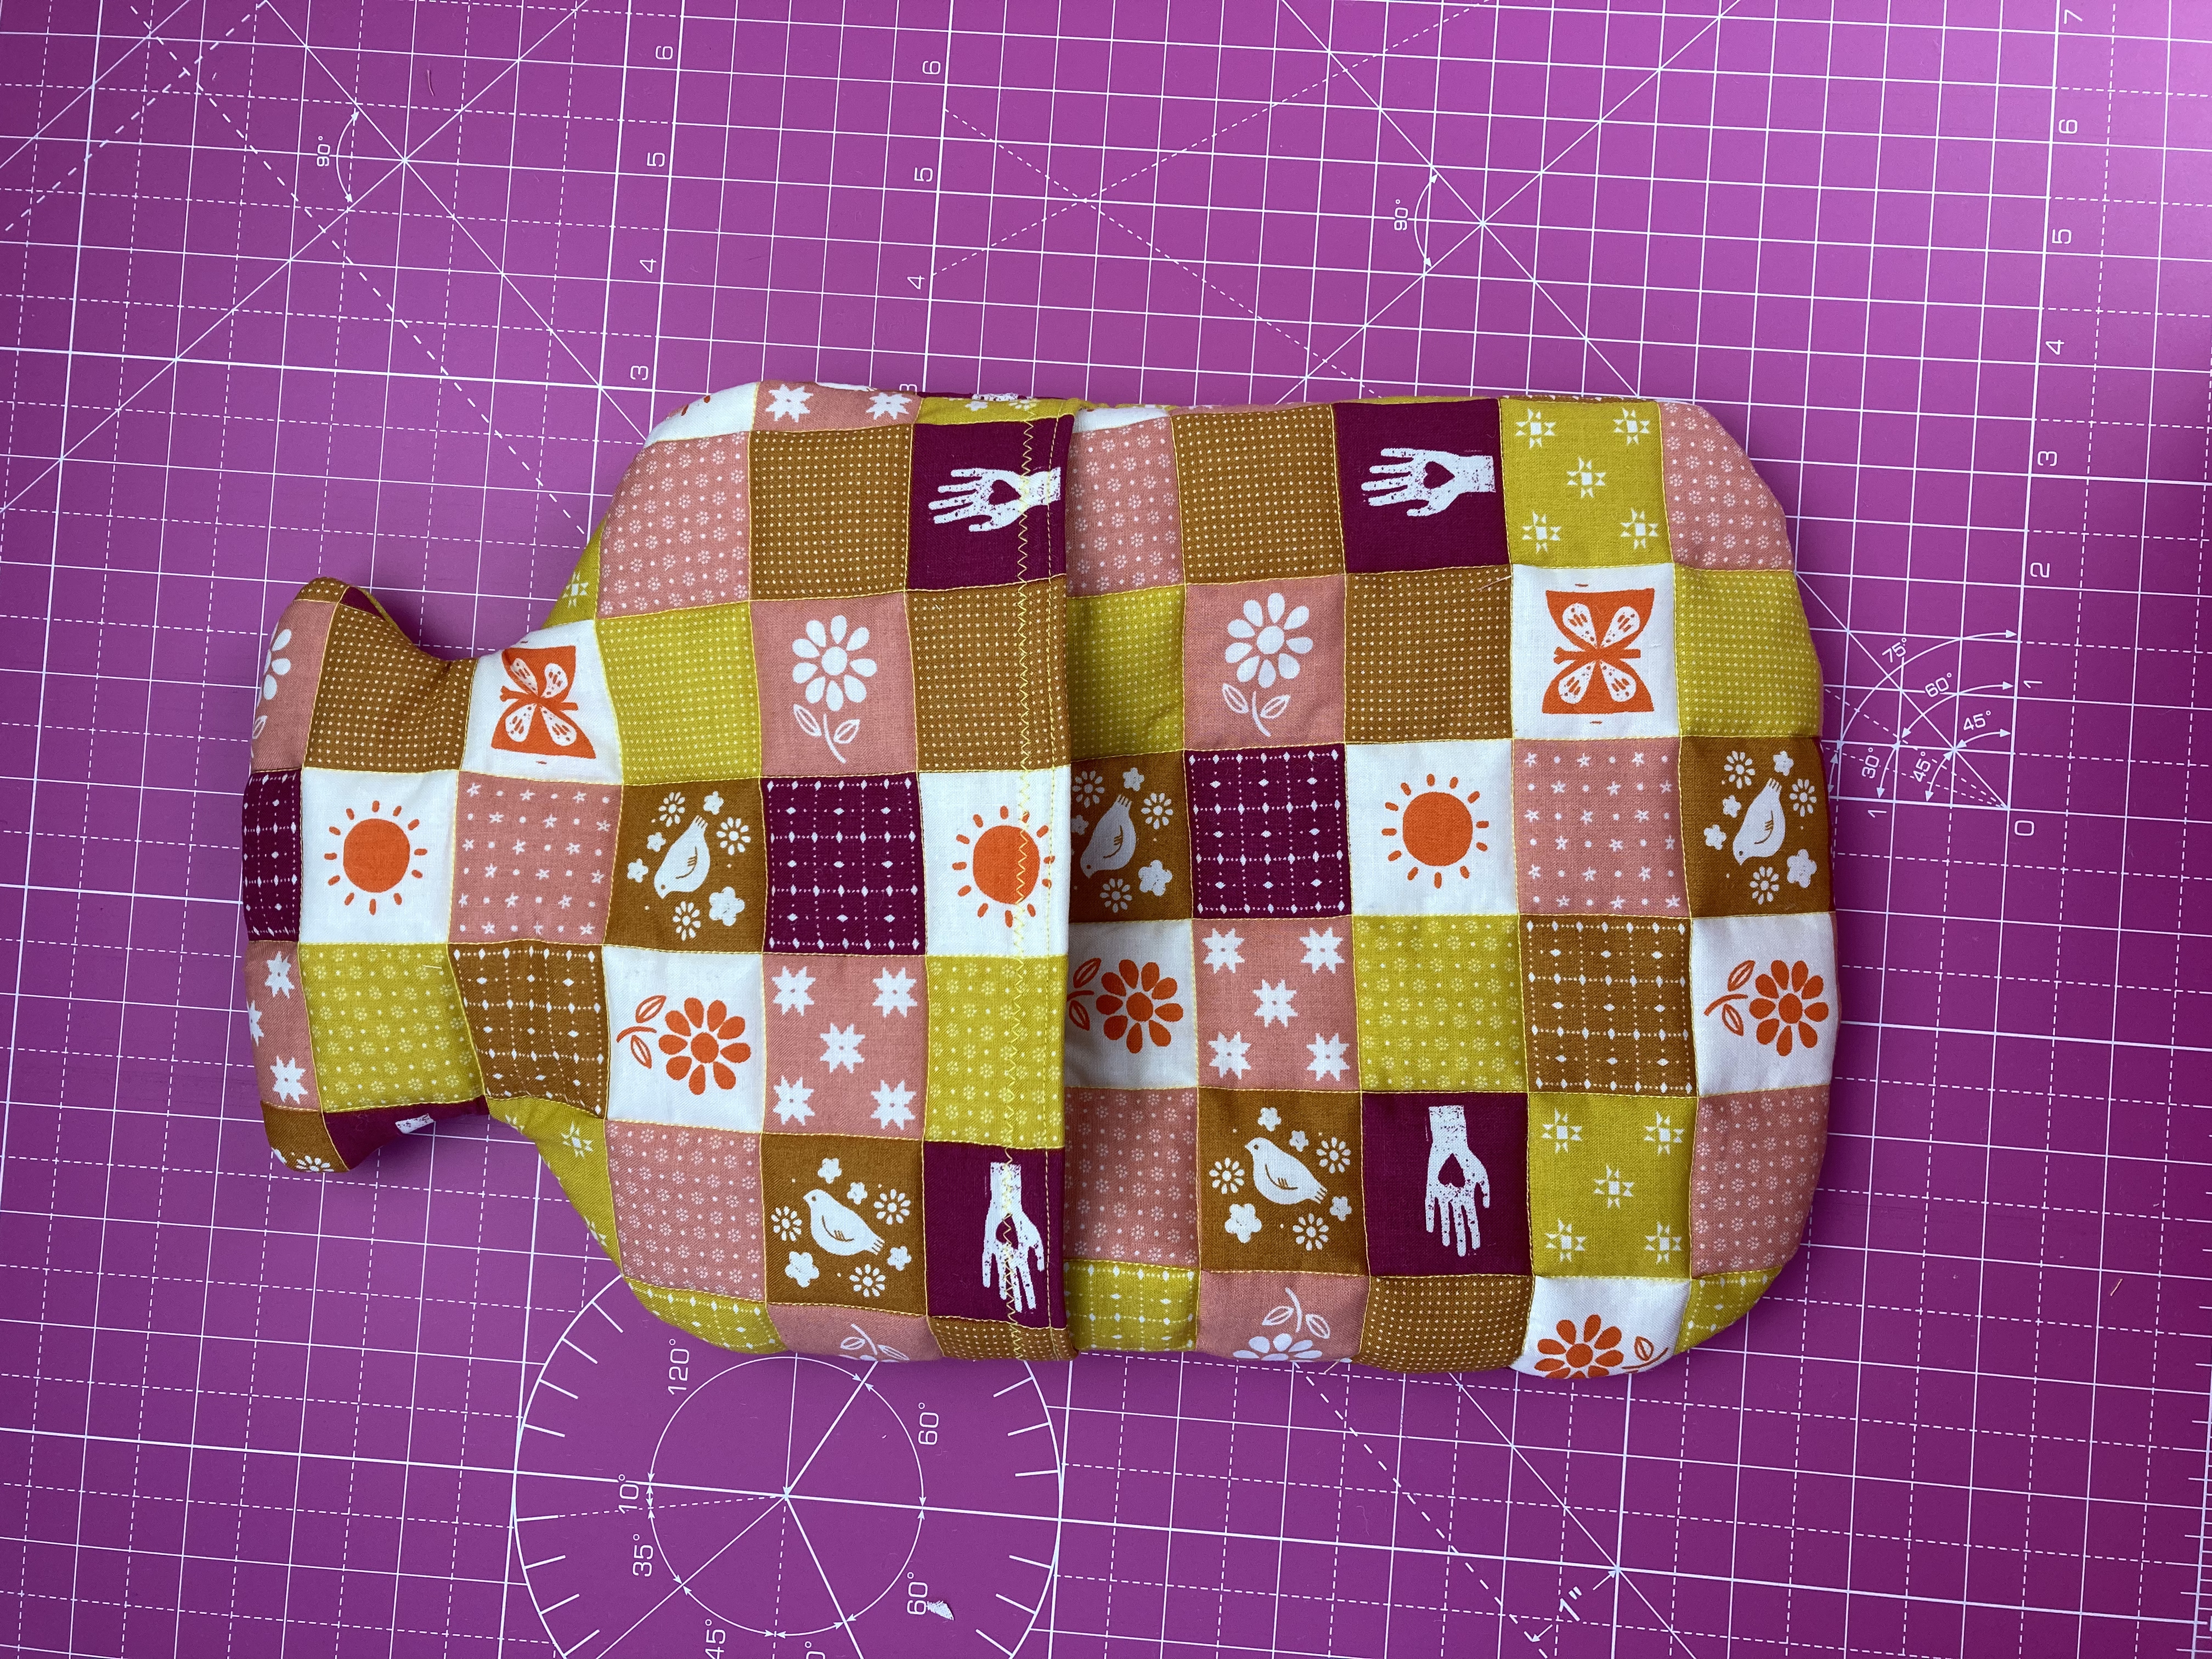
On your back top and back bottom pieces, fold over a 1/2 inch of fabric and hold the folds in place with some fabric clips or pins.
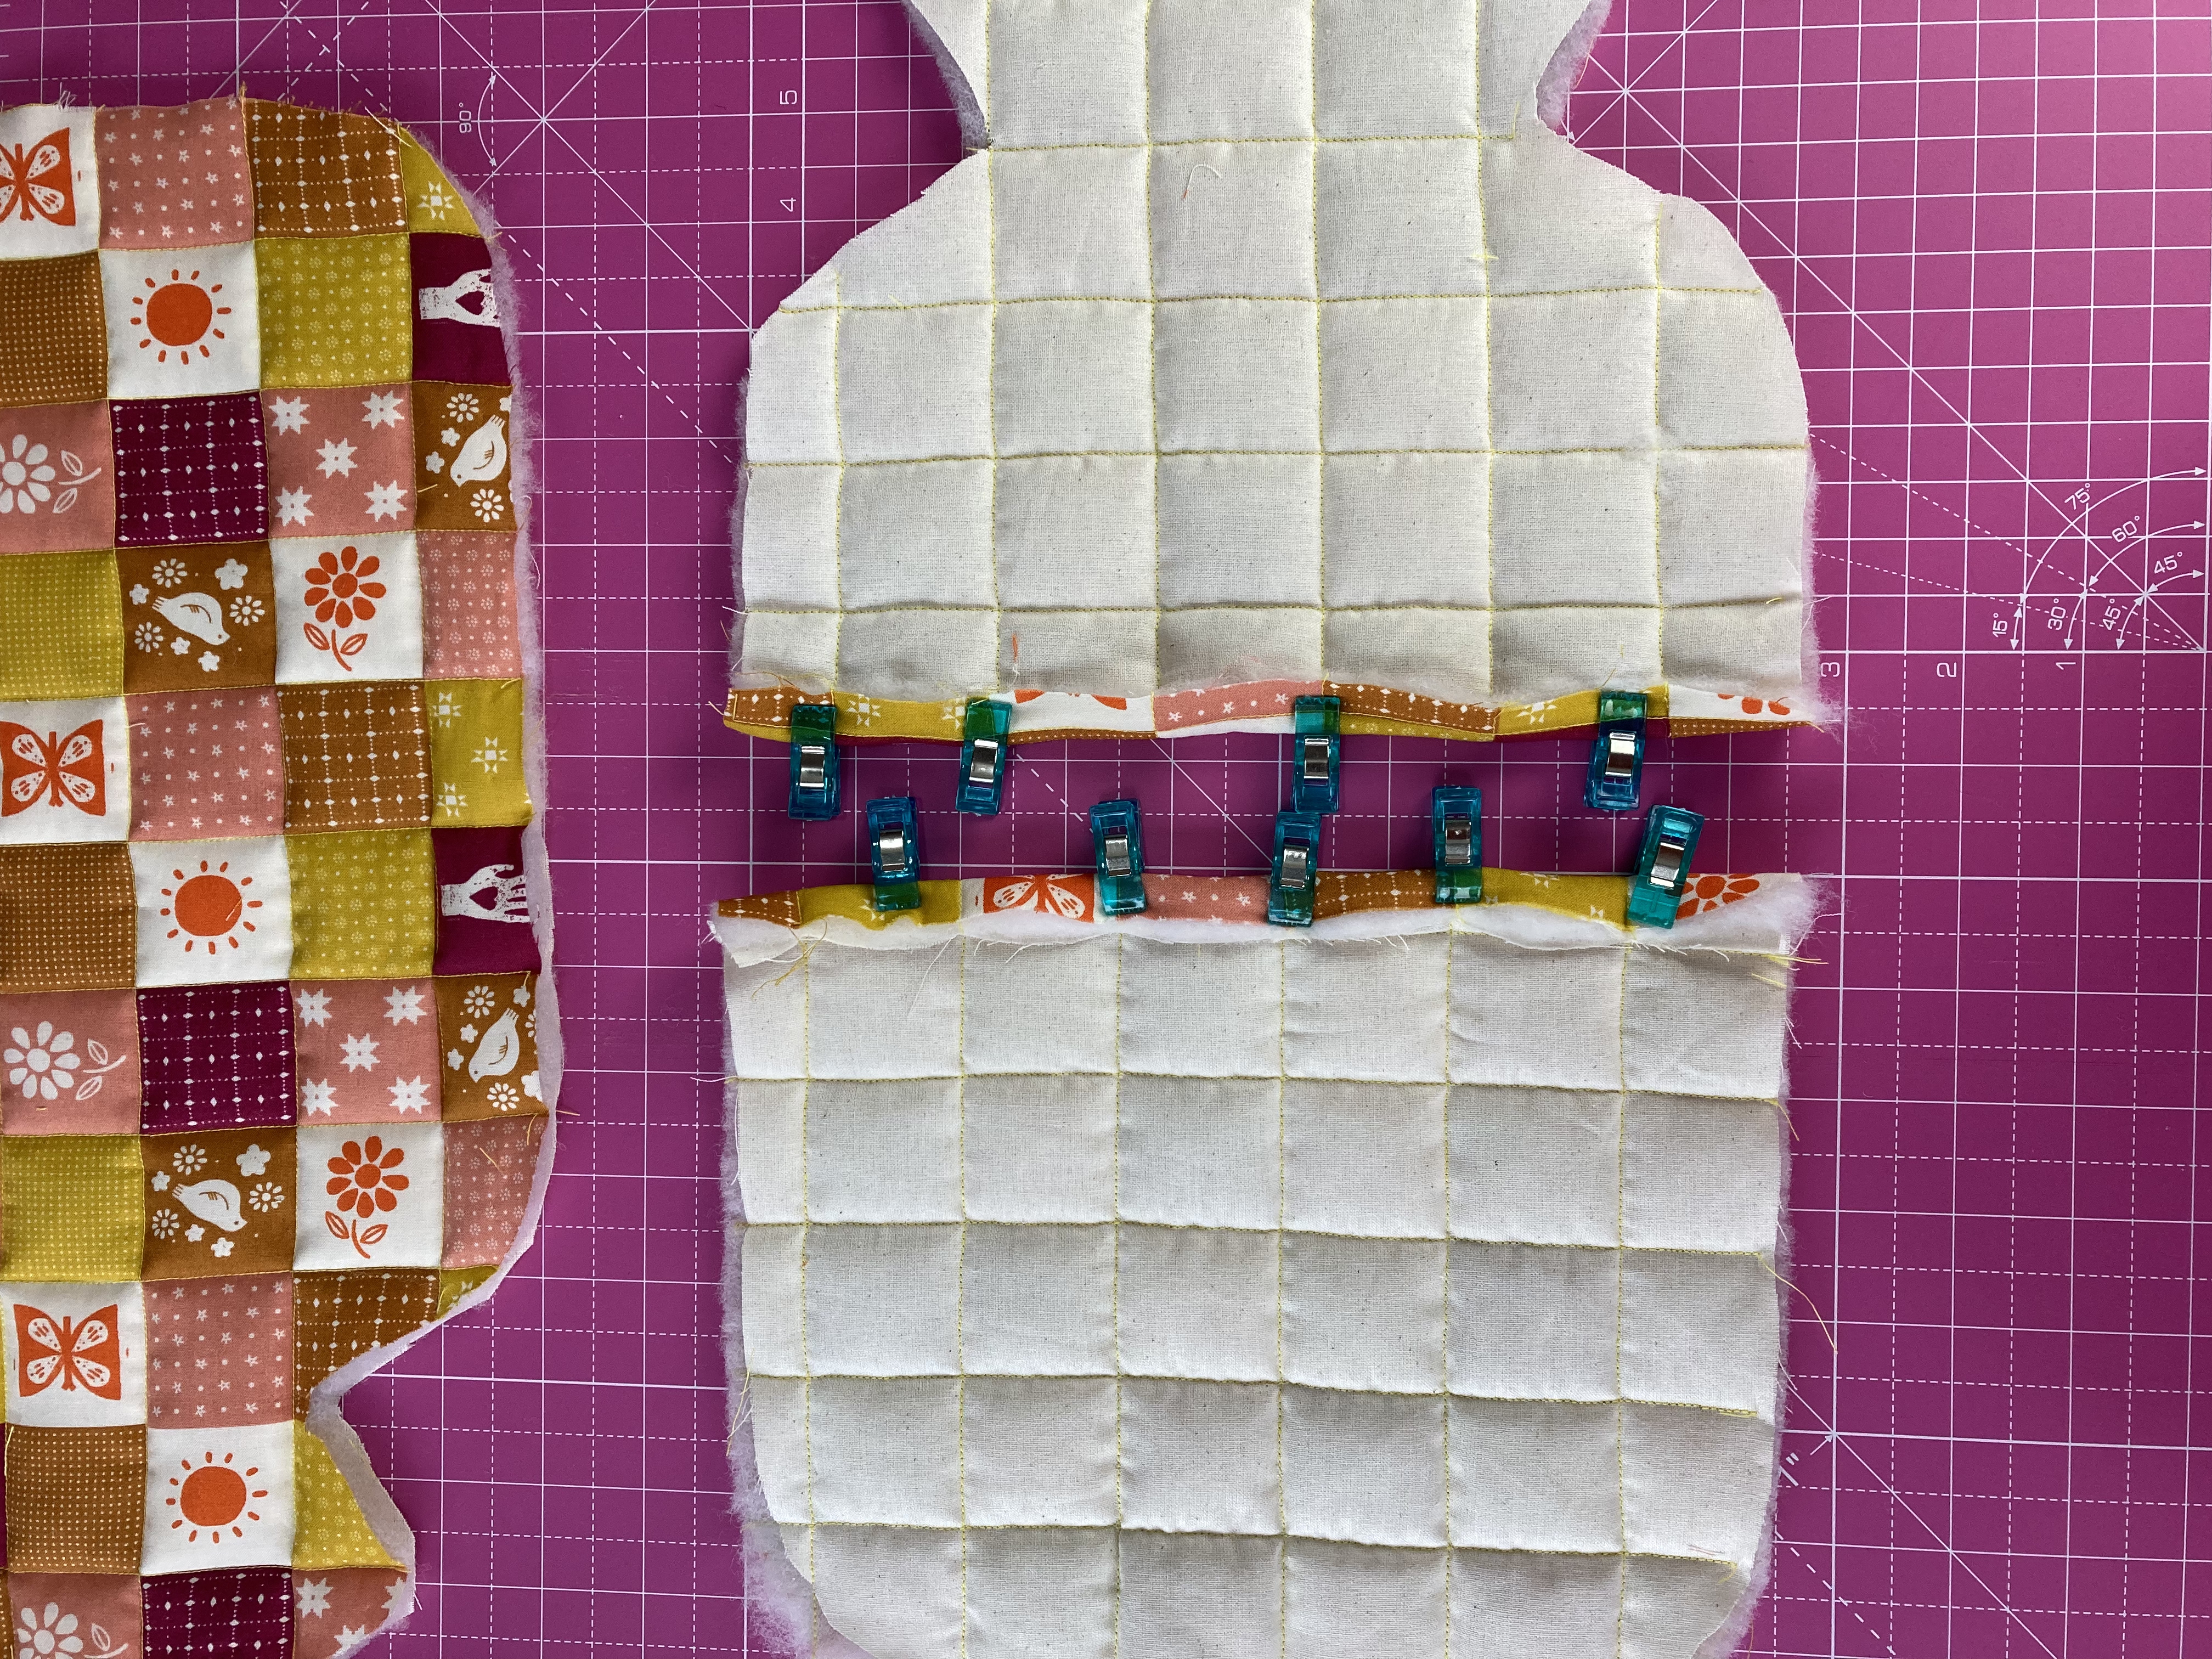
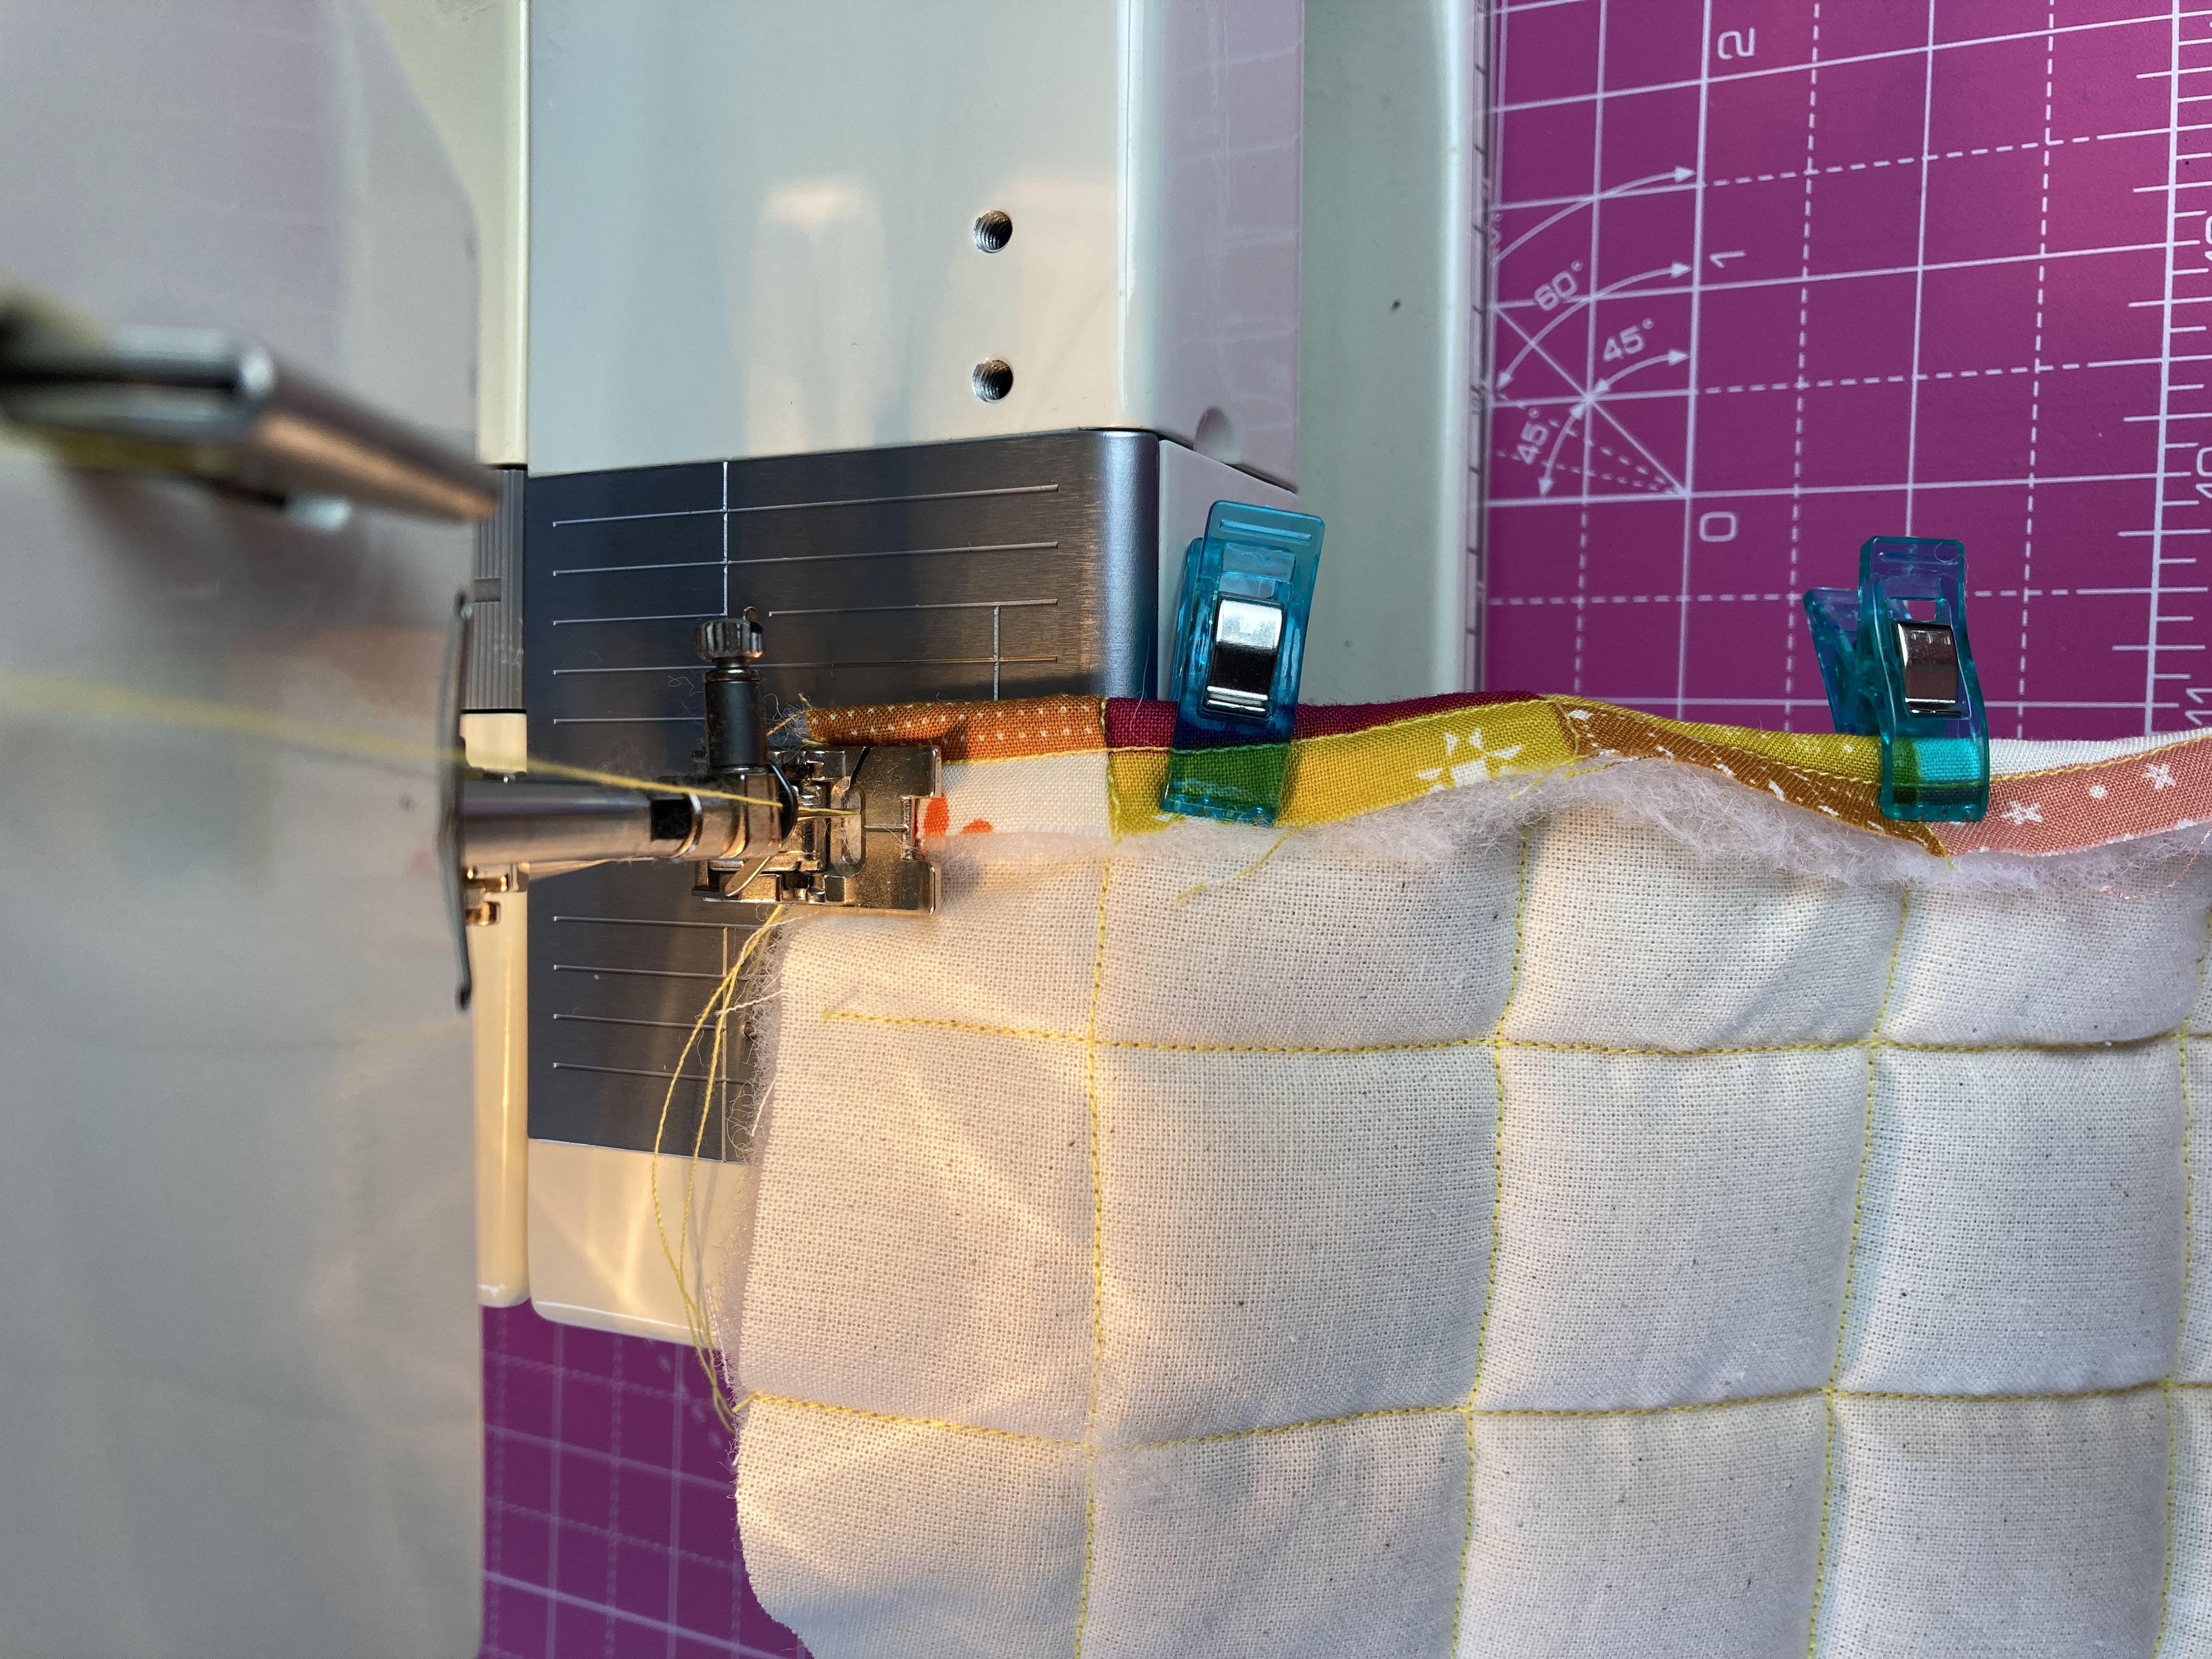
Sew a zigzag stitch along the raw edge, carefully removing the fabric clips as you go. Then, do a straight stitch along the top of the fold behind the zigzag stitch you just made.
Step 9: Assemble the Hot Water Bottle Cover
Place the front piece right side up (so the main fabric is facing you). Place the back top piece right side down first, then place the back bottom piece right side down last - make sure the bottom piece overlaps the top piece!
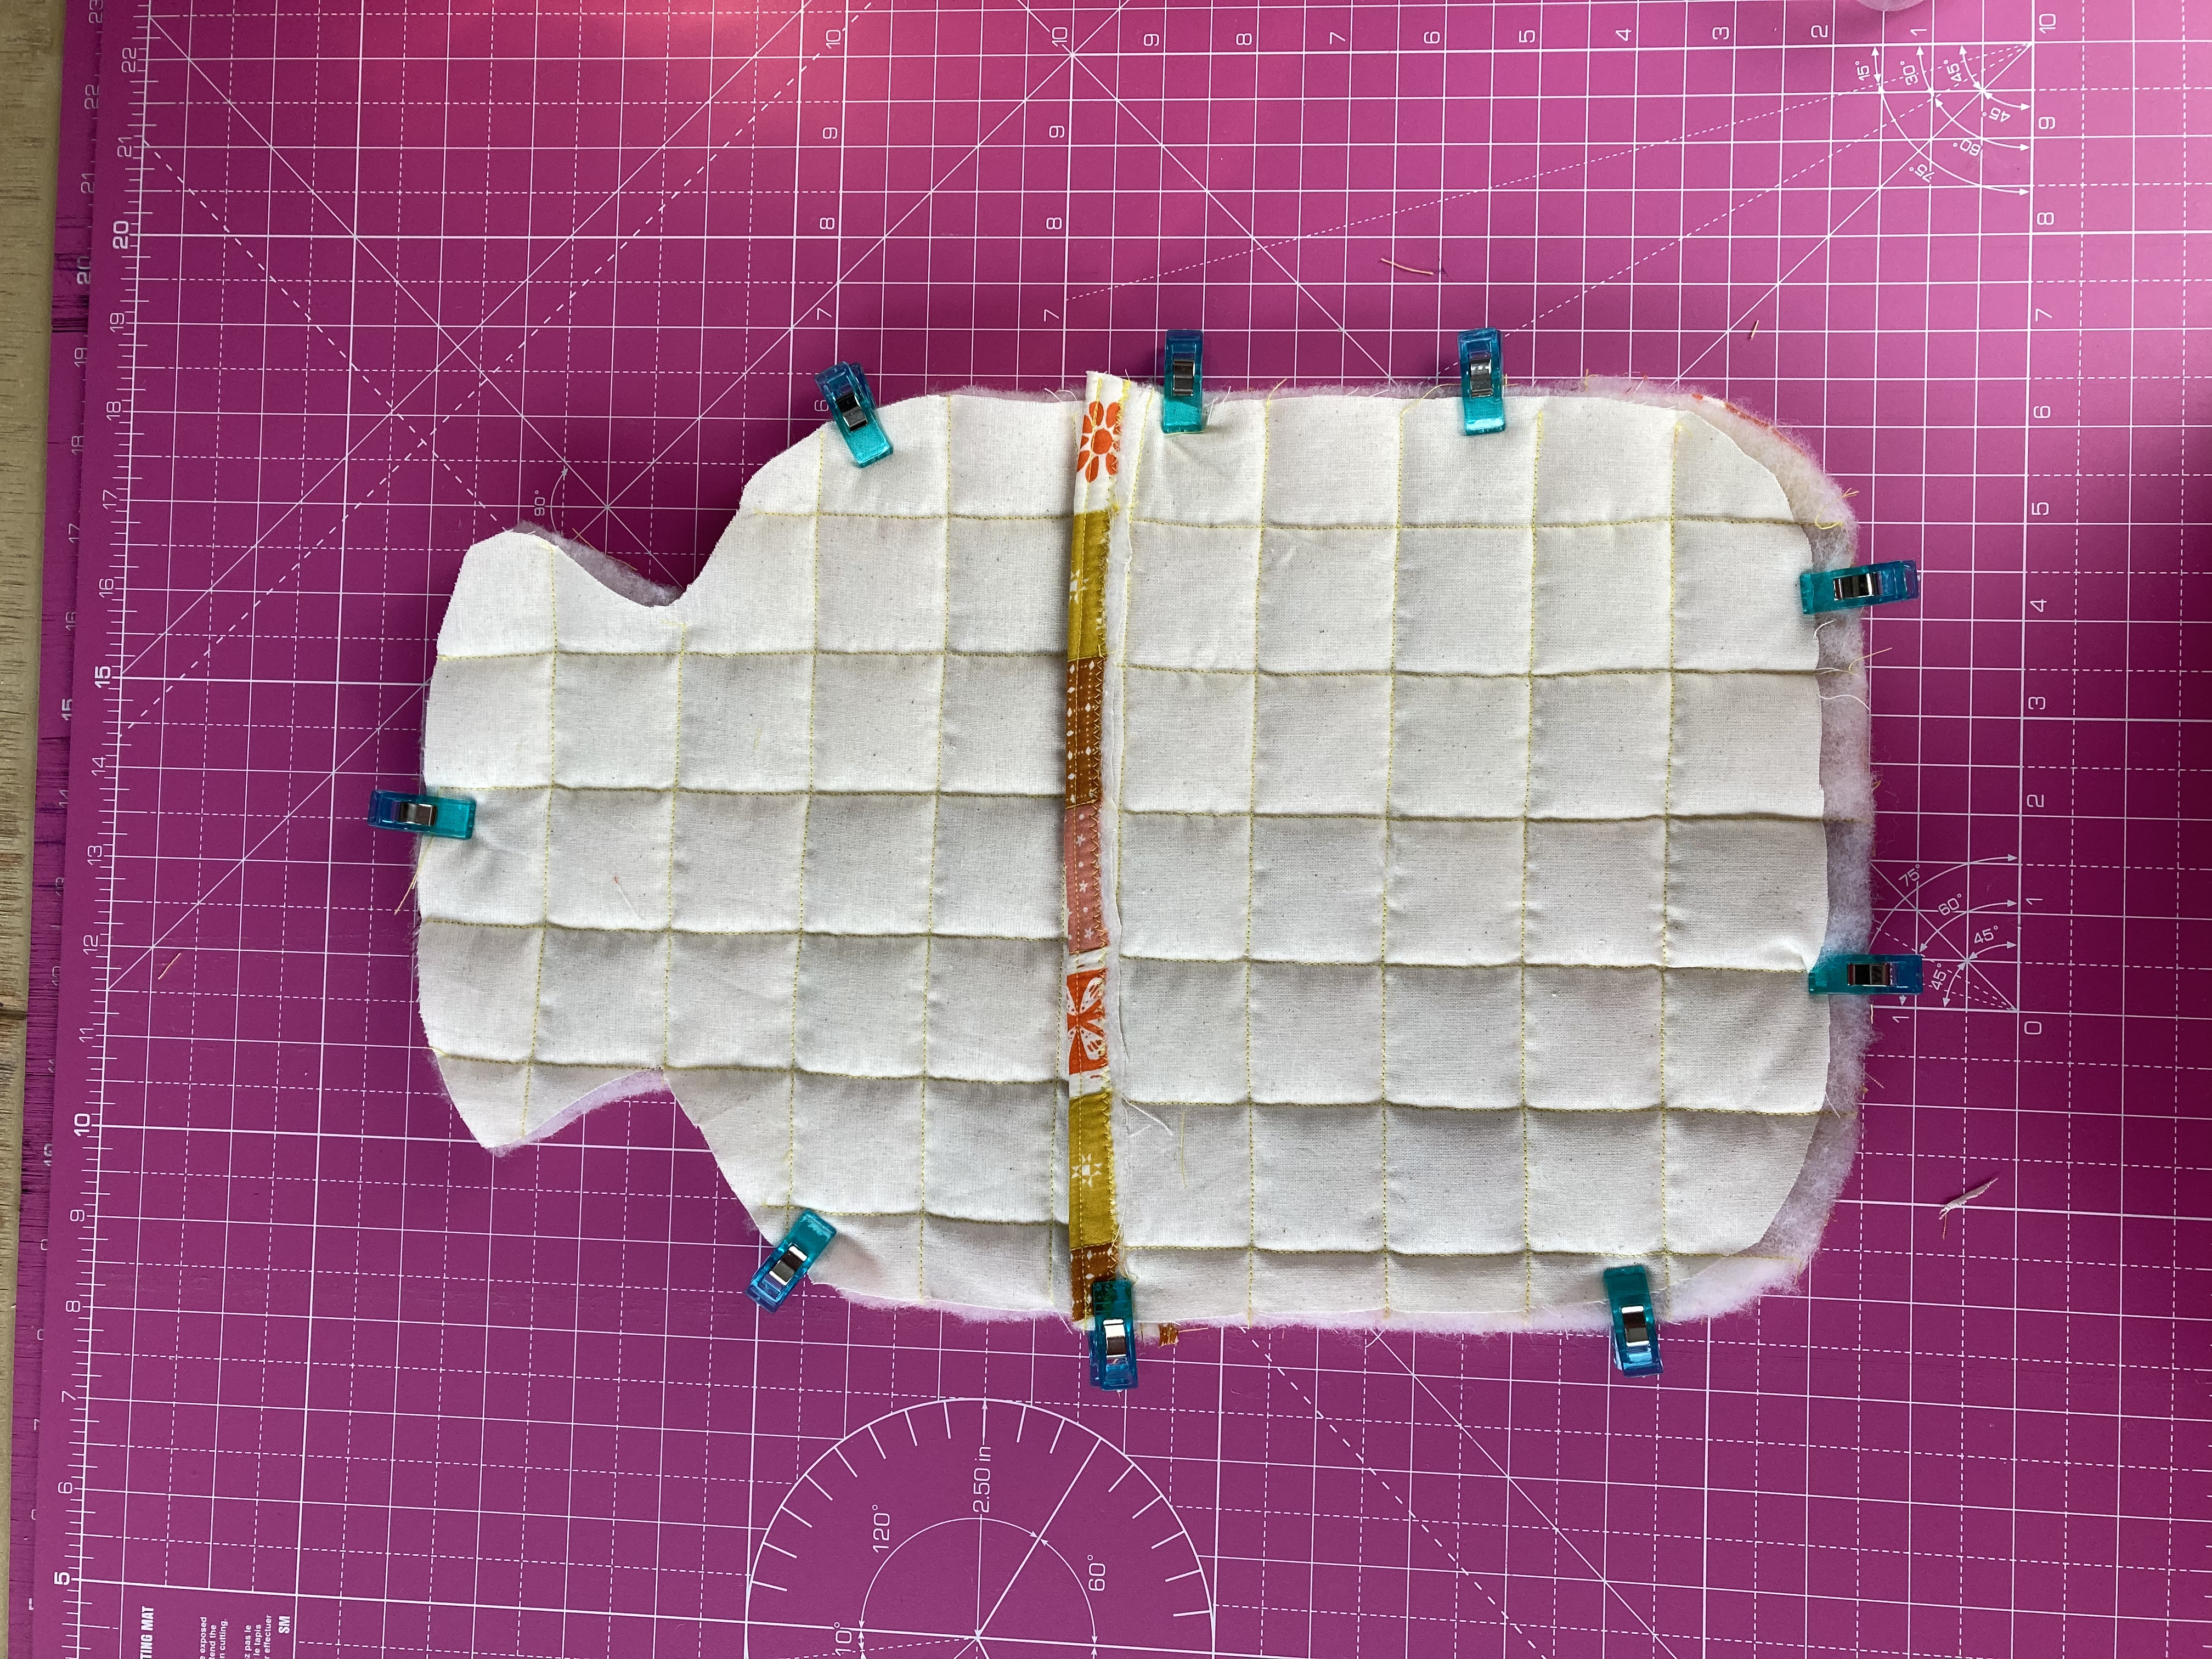
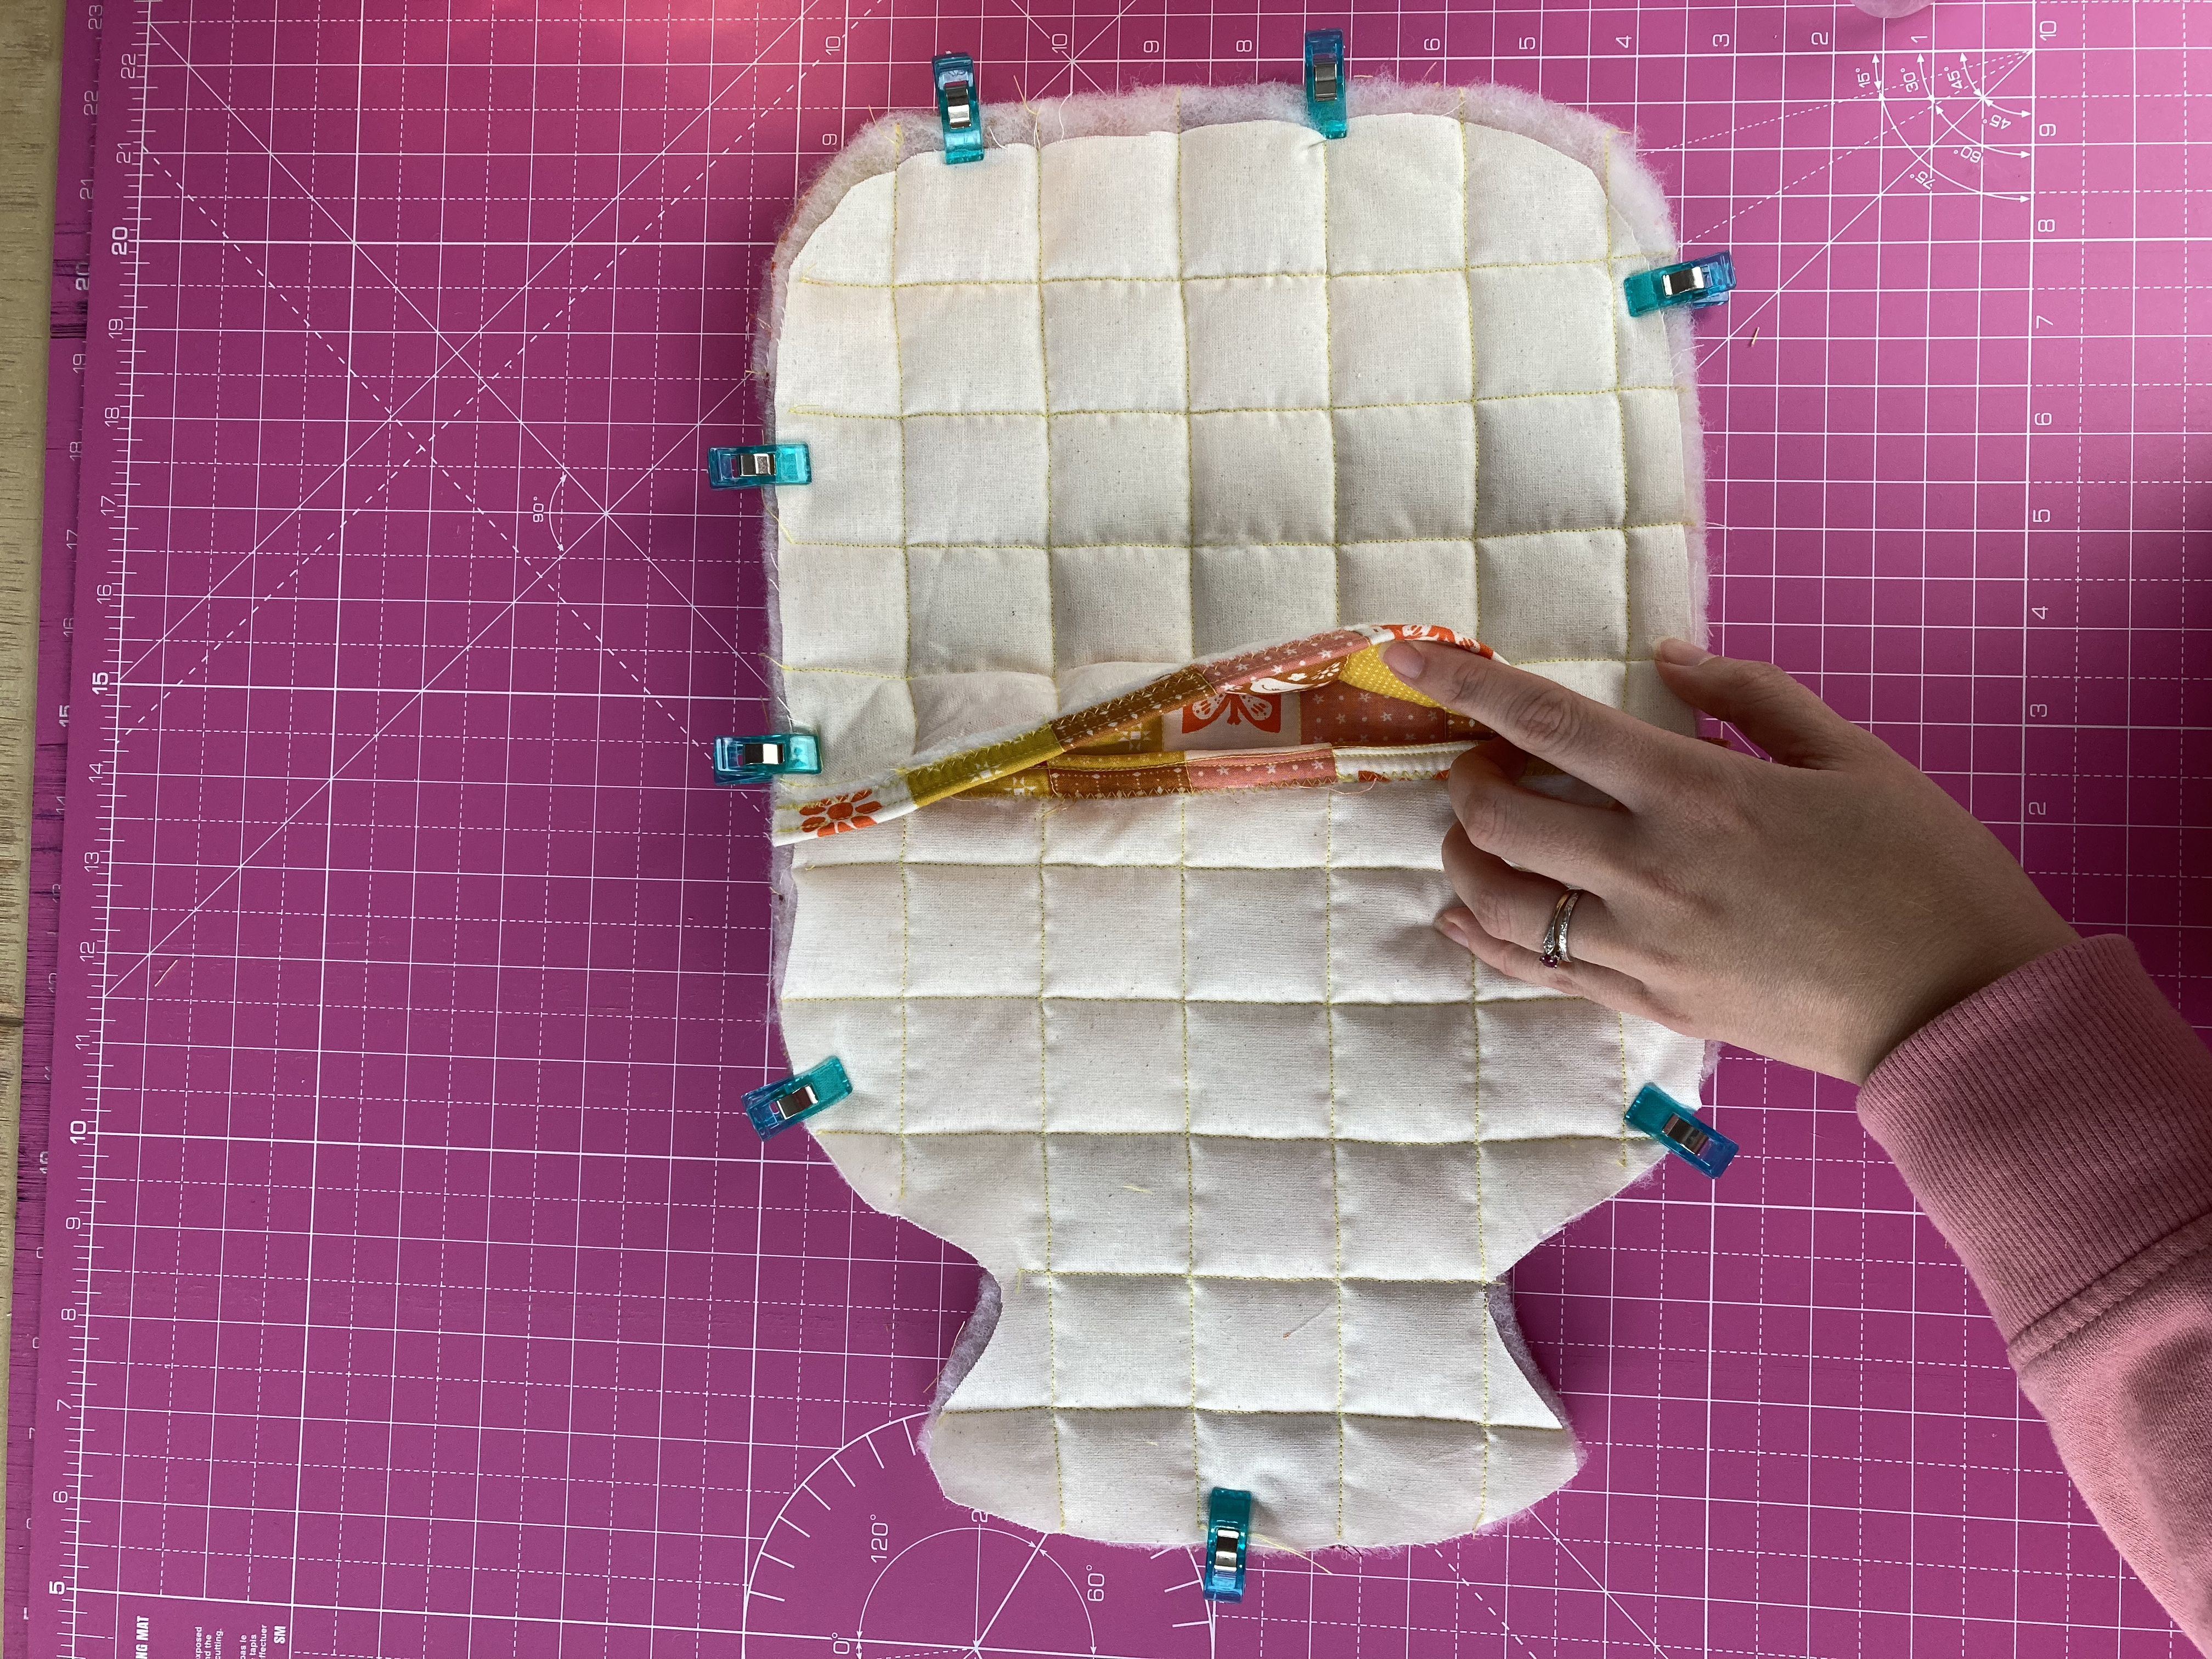
Hold together with fabric clips and sew around the edge.
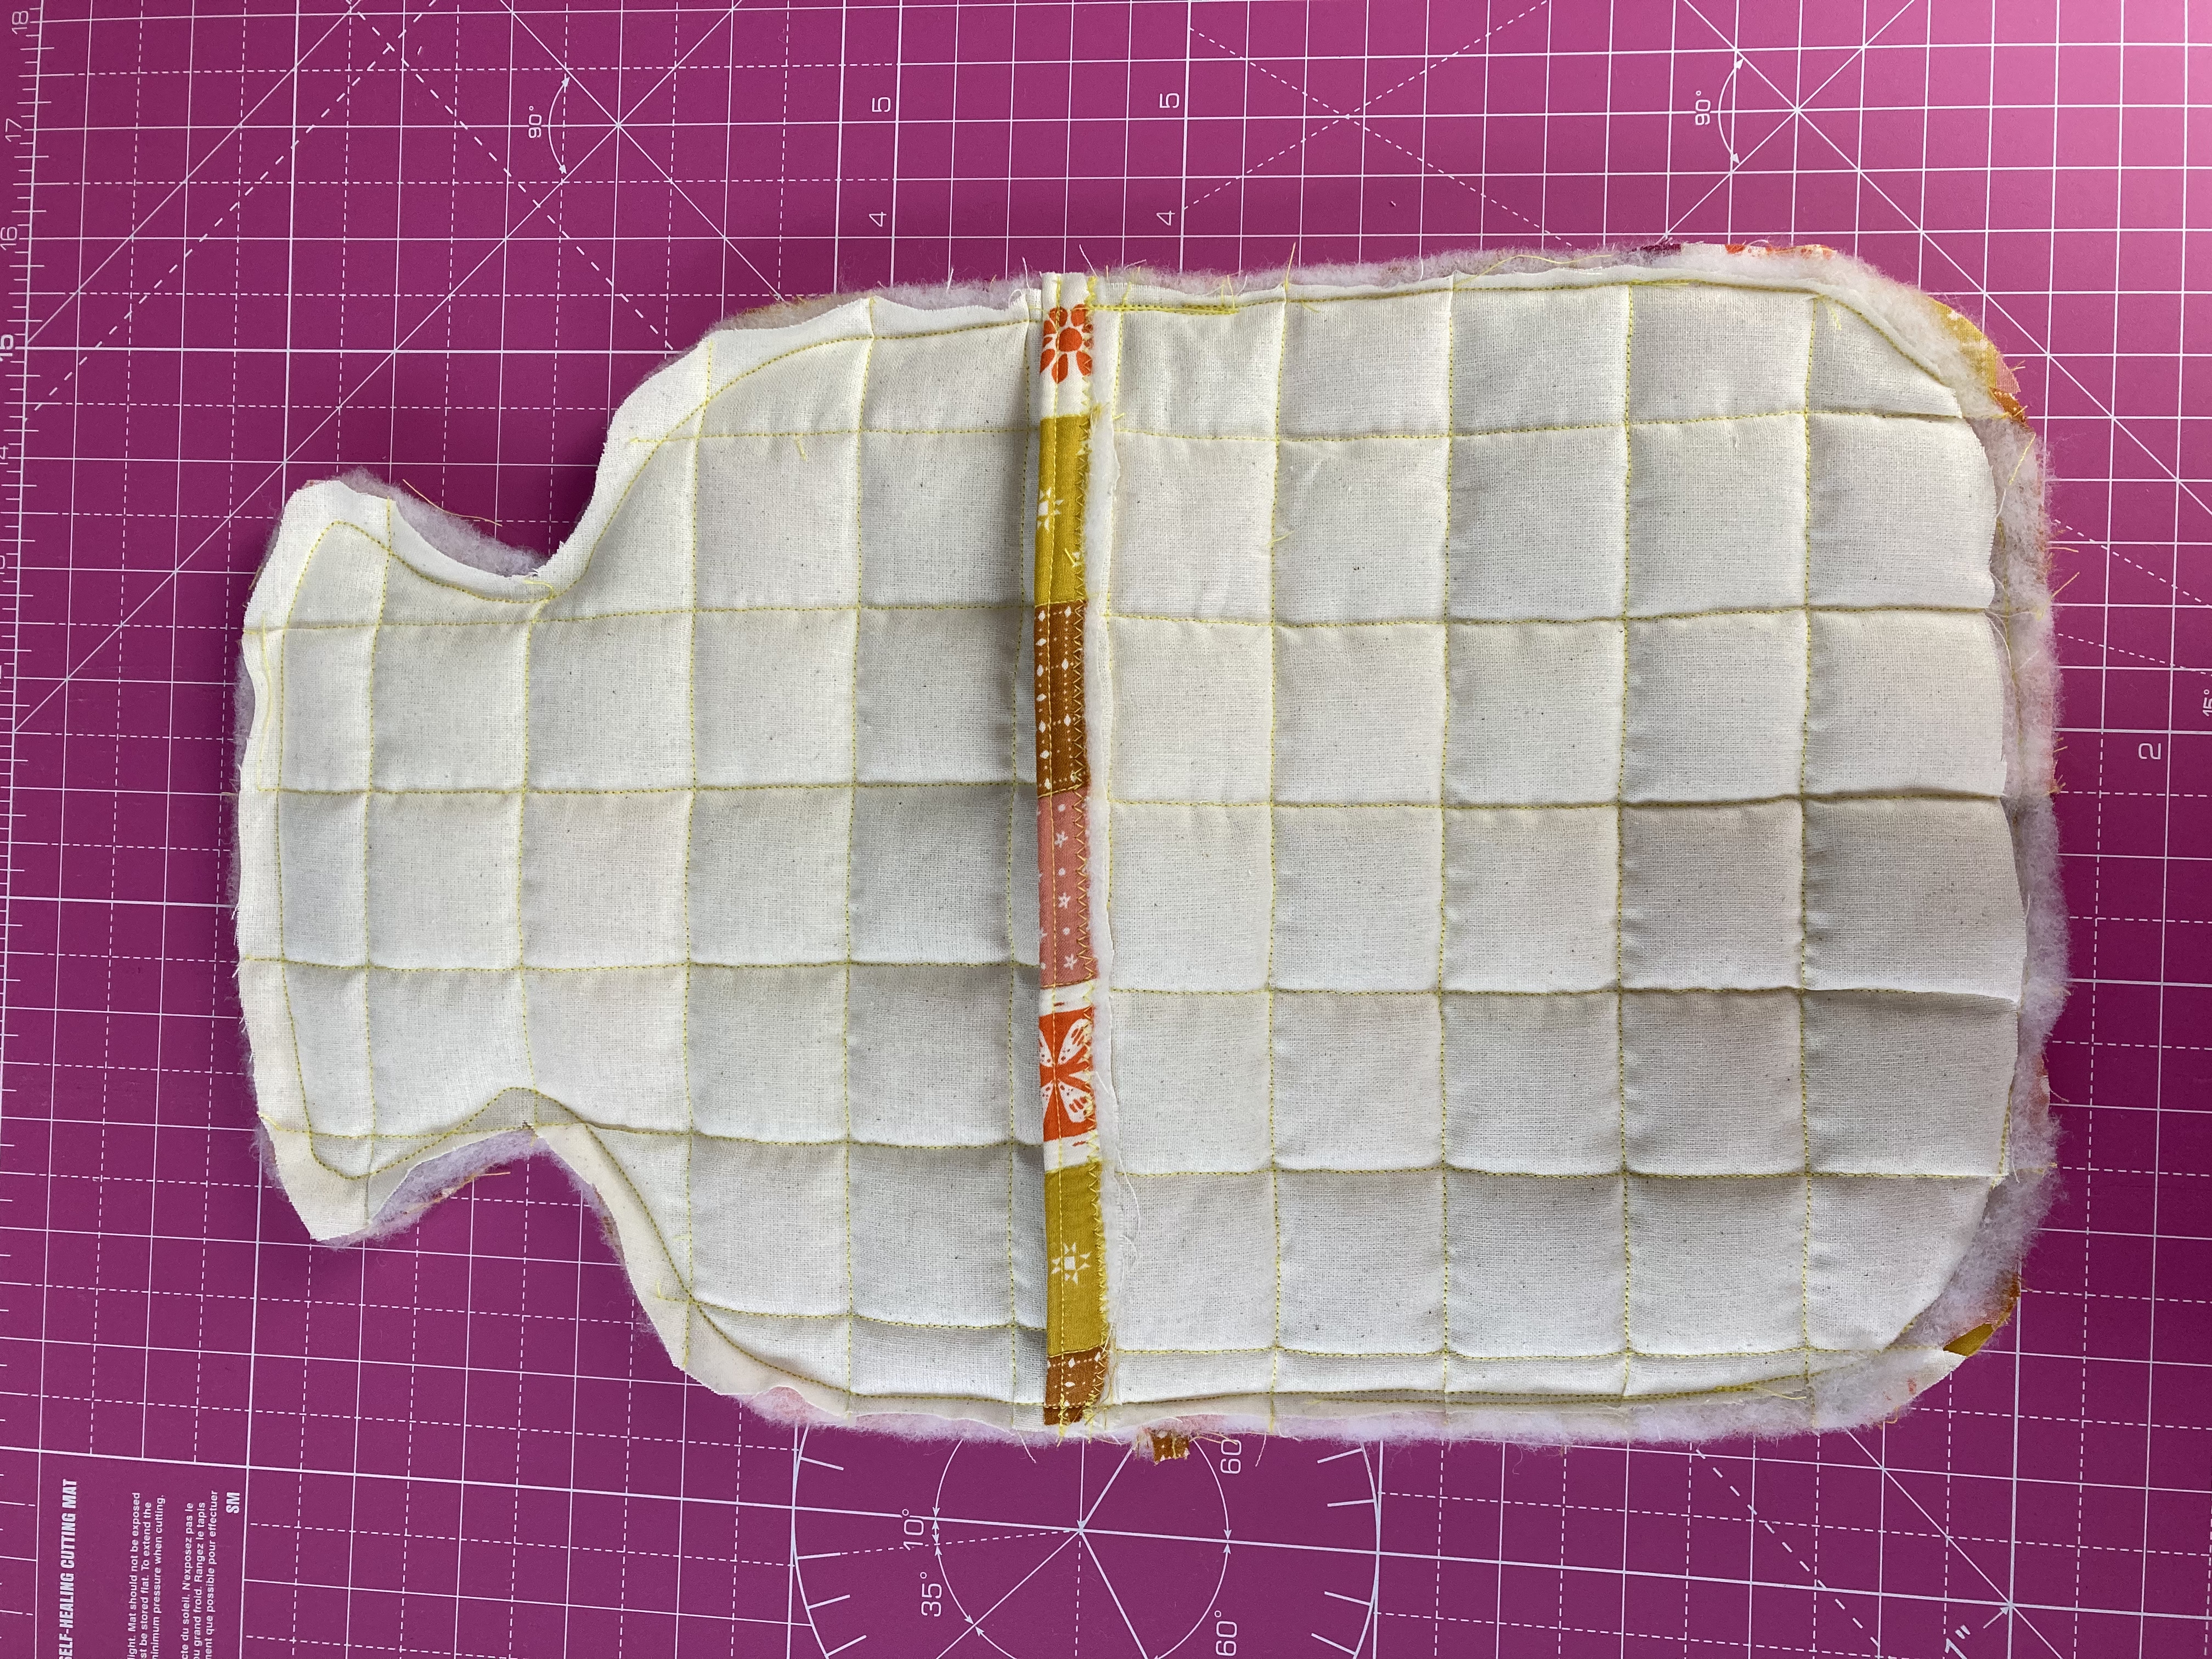
Cut away any excess fabric around the seam allowance and snip cuts into the curved sections and corners - this will make it easier to turn out and insert a hot water bottle!
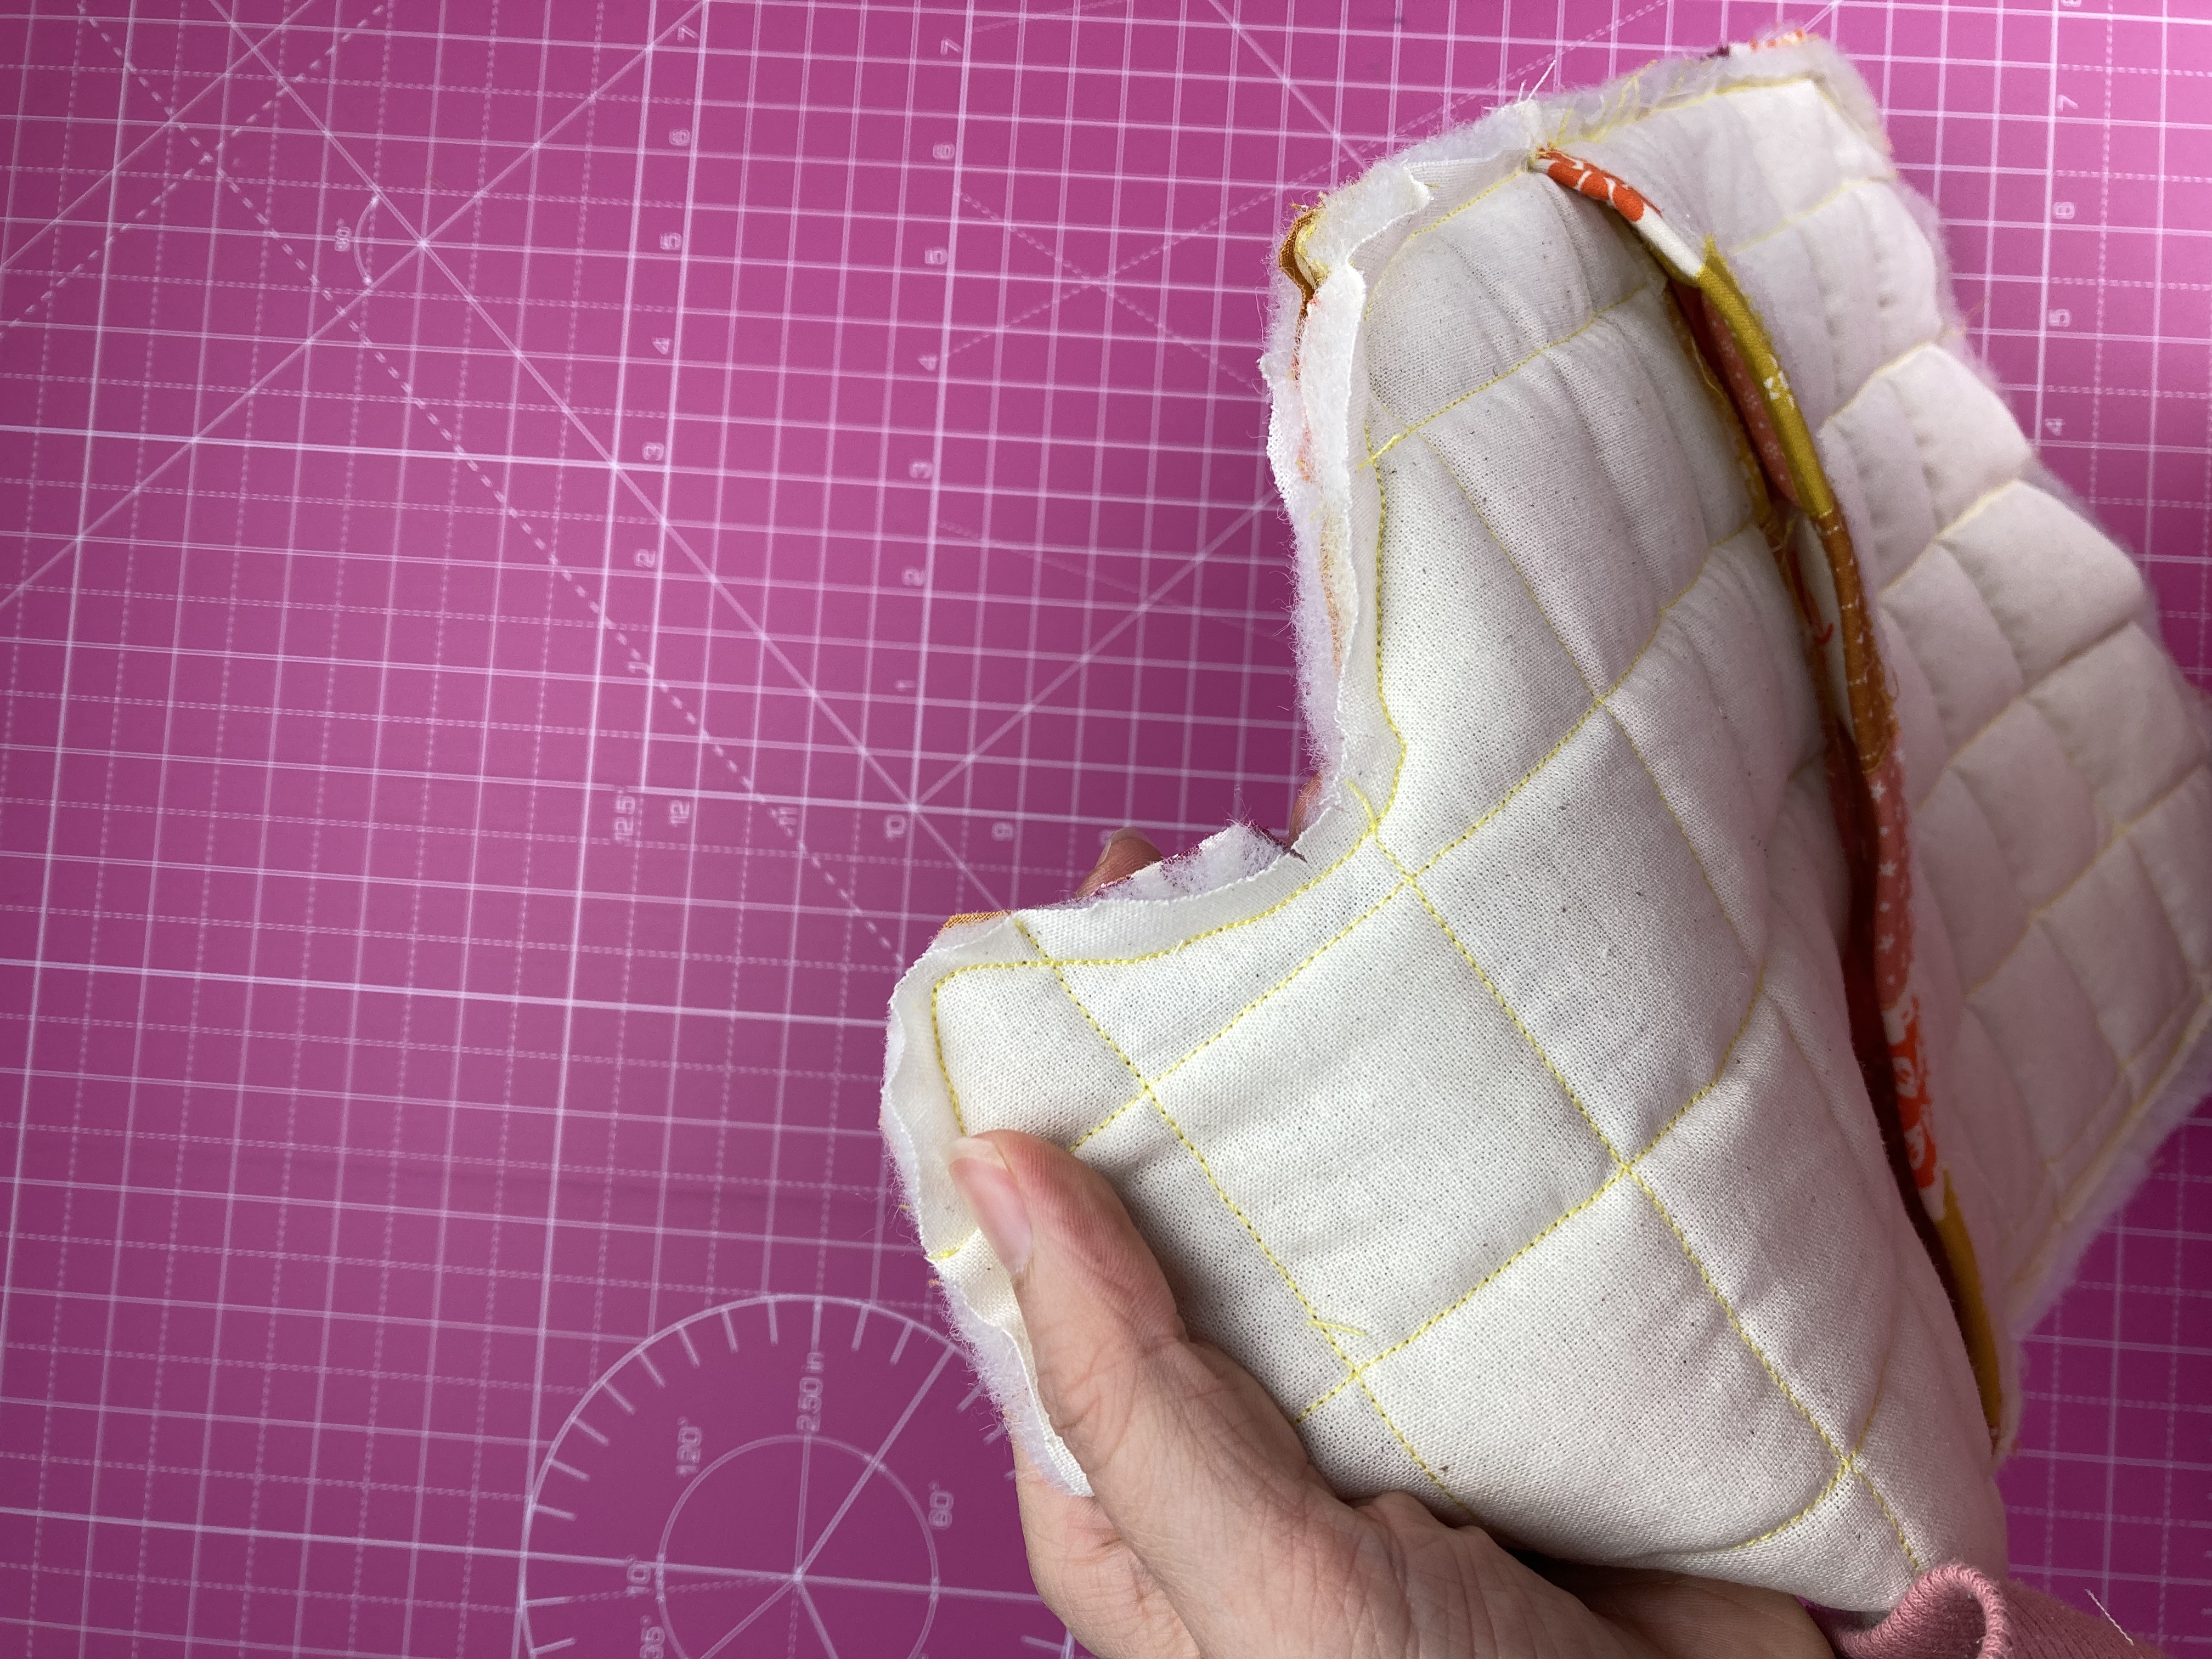
Step 10: Turn Out and Insert the Hot Water Bottle
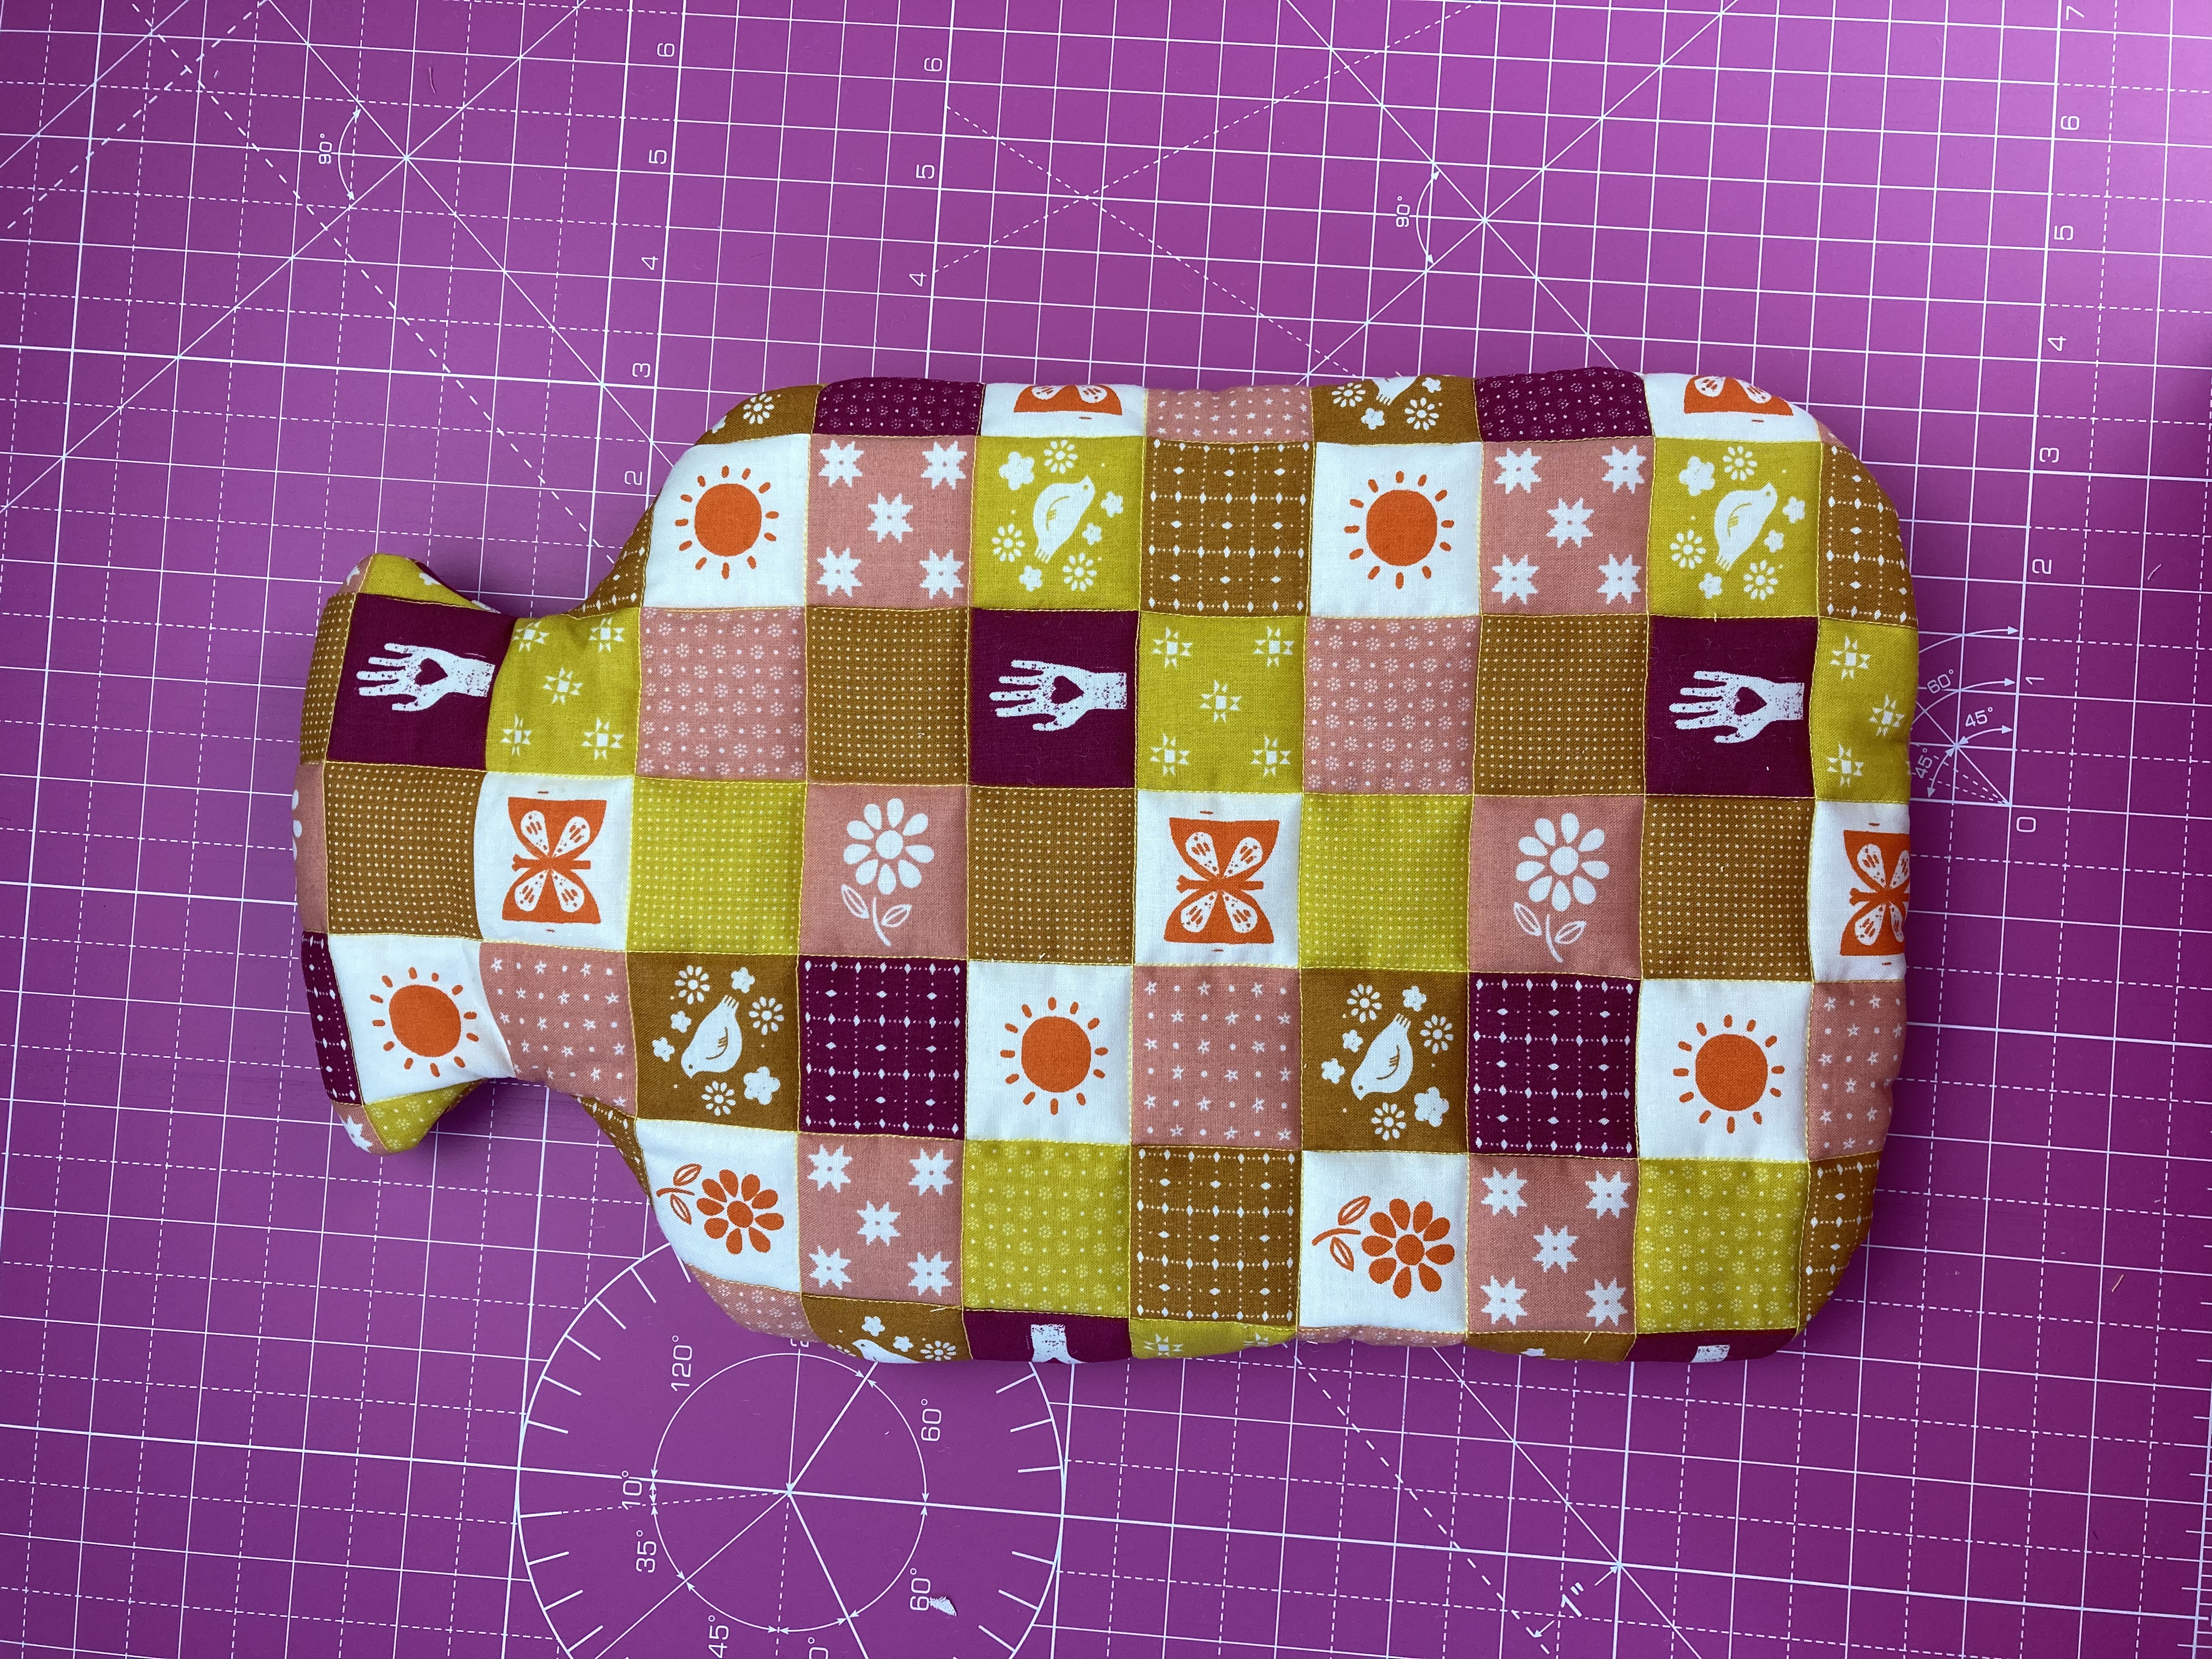
Turn your finished hot water bottle cover inside out. Slide in a hot water bottle, top up with hot (but not boiling) water, and cuddle up in front of the TV!
The Fabric Fox is an online fabric shop based in Halstead, Essex, UK
Please visit our About section for more information
You can contact us at info@thefabricfox.co.uk

